Discover the art of textured eyebrows at Permanent Makeup Studio. Elevate natural beauty with innovative techniques for a fuller, natural appearance.

Sun-Kissed Palette

Sun-Kissed Palette Brow Pigments

Table of Contents

The Ultimate Guide to Sun-Kissed Palette Brow Pigments

Introduction to Brow Pigments

Brow pigmentation has transformed the beauty industry, offering clients natural-looking, long-lasting results that define and enhance facial features. Among the various options available, the sun-kissed palette has gained popularity for its ability to provide a warm, natural look that complements a wide range of skin tones. In this comprehensive guide, we will delve into the intricacies of brow pigments, focusing on the sun-kissed palette, its benefits, application techniques, and aftercare.

Understanding Sun-Kissed Brow Pigments

What are Sun-Kissed Brow Pigments?

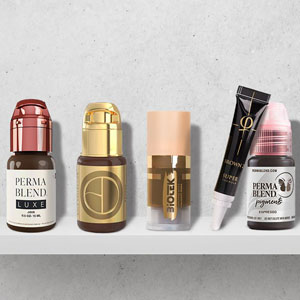
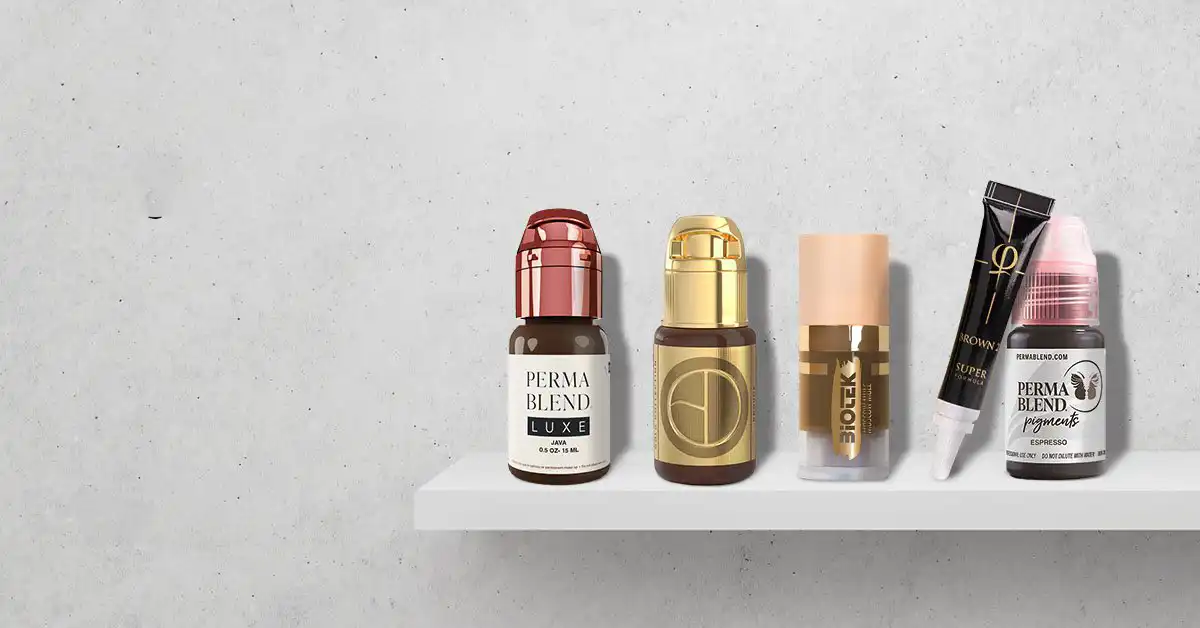
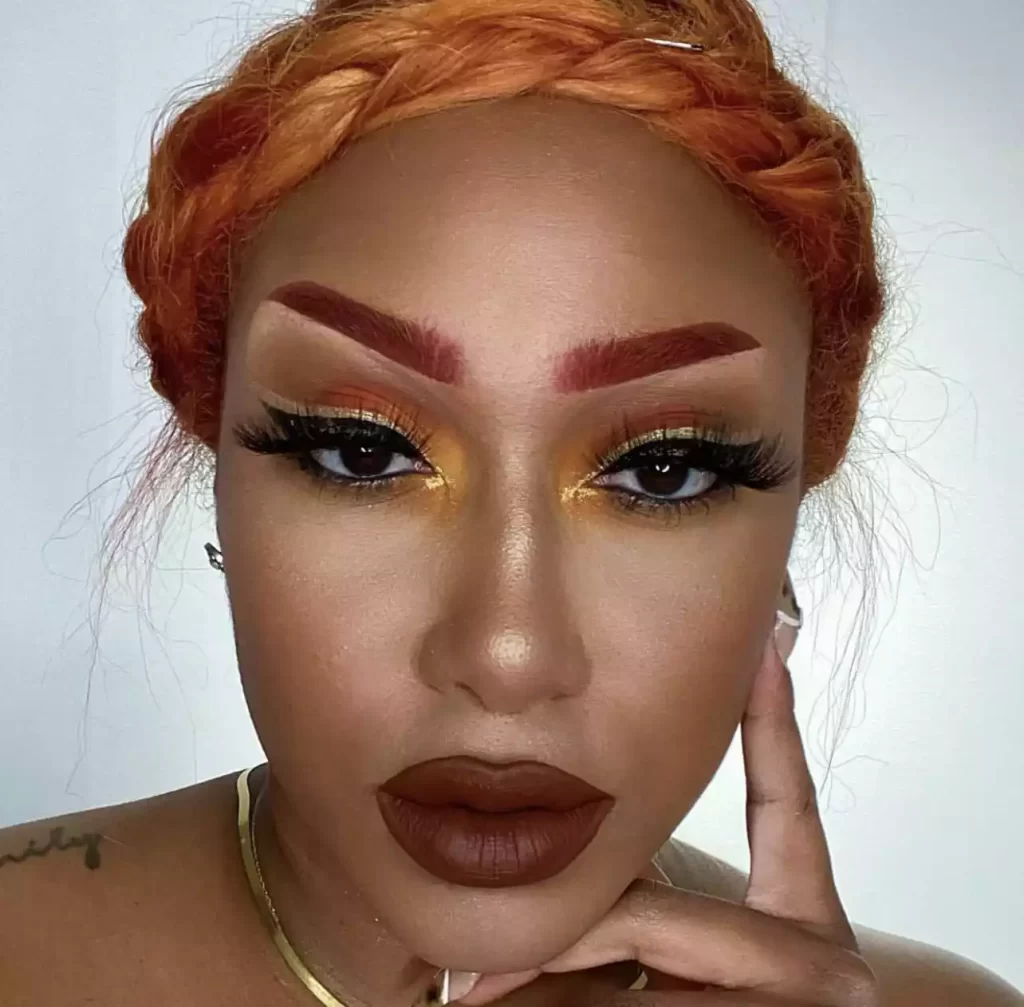
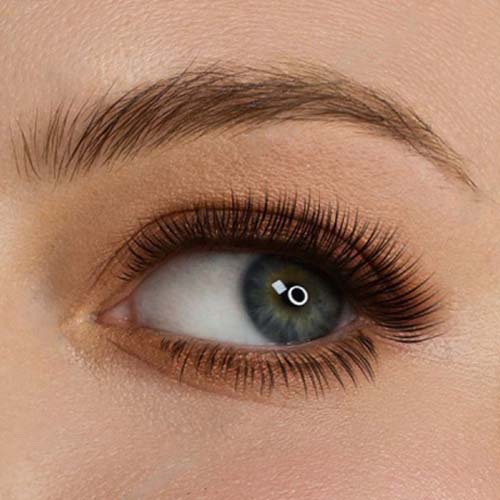
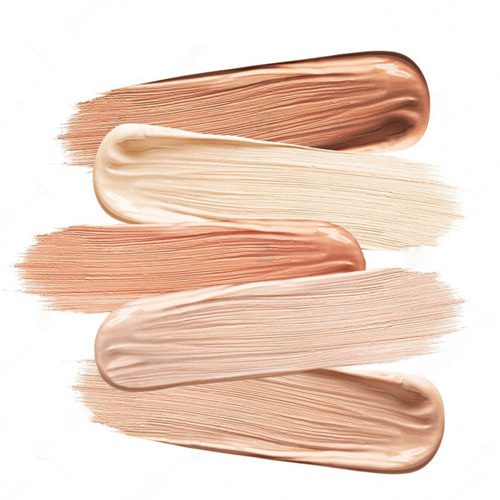
Sun-kissed brow pigments are specialized colorants designed to mimic the warm, natural tones of sun-kissed skin. These pigments are typically composed of a blend of warm browns, soft golds, and subtle reddish undertones. The goal is to create a natural, radiant appearance that enhances the brows without looking overly bold or artificial.

Composition and Ingredients

Sun-kissed brow pigments are made from high-quality ingredients, including iron oxides, titanium dioxide, and organic colorants. These components are chosen for their safety, longevity, and ability to blend seamlessly with the skin. Iron oxides provide rich, stable colors, while titanium dioxide adds opacity and ensures the pigment adheres well to the skin.

Benefits of Sun-Kissed Brow Pigments
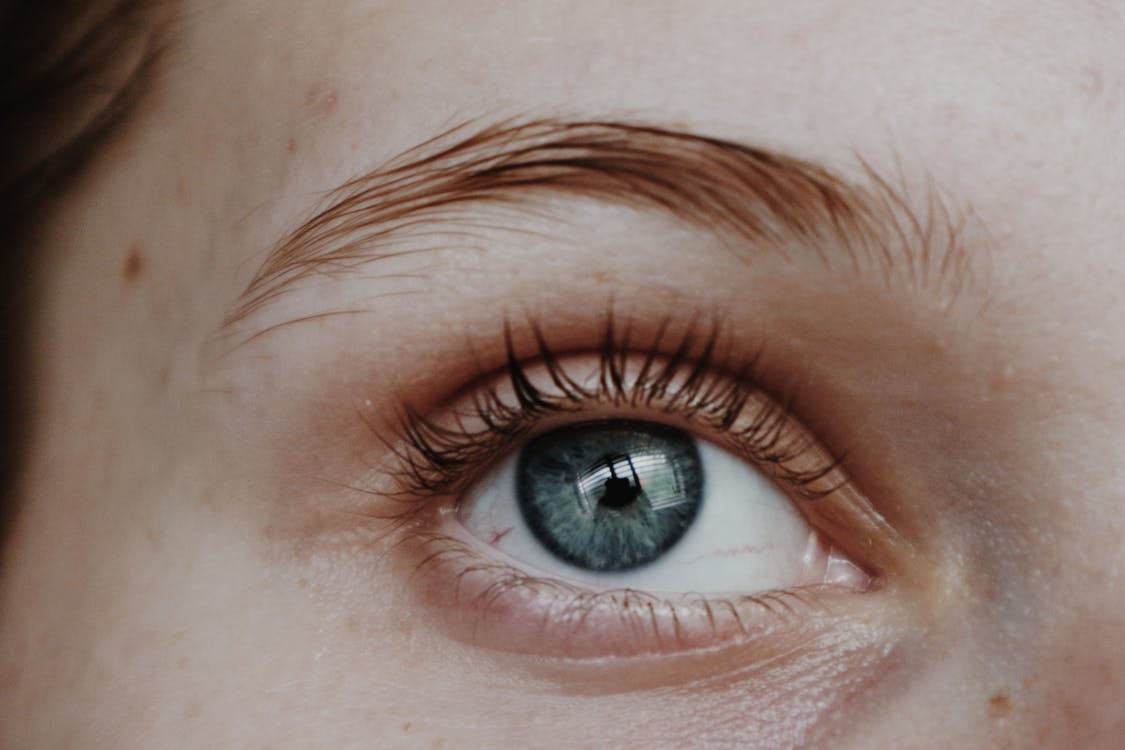
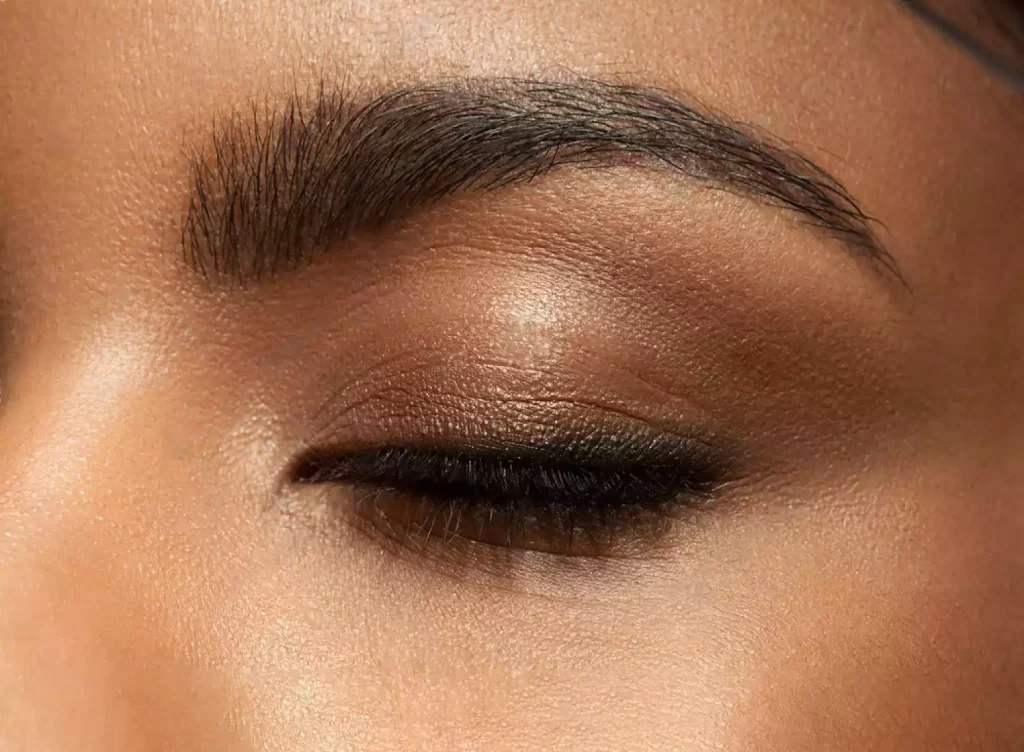
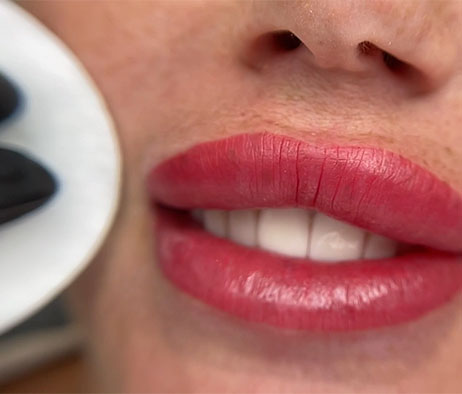
Natural Appearance

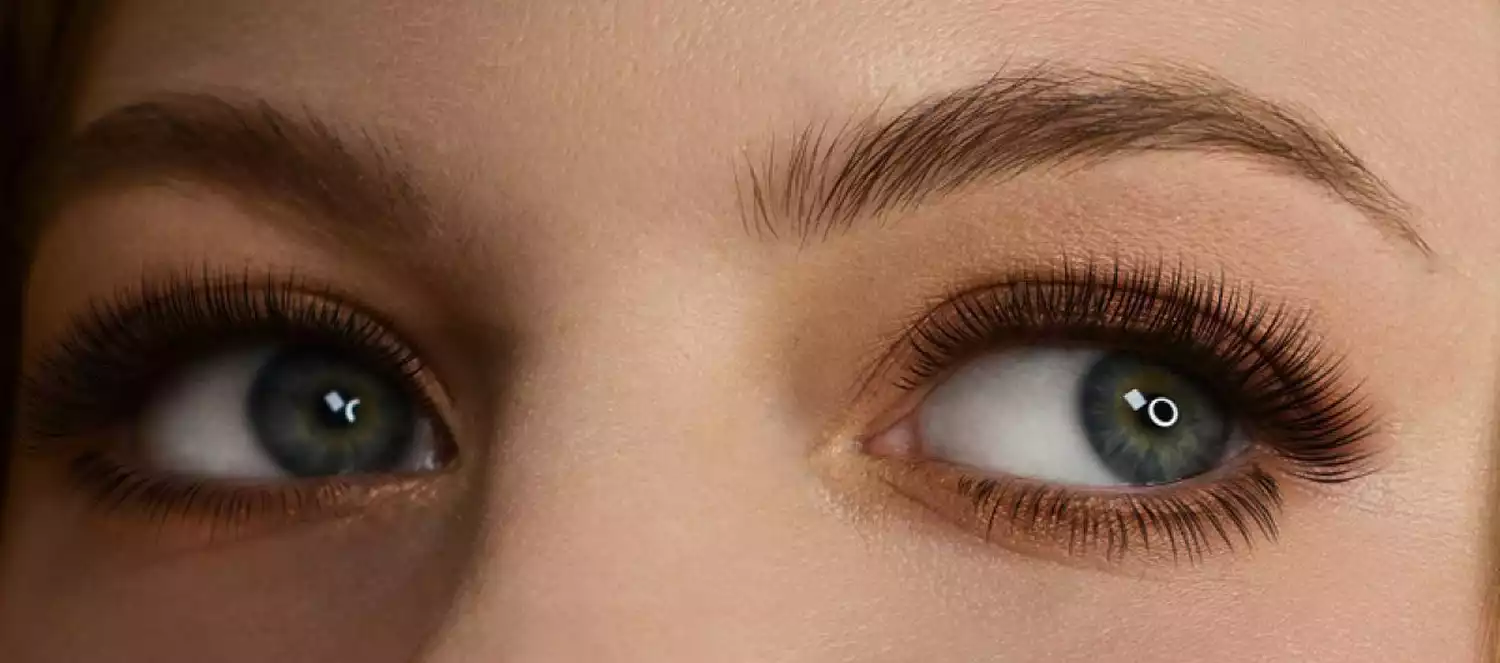
One of the primary benefits of using sun-kissed brow pigments is their ability to provide a natural look. The warm tones blend harmoniously with various skin tones, offering a soft, understated enhancement that doesn’t overpower the face. This makes it an ideal choice for clients seeking subtle definition rather than dramatic changes.

Versatility Across Skin Tones

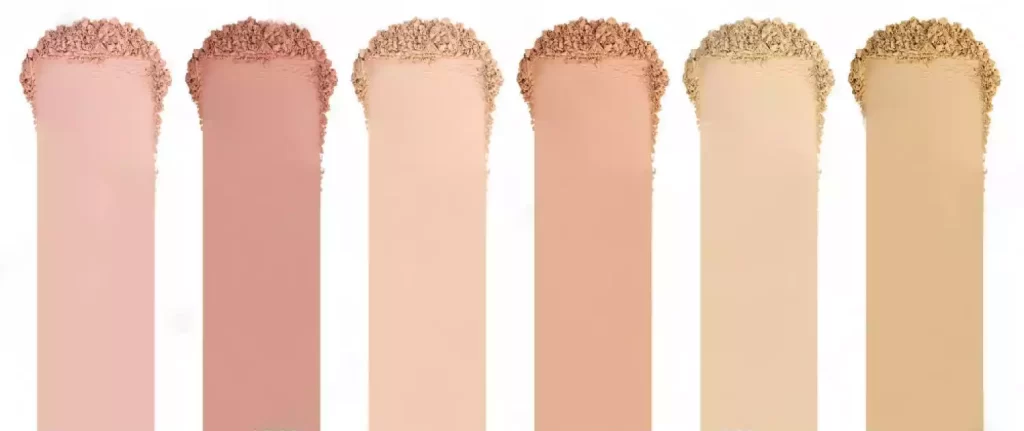
Sun-kissed brow pigments are versatile and suitable for a wide range of skin tones, from fair to deep. The pigments can be customized to match the client’s natural hair color and skin undertones, ensuring a personalized result that enhances their unique beauty.

Long-Lasting Results

These pigments are designed to last, offering clients a long-term solution to brow maintenance. With proper application and aftercare, sun-kissed brow pigments can last anywhere from 12 to 24 months before a touch-up is needed.

Application Techniques for Sun-Kissed Brow Pigments

Pre-Application Consultation

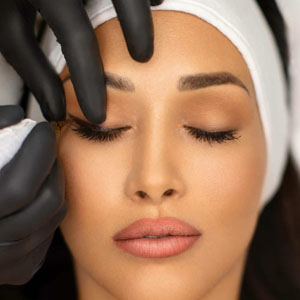
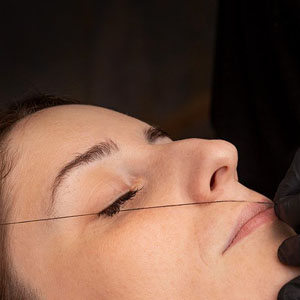
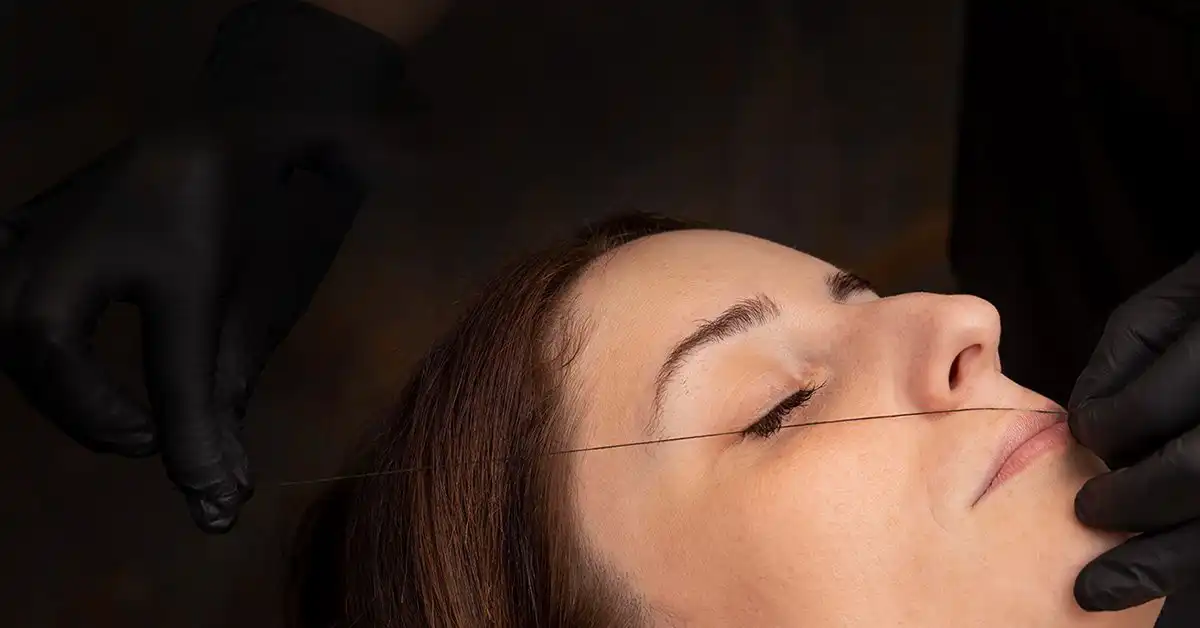
Before applying sun-kissed brow pigments, it’s crucial to conduct a thorough consultation with the client. This includes discussing their desired look, assessing their skin tone, and determining the appropriate pigment shade. The consultation also provides an opportunity to explain the procedure, potential risks, and aftercare requirements.
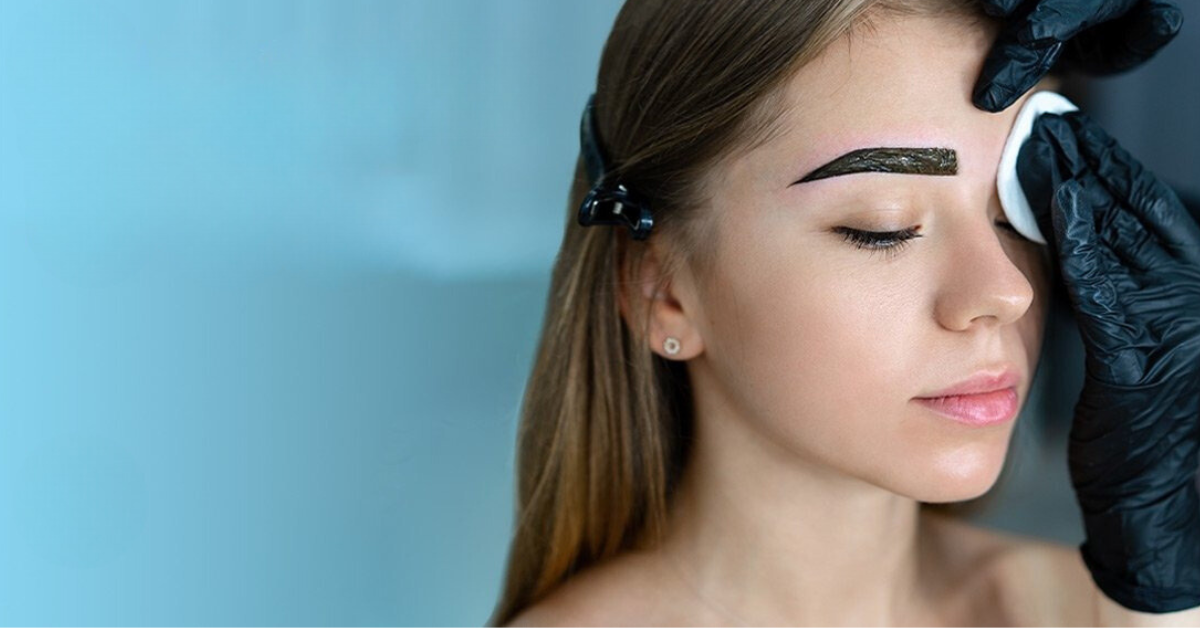
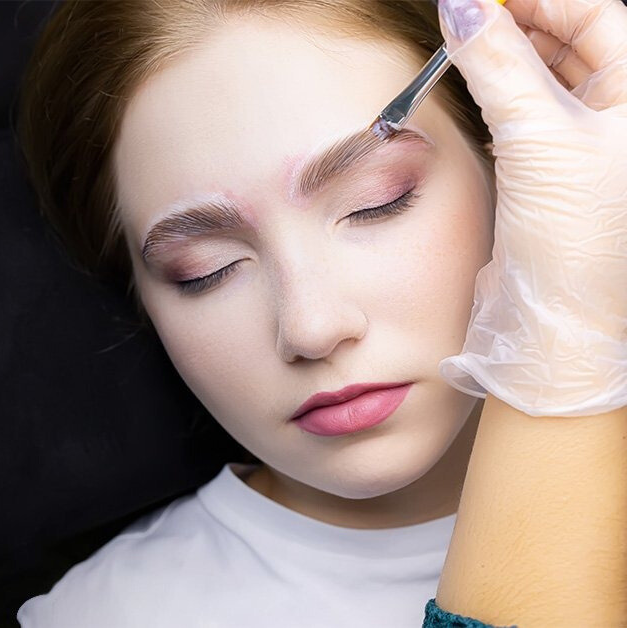
Preparing the Skin

Proper skin preparation is key to achieving optimal results. The skin should be thoroughly cleansed and exfoliated to remove any oils or debris that could interfere with pigment absorption. A numbing cream may be applied to minimize discomfort during the procedure.

Application Process

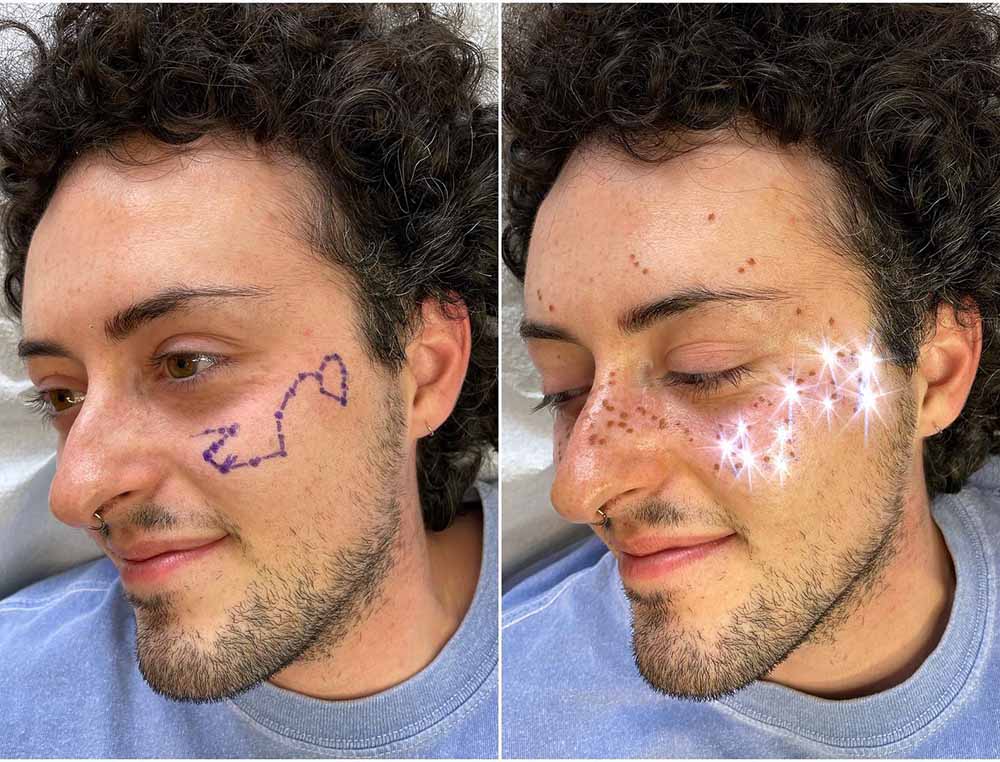
The application of sun-kissed brow pigments involves several steps:

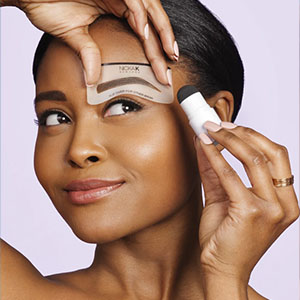
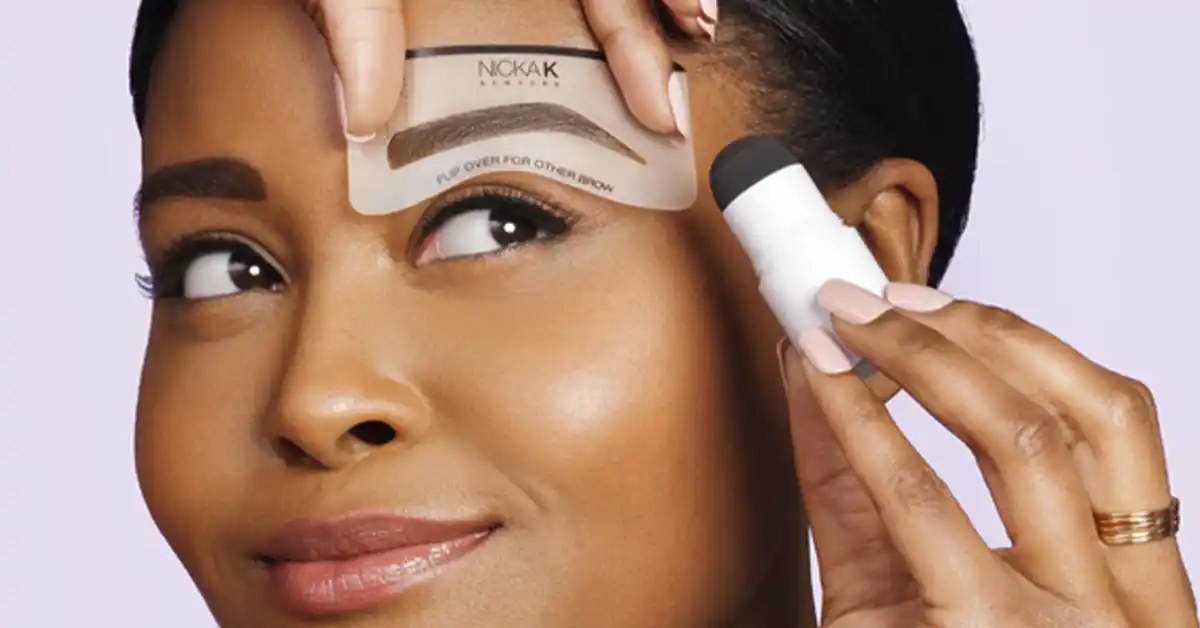
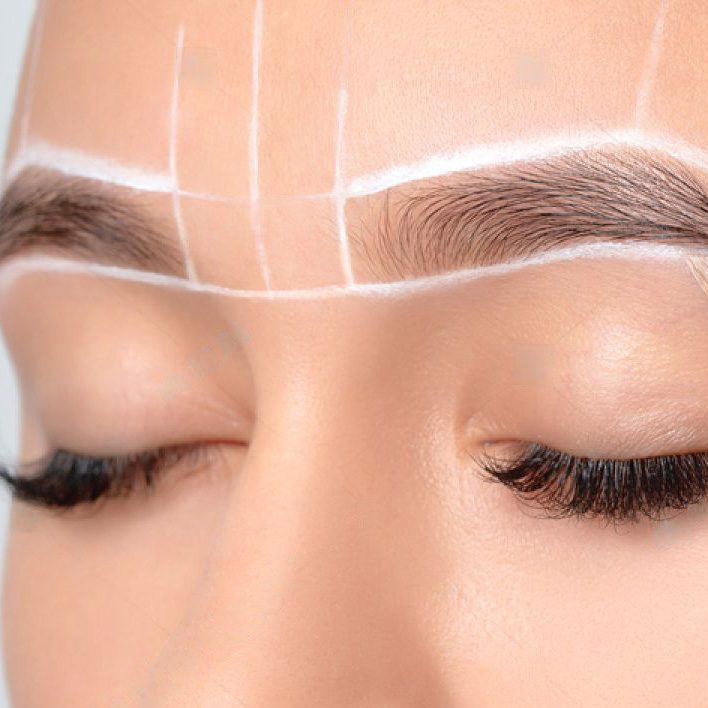
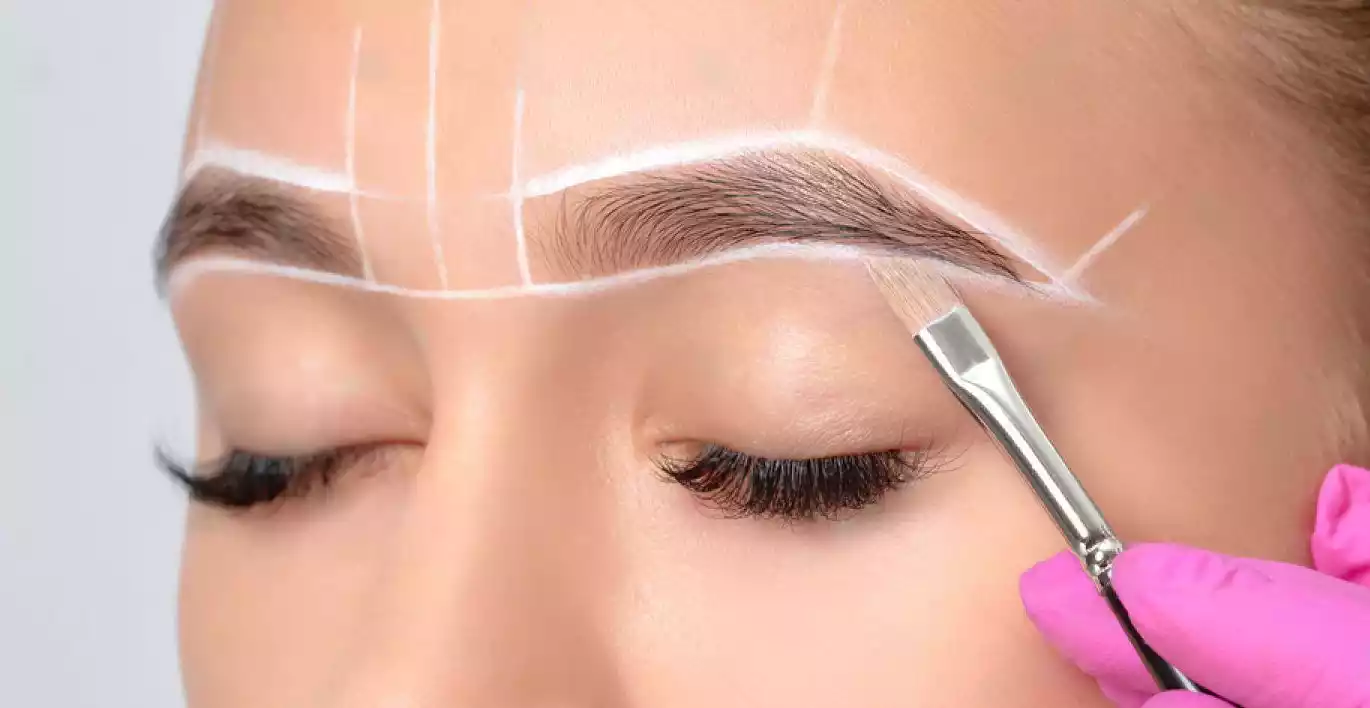
  1. Mapping the Brows: Using precise measurements, the artist maps out the ideal brow shape, ensuring symmetry and alignment with the client’s facial features.
  2. Choosing the Pigment: Based on the consultation, the artist selects the appropriate sun-kissed pigment shade, blending it if necessary to achieve the perfect match.
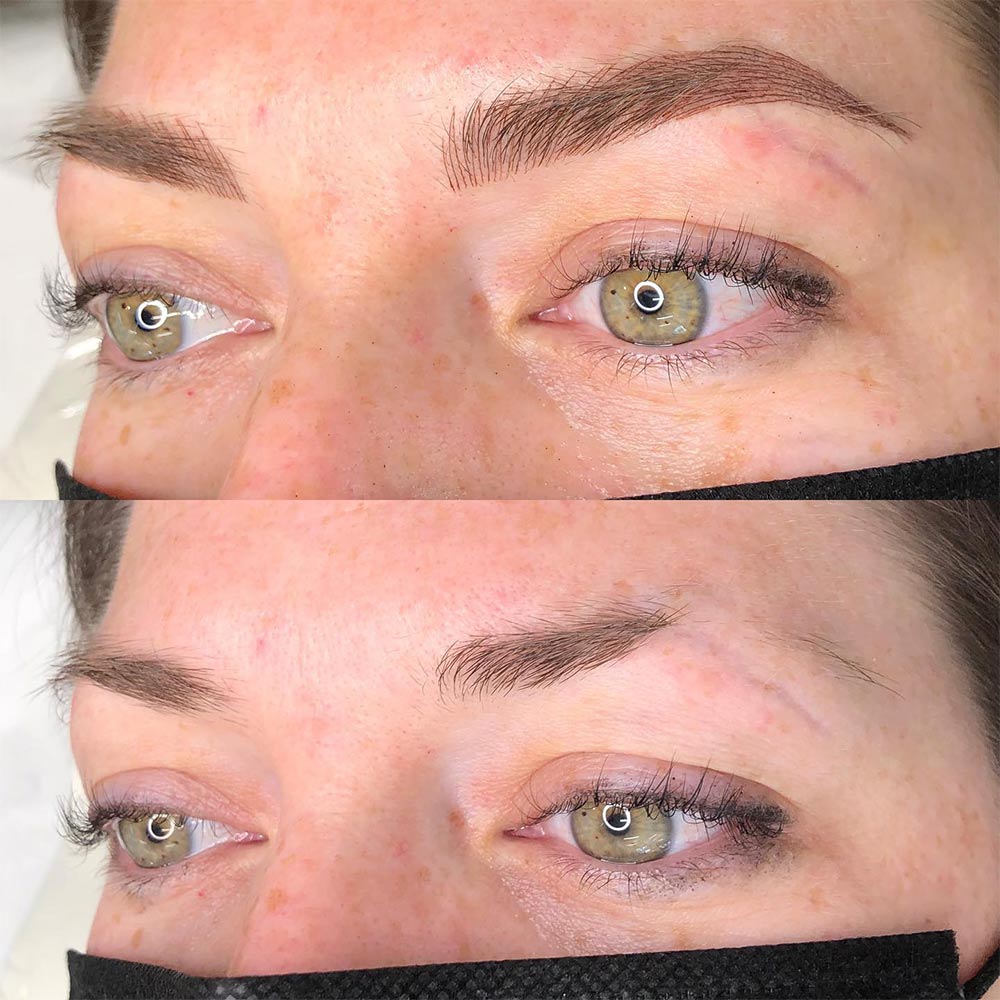
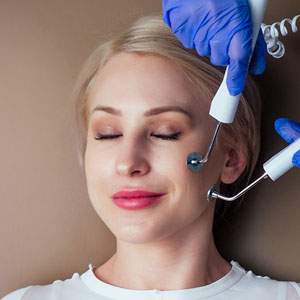
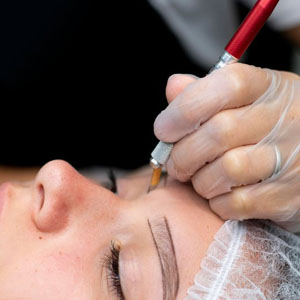
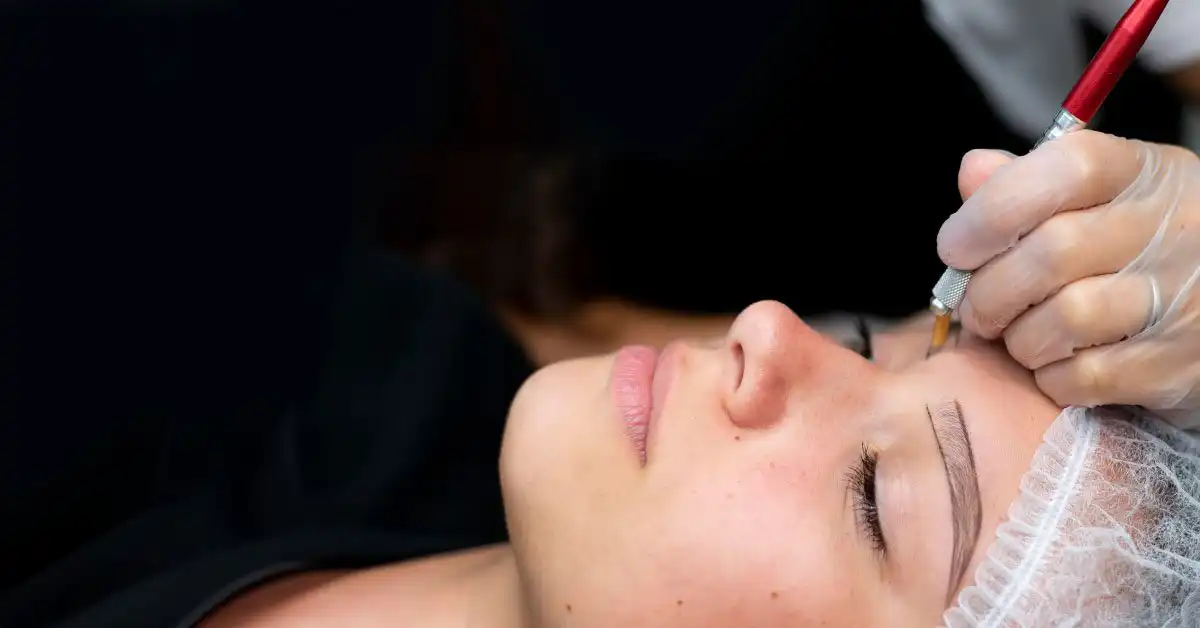
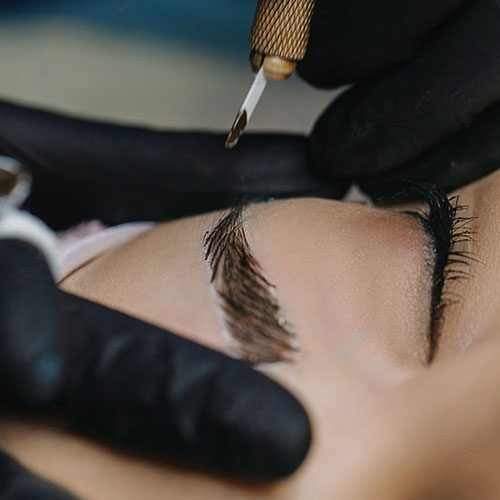
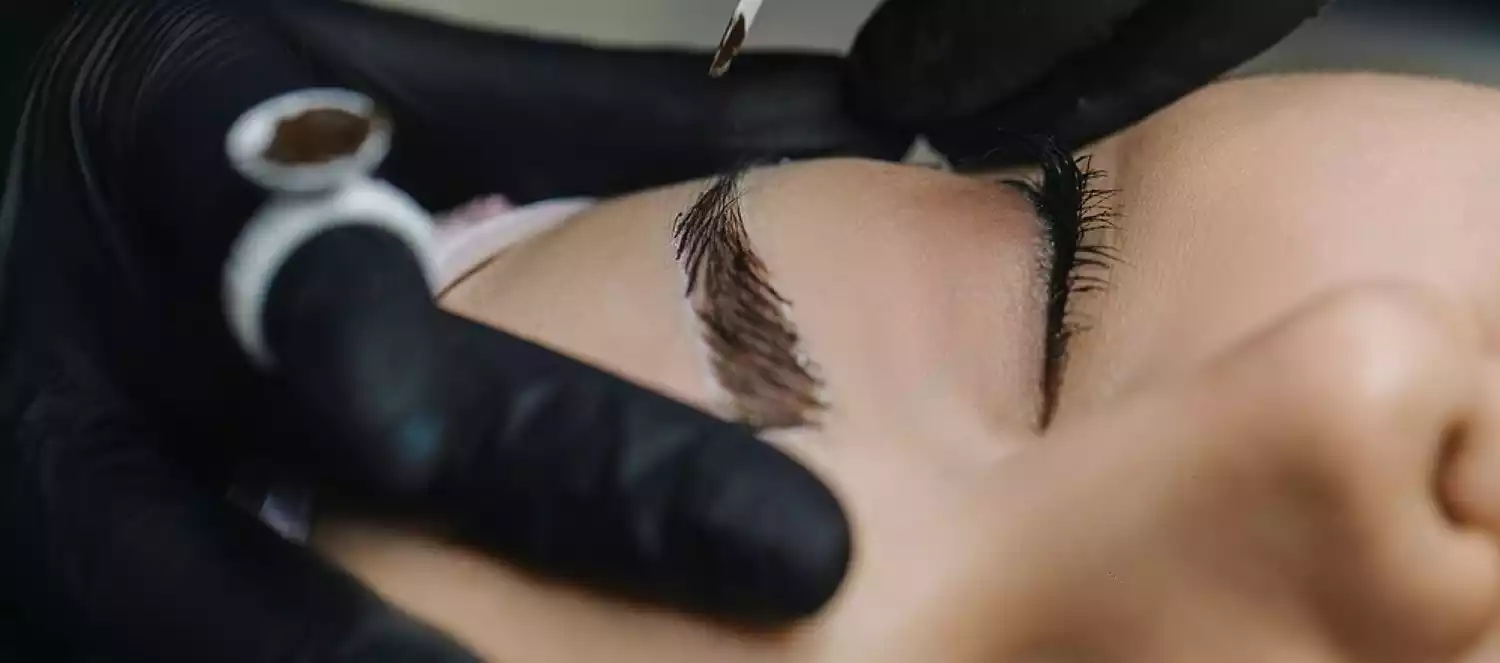
  3. Microblading or Micropigmentation: The pigment is applied using either microblading (manual method) or micropigmentation (machine method). The choice of technique depends on the client’s skin type, desired look, and the artist’s expertise.
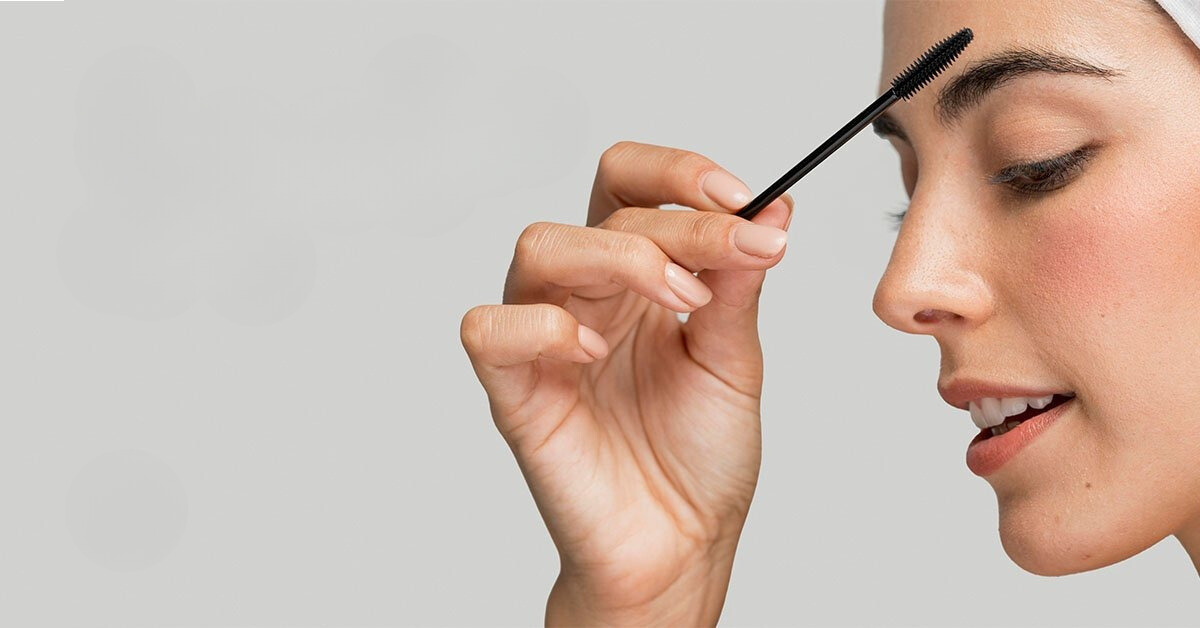
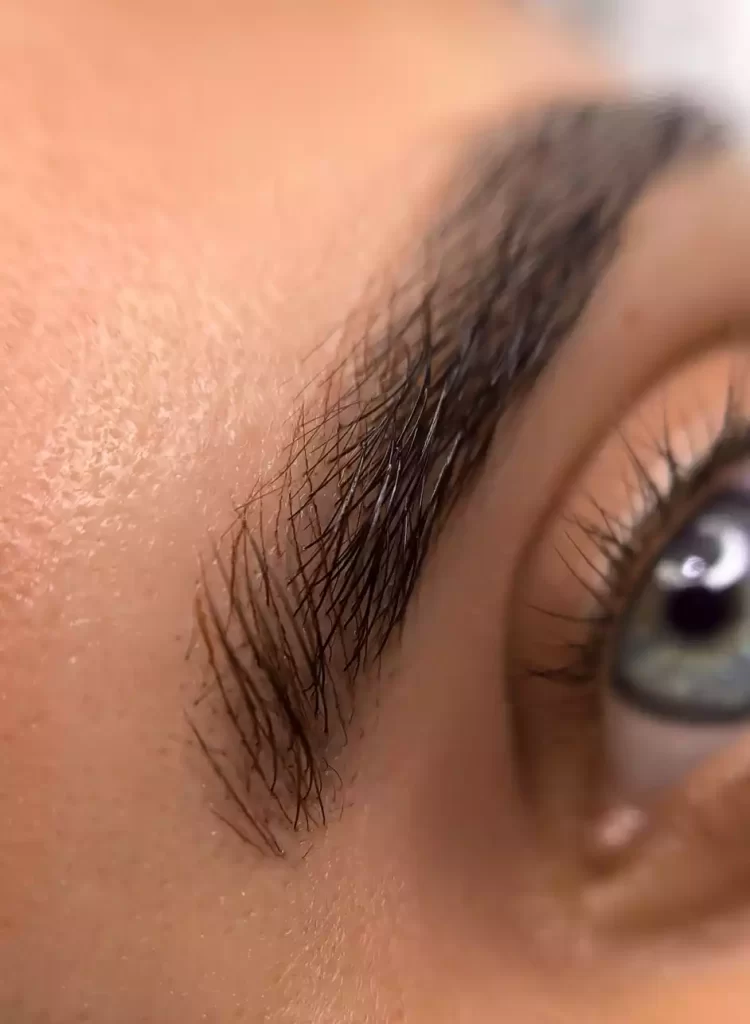
  4. Layering the Pigment: To ensure depth and dimension, the pigment is layered in thin, even strokes, mimicking the natural growth pattern of eyebrow hairs.

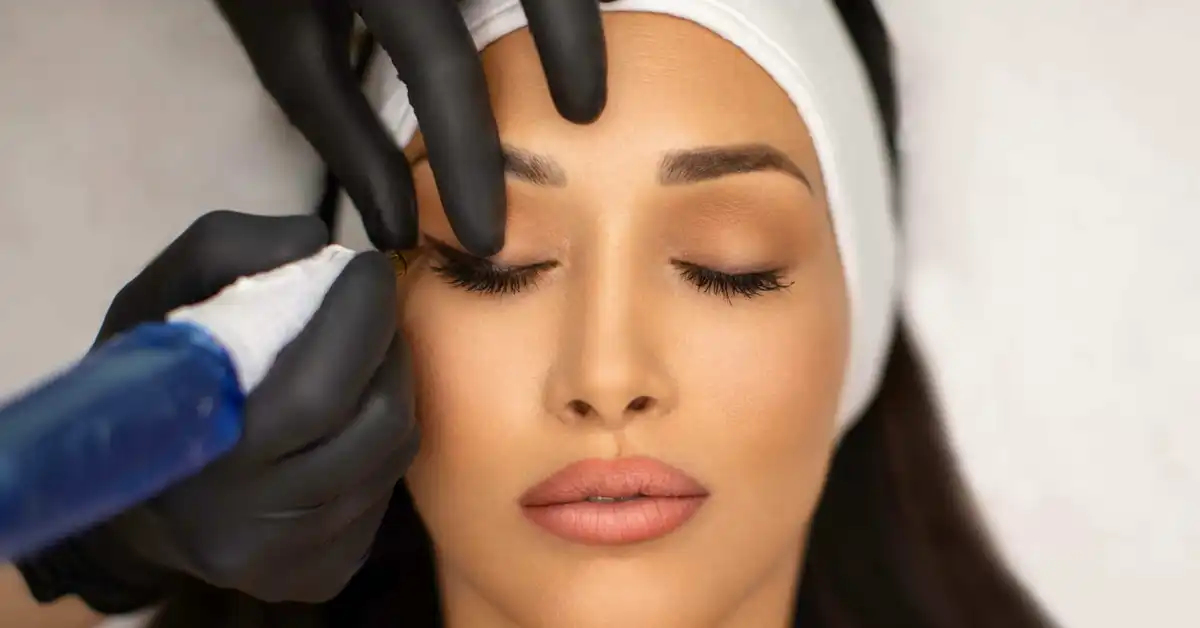
Aftercare for Optimal Results

Proper aftercare is essential to ensure the longevity and appearance of sun-kissed brow pigments. Clients should be advised to follow these steps:

  • Avoid Water and Sweat: For the first 7-10 days, clients should avoid getting the brow area wet or sweaty to prevent pigment loss.
  • Use a Healing Ointment: Apply a thin layer of healing ointment as directed by the artist to keep the area moisturized and promote healing.
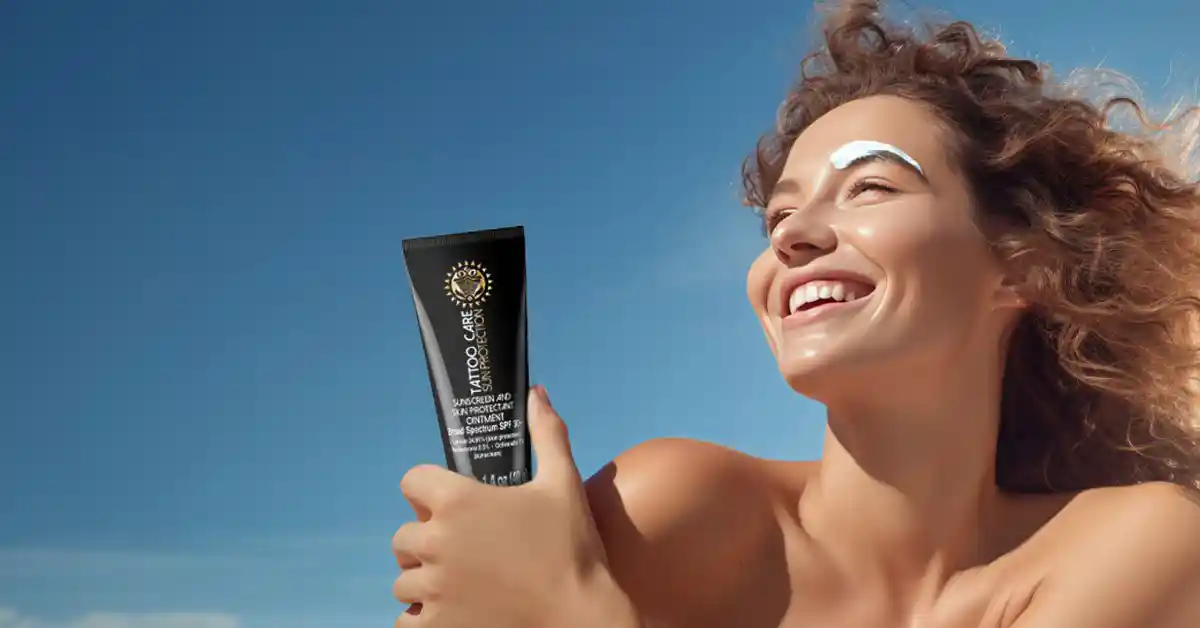
  • Avoid Sun Exposure: Direct sun exposure can cause the pigment to fade prematurely. Clients should wear a hat or use sunscreen on the brow area once healed.
  • No Picking or Scratching: It’s important not to pick or scratch the brow area during the healing process, as this can lead to uneven pigment retention.

Potential Risks and Considerations

While sun-kissed brow pigments offer numerous benefits, it’s important to be aware of potential risks:

  • Allergic Reactions: Although rare, some clients may experience allergic reactions to the pigments. A patch test should be conducted prior to the procedure.
  • Pigment Fading: Over time, all brow pigments will fade due to factors such as sun exposure, skin type, and lifestyle. Regular touch-ups are recommended to maintain the desired look.
  • Infection: As with any cosmetic procedure, there is a risk of infection if aftercare instructions are not followed properly.

Conclusion

Sun-kissed brow pigments are a versatile and natural-looking option for clients seeking to enhance their brows. By understanding the composition, benefits, and application techniques, artists can achieve stunning, long-lasting results that meet the needs of a diverse clientele. Proper aftercare and awareness of potential risks are essential to ensure the best outcomes and client satisfaction.

permanent makeup proud portfolio

What are sun-kissed brow pigments?

Sun-kissed brow pigments are specialized colorants that create a warm, natural look, mimicking sun-kissed skin tones.

Are sun-kissed brow pigments suitable for all skin tones?

Yes, they are versatile and can be customized to match various skin tones, from fair to deep.

How long do sun-kissed brow pigments last?

With proper care, they can last 12 to 24 months before a touch-up is needed.

What is the application process for sun-kissed brow pigments?

The process involves mapping the brows, selecting the right pigment, and applying it through microblading or micropigmentation.

What aftercare is needed for sun-kissed brow pigments?

Avoid water, sweat, and sun exposure for the first 7-10 days, and apply a healing ointment as directed.

Can I be allergic to sun-kissed brow pigments?

Allergic reactions are rare, but a patch test should be done prior to the procedure to ensure safety.

Will sun-kissed brow pigments fade over time?

Yes, they will gradually fade due to factors like sun exposure and skin type, so regular touch-ups are recommended.

Eyebrow Tattoo Color Correction

Eyebrow Tattoo Color Correction

Eyebrow Tattoo Color Correction

Table of Contents

Eyebrow Tattoo Color Correction: Pro Tips for Perfect Results

Introduction to Eyebrow Tattoo Color Correction

Eyebrow tattooing has become increasingly popular as a semi-permanent solution for achieving fuller, well-defined brows. However, over time, the color of an eyebrow tattoo can fade, shift, or become uneven, leading to a less-than-desirable appearance. This is where eyebrow tattoo color correction comes in—a specialized process that restores and enhances the original color, ensuring your brows look their best. In this guide, we will cover essential pro tips for successful eyebrow tattoo color correction, helping you achieve the perfect brow shade.

Understanding Why Eyebrow Tattoos Fade or Change Color

Factors Contributing to Color Changes

Several factors can cause eyebrow tattoos to fade or change color over time:

  1. Pigment Quality: The type and quality of pigment used in the original tattoo can significantly impact how the color holds up over time. Inferior pigments are more likely to fade or change color.
  2. Sun Exposure: UV rays from the sun can break down the pigments in the skin, causing them to fade or alter in color.
  3. Skin Type: Oily skin tends to retain pigment less effectively, leading to faster fading. Similarly, certain skin tones may cause pigments to heal in unexpected shades.
  4. Aftercare: Proper aftercare is crucial for maintaining the color of your eyebrow tattoo. Skipping sunscreen or using harsh skincare products can accelerate fading.
  5. Aging Process: As the skin ages, it loses elasticity and becomes thinner, which can affect how the tattooed pigment appears.

Common Issues with Eyebrow Tattoo Colors

  • Fading: The most common issue is fading, where the pigment becomes lighter and less vibrant.
  • Color Shifting: Some tattoos may turn blue, green, or even red over time, depending on the original pigments used and how they interact with the skin.
  • Uneven Color: Patches of the tattoo may fade faster than others, leading to an uneven appearance.

How Long Does It Take for Tattooed Eyebrows to Fade?

Pro Tips for Successful Eyebrow Tattoo Color Correction

1. Consult a Professional Technician

The first and most important step in eyebrow tattoo color correction is to consult a professional technician who specializes in this area. Color correction requires an in-depth understanding of color theory, skin tones, and pigment behavior, making it a task best left to experienced professionals.

2. Assess the Current Condition of Your Brows

Before proceeding with color correction, it is essential to assess the current state of your eyebrow tattoos. This includes evaluating the degree of fading, the presence of any unwanted color tones, and the overall shape and symmetry of the brows. This assessment will guide the technician in determining the best approach for correction.

3. Choose the Right Corrective Pigment

Color correction involves neutralizing unwanted tones and restoring the desired color. Depending on the issue, different corrective pigments may be used:

  • Neutralizing Cool Tones: If your brows have turned blue or green, a warm, orange-based pigment can neutralize the cool tones.
  • Neutralizing Warm Tones: For brows that have turned red or pink, a green or olive-based pigment may be used to counteract the warmth.
  • Reinforcing Faded Colors: If your brows have simply faded and need a refresh, the technician will use a pigment that closely matches your original or desired brow color.

4. Consider Laser Tattoo Removal for Severe Cases

In some cases, color correction alone may not be enough, especially if the original tattoo has significantly shifted in color or the shape is incorrect. Laser tattoo removal can be used to lighten or remove the existing pigment, creating a clean canvas for re-tattooing. This process requires multiple sessions and should be done by a qualified professional to avoid skin damage.

5. Follow Proper Aftercare

After undergoing color correction, proper aftercare is crucial to maintaining the results. This includes:

  • Avoiding Sun Exposure: Use a high SPF sunscreen on your brows to protect the pigments from UV damage.
  • Gentle Cleansing: Cleanse the brow area gently to avoid disturbing the new pigment.
  • Moisturizing: Keep the area moisturized with a recommended ointment to aid in healing.
  • Avoiding Harsh Skincare Products: Steer clear of exfoliants, retinoids, and other potent skincare ingredients that could fade the pigment.

6. Schedule Follow-Up Appointments

Color correction may require multiple sessions to achieve the desired result. Schedule follow-up appointments as recommended by your technician to ensure the color remains vibrant and even.

Free Person With Blue Eyes Stock Photo

Maintaining Your Corrected Eyebrow Tattoo

Regular Touch-Ups

Even after a successful color correction, your eyebrow tattoo will require periodic touch-ups to maintain its appearance. Depending on your skin type and lifestyle, touch-ups may be needed every 12 to 18 months.

Protecting Your Investment

To prolong the life of your eyebrow tattoo, consider the following:

  • Use Sun Protection: Regularly apply sunscreen to your brows, even on cloudy days.
  • Avoid Excessive Exfoliation: Limit the use of exfoliating products on your face, especially near your brows.
  • Be Mindful of Skincare Products: Avoid products that can accelerate fading, such as those containing acids or retinoids.

Conclusion

Eyebrow tattoo color correction is an intricate process that can restore and enhance the beauty of your brows. Whether you’re dealing with fading, color shifts, or uneven pigmentation, following these pro tips and working with a skilled technician will ensure the best possible results. With the right approach, you can enjoy beautifully corrected brows that complement your natural features and boost your confidence.

permanent makeup proud portfolio

Eyebrow Tattoo Color Correction FAQs

What is eyebrow tattoo color correction?

Eyebrow tattoo color correction is a process that adjusts or neutralizes unwanted tones in your existing eyebrow tattoo to restore the desired color.

Why do eyebrow tattoos change color over time?

Eyebrow tattoos can change color due to factors like pigment quality, sun exposure, skin type, and aging, which may cause the pigments to fade or shift.

How long does eyebrow tattoo color correction take?

The color correction process typically requires 1-3 sessions, depending on the extent of correction needed and the individual’s skin type.

Can all unwanted eyebrow tattoo colors be corrected?

Most unwanted colors can be corrected with the right pigments, but in severe cases, laser removal may be necessary before re-tattooing.

Is eyebrow tattoo color correction painful?

The process is generally tolerable, with most technicians using numbing agents to minimize discomfort during the procedure.

How do I choose the right technician for color correction?

Look for a technician with specialized experience in eyebrow tattoo color correction, good reviews, and a portfolio of before-and-after photos.

How can I prevent my corrected eyebrow tattoo from fading?

To prevent fading, follow aftercare instructions, apply sunscreen regularly, avoid harsh skincare products, and schedule regular touch-ups.

Best Retinol for Men

Best Retinol for Men

Best Retinol for Men

Table of Contents

Unlocking Your Skin’s Potential: The Best Retinol for Men at Brows & Lips

In the realm of skincare, retinol has earned its reputation as a true powerhouse, renowned for its ability to transform skin and defy the signs of aging. While often associated with women’s skincare, retinol is equally beneficial for men seeking to maintain a youthful, healthy complexion. At Brows & Lips, we believe everyone deserves to experience the transformative power of retinol, and we’re here to guide you on your journey to radiant skin.

Retinol Demystified: A Powerful Ally for Men’s Skin

Retinol, a vitamin A derivative, increases cell turnover, stimulates collagen production, and improves skin texture. It’s a multitasking ingredient that can tackle many skin concerns, including fine lines, wrinkles, acne, uneven skin tone, and dullness.

For men, retinol can be a game-changer, helping combat aging, environmental damage, and even shaving-related irritation. It’s a simple yet effective way to elevate your skincare routine and achieve a smoother, more youthful complexion.

Choosing the Right Retinol: Factors to Consider

The world of retinol can be overwhelming, with countless options available on the market. At Brows & Lips, we understand the importance of choosing the right product for your specific needs. Here are some key factors to consider:

  • Concentration: Retinol comes in various concentrations, ranging from 0.01% to 1%. If you’re new to retinol, starting with a lower concentration and gradually increasing it as your skin adjusts is best.
  • Formulation: Retinol can be found in serums, creams, and even oils. Choose a formulation that suits your skin type and preferences.
  • Additional Ingredients: Some retinol products are formulated with additional ingredients like hyaluronic acid, niacinamide, or antioxidants, which can further enhance their benefits.
  • Sensitivity: Retinol can be irritating for some, so choosing a product that’s gentle on your skin is important. If you have sensitive skin, opt for a retinol alternative like bakuchiol, which offers similar benefits without the potential for irritation.

Brows & Lips Recommends: Top Retinol Products for Men

While the best retinol for you will depend on your individual skin type and concerns, here are some top-rated options we recommend:

  • The Ordinary Granactive Retinoid 2% Emulsion: This affordable option is a great starting point for beginners, offering a gentle yet effective dose of retinol.
  • Skinceuticals Retinol 0.5 Refining Night Cream: This powerful cream is formulated with pure retinol and soothing ingredients to minimize irritation while delivering noticeable results.
  • Paula’s Choice Clinical 1% Retinol Treatment: This potent treatment is ideal for those seeking a more intensive retinol experience. It’s formulated with a high concentration of retinol and antioxidants to combat signs of aging and improve skin texture.

Integrating Retinol into Your Skincare Routine

To reap the full benefits of retinol, it’s essential to incorporate it into your skincare routine gradually and consistently. Start using it a few times a week and gradually increase frequency as your skin tolerates it. Always apply retinol at night, as it can increase your skin’s sensitivity to the sun.

Your Skin’s Transformation Starts Here

At Brows & Lips, we believe that skincare is an investment in your overall well-being. Retinol is a powerful tool to help you achieve a smoother, more youthful complexion. Understanding your skin’s unique needs and choosing the right retinol product can unlock your skin’s full potential and embrace a new confidence level.

If you’re ready to embark on your retinol journey, our team of skincare experts is here to guide you. Contact us today to schedule a personalized consultation and discover the best retinol products and routines for your specific needs.

permanent makeup proud portfolio

Best Retinol for Men FAQs

What is retinol, and how does it benefit men’s skin? 

Retinol, a vitamin A derivative, increases cell turnover, stimulates collagen production, and improves skin texture, combating ageing and environmental damage.

How should men incorporate retinol into their skincare routine?

 Start with a low concentration a few times a week, apply it at night, and gradually increase frequency as your skin adjusts.

Can retinol cause skin irritation?

Retinol can cause irritation, especially for sensitive skin. Opt for gentle formulations or alternatives like bakuchiol.

What are some recommended retinol products for men?

The top choices are the Ordinary Granactive Retinoid 2%, Skinceuticals Retinol 0.5 Night Cream, and Paula’s Choice Clinical 1% Retinol Treatment.

Why should retinol be applied at night?

Retinol increases skin’s sensitivity to the sun, making nighttime application safer and more effective.

Brow Health & Permanent Makeup

Holistic Approach to Brow Health & Permanent Makeup

Table of Contents

Unleashing Your Brow Potential: A Holistic Approach to Brow Health & Permanent Makeup at Brows & Lips

Beautiful eyebrows are more than just a trend; they’re a statement of personal style and a defining feature of your face. At Brows & Lips, we understand the transformative power of perfect brows and believe that everyone deserves to experience the confidence they bring.

Whether you’re struggling with sparse, unruly, or simply lackluster brows, we offer a holistic approach that combines expert guidance, innovative techniques, and personalized care to help you achieve your brow goals. This comprehensive guide will delve into the world of brow health, exploring the intricacies of brow growth, grooming, and permanent makeup.

Understanding the Brow Growth Cycle: The Foundation for Healthy Brows

Your eyebrows, like the hair on your head, follow a natural growth cycle. Understanding this cycle is key to managing your expectations and tailoring your brow care routine. The three phases of the brow growth cycle are:

  1. Anagen (Growth Phase): This is the active growth phase, where hair follicles produce new hairs. The length of this phase varies for each individual, typically lasting several weeks.
  2. Catagen (Transition Phase): In this brief phase, hair growth slows down, and the hair follicle begins to shrink.
  3. Telogen (Resting Phase): The hair follicle rests during this phase, and the old hair eventually sheds to make way for new growth.

Factors Influencing Brow Growth: Nurturing from Within

Several factors can influence the speed and density of your brow growth, including:

  • Genetics: Your genes significantly determine your natural brow shape, thickness, and growth rate.
  • Age: Hair growth tends to slow down as we age, including brow hair growth.
  • Hormonal Imbalances: Hormonal fluctuations, such as those experienced during pregnancy or menopause, can impact brow growth.
  • Nutritional Deficiencies: A lack of essential vitamins, minerals, and protein can hinder hair growth, including that of your brows.
  • Medical Conditions: Certain medical conditions, like alopecia areata or thyroid disorders, can cause hair loss, including brow hair loss.

Promoting Healthy Brow Growth: Tips and Tricks

While genetics play a role, there are several things you can do to encourage healthy brow growth:

  • Nourish from Within: A balanced diet rich in protein, vitamins, and minerals is essential for overall health, including hair growth. Focus on incorporating foods like lean meats, fish, eggs, nuts, seeds, fruits, and vegetables into your diet.
  • Consider Supplements: Supplements like biotin, collagen, and omega-3 fatty acids can be beneficial for hair growth, but always consult your doctor before starting any new supplement regimen.
  • Gentle Cleansing and Exfoliation: Avoid harsh cleansers and scrubs that can strip your brows of natural oils and weaken hair follicles. Opt for gentle, oil-based cleansers and exfoliate with a soft brush or a mild scrub specifically designed for the face.
  • Brow-Boosting Serums: Look for serums containing peptides, vitamins, and other growth-promoting ingredients to nourish and strengthen your brow hairs.
  • Massage: Gently massage your brows for a few minutes each day to stimulate blood circulation to the hair follicles and promote growth.

The Art of Brow Shaping: Refining Your Arches

Once you’ve promoted healthy brow growth, it’s time to focus on shaping and grooming. At Brows & Lips, our skilled brow artists are experts in the art of brow shaping, tailoring their techniques to your individual face shape, preferences, and brow goals.

  • Mapping: We begin by carefully mapping your brows to determine the ideal shape and symmetry to enhance your features.
  • Trimming: We’ll gently trim stray hairs outside your desired brow shape, creating a clean and polished look.
  • Tweezing or Threading: We’ll remove unwanted hair with precision using tweezers or threading, a traditional hair removal technique that is gentle on the skin.
  • Tinting: For those with lighter brow hairs, tinting can add depth and definition, making your brows appear fuller and more prominent.
  • Brow Lamination: This innovative treatment lifts and sets your brow hairs in a desired direction, creating a fuller, feathery look that lasts for weeks.

Permanent Makeup for Brows: The Ultimate Brow Enhancement

For those seeking a more permanent solution for sparse or uneven brows, permanent makeup is a transformative option. At Brows & Lips, we offer a range of PMU techniques, including microblading, powder brows, and combination brows, each tailored to your unique needs and preferences.

Our skilled artists will work with you to create a bespoke brow design that complements your features and enhances your natural beauty. With meticulous attention to detail and a commitment to excellence, we’ll ensure that your permanent makeup brows look stunning and natural.

Your Journey to Brow Perfection Starts at Brows & Lips

Beautiful brows are an investment in your confidence and self-esteem. At Brows & Lips, we’re dedicated to helping you achieve your dream brows through a comprehensive approach that combines expert guidance, innovative techniques, and personalized care. Contact us today to schedule your consultation and discover how we can help you unlock your brow potential.

permanent makeup proud portfolio

What is the brow growth cycle?

The brow growth cycle consists of three phases: anagen (growth), catagen (transition), and telogen (resting).

How can I promote healthy brow growth? 

Nourish your brows with a balanced diet, use growth serums, gently cleanse and exfoliate, and massage your brows daily.

What is brow lamination?

Brow lamination is a treatment that lifts and sets brow hairs in the desired direction, creating a fuller, feathery look.

What types of permanent makeup for brows do you offer?

We offer microblading, powder, and combination brows, each tailored to your unique needs and preferences.

How does permanent makeup enhance my brows?

Permanent makeup provides a long-lasting solution for sparse or uneven brows, giving them a fuller, natural appearance.

What factors influence brow growth?

Genetics, age, hormonal imbalances, nutritional deficiencies, and medical conditions can all impact brow growth.

Can brow tinting make my brows look fuller?

Yes, brow tinting adds depth and definition to lighter brow hairs, making them appear fuller and more prominent.

How does Brows & Lips approach brow shaping?

Our skilled artists map, trim, tweeze/thread, and tint your brows to create a shape that enhances your features.

Are brow-boosting serums effective?

Serums containing peptides and vitamins can nourish and strengthen brow hairs, promoting growth.

KHDA-Certified Microblading Course

Ultimate Guide to Brows & Lips KHDA-Certified Microblading Course

Table of Contents

Unleash Your Inner Brow Artist: The Ultimate Guide to Brows & Lips’ KHDA-Certified Microblading Course

In a world where eyebrows have become the crown jewels of facial aesthetics, the demand for skilled microblading artists has skyrocketed. Imagine the power to transform sparse or uneven brows into perfectly sculpted arches that radiate confidence. This dream can become your reality with Brows & Lips’ KHDA-certified Microblading Course.

Delving Deeper into Microblading: More Than Meets the Eye

Microblading is a meticulously refined art form that goes beyond mere cosmetics. It’s a fusion of precision and creativity, where pigments are delicately implanted into the skin’s surface layers using a handheld tool with ultra-fine needles. The result is a breathtaking illusion of natural hair strokes that enhance and define the brows, leaving your clients with a renewed sense of beauty and self-assurance.

But microblading isn’t just about aesthetics; it’s a transformative experience. It’s about restoring confidence in those who have lost their eyebrows due to medical conditions or over-plucking. It’s about correcting asymmetries and creating a sense of balance and harmony in the face. And it’s about empowering individuals to embrace their unique beauty and feel their best.

Why Brows & Lips Stands Out: Your Partner in Microblading Excellence

Choosing the right microblading course is a pivotal decision that will shape your future career. Brows & Lips has emerged as a leading authority in permanent makeup education, renowned for its commitment to excellence, innovation, and student success. Here’s what sets us apart:

KHDA Certification: The Gold Standard in Quality

In Dubai, the Knowledge and Human Development Authority (KHDA) is the ultimate benchmark for educational institutions. Our Microblading Course proudly boasts KHDA certification, signifying that it has undergone rigorous evaluation and meets the highest standards for curriculum content, instructional quality, and student outcomes. This prestigious accreditation validates your training and opens doors to exciting opportunities in Dubai’s thriving beauty scene.

A Holistic Curriculum: Nurturing Well-Rounded Brow Artists

We believe in a comprehensive approach to microblading education beyond teaching techniques. Our curriculum is designed to nurture well-rounded brow artists with the technical skills and the artistic vision to create stunning results. Here’s a deeper look into the knowledge you’ll gain:

  • Microblading Techniques: From Basic to Advanced: Master the fundamental strokes that mimic natural hair growth, and then elevate your artistry with advanced techniques like ombre brows, powder brows, and combination brows. Learn to create subtle shading effects and customize brow designs to perfectly suit each client’s unique facial features and preferences.
  • The Science of Skin and Color: Dive into the intricacies of skin types, undertones, and color theory. This in-depth understanding will enable you to select the ideal pigments that complement each client’s complexion, ensuring natural-looking and long-lasting results.
  • Client-Centric Approach: Master the art of communication and build strong rapport with your clients. Learn to conduct thorough consultations, understand their desires and expectations, and create personalized treatment plans that deliver results that exceed their dreams.
  • Hygiene and Safety: A Non-Negotiable Priority: Uphold the highest standards of hygiene and safety to protect your clients and your reputation. Learn meticulous sterilization protocols, infection control measures, and best practices for maintaining a safe and comfortable treatment environment.
  • The Business of Brows: Building Your Brand: Transform your passion into a thriving business. Discover marketing strategies, pricing models, social media engagement tactics, and client retention techniques that will set you on the path to entrepreneurial success.
  • Hands-On Training: Where Theory Meets Real-World Experience

At Brows & Lips, we understand that true mastery comes from practice. Our course provides extensive hands-on training sessions with live models, allowing you to hone your skills in a real-world setting. Our experienced instructors will be there to guide you every step of the way, offering personalized feedback and support to help you refine your technique and build confidence.

Expert Instructors: Your Mentors and Guides

Our instructors are not just teachers; they are passionate microblading artists who have mastered their craft. They are committed to sharing their knowledge, experience, and insider tips with you, creating a dynamic and supportive learning environment where you can flourish. You’ll receive individualized attention, constructive feedback, and the encouragement you need to reach your full potential.

World-Class Facilities and Premium Supplies:

Your learning experience is our top priority. Our state-of-the-art training centre is equipped with cutting-edge technology and designed to provide a comfortable and professional environment. During your training, you’ll have access to premium pigments, needles, and tools, ensuring you’re practicing with the best materials in the industry.

Invest in Your Future: A Rewarding Career Awaits

Investing in your education is a decision that will shape your future. Our Microblading Course is designed to provide exceptional value and a high return on your investment. We offer two course options to cater to different experience levels:

  • Beginners: AED 12,000
  • Professionals: AED 8,000

The potential return on your investment is significant. With the average cost of a microblading session in Dubai ranging from AED 1,000 to AED 2,000, you can quickly recoup your course fees and earn a substantial income. Many of our graduates have achieved financial independence and built thriving businesses within months of completing our course.

Unleash Your Creativity and Transform Lives

The world of microblading is your canvas, and your clients are your masterpieces. Embrace your passion, unleash your creativity, and become a sought-after brow artist with Brows & Lips’ KHDA-certified Microblading Course.

With our comprehensive curriculum, expert instructors, hands-on training, and unwavering support, you’ll be well on your way to transforming brows and lives. The beauty industry is eagerly awaiting your unique artistry.

Don’t wait any longer. Your journey to a fulfilling and lucrative career starts now. Contact us today to schedule a consultation and discover how we can help you achieve your microblading aspirations.

permanent makeup proud portfolio

What is microblading? 

Microblading is a semi-permanent makeup technique that uses a handheld tool with ultra-fine needles to implant pigments into the skin, creating the illusion of natural hair strokes.

Why should I choose a KHDA-certified microblading course? 

A KHDA certification ensures that the course meets the highest curriculum content standards, instructional quality, and student outcomes, opening doors to opportunities in Dubai’s beauty industry.

What skills will I learn in the Brows & Lips’ Microblading Course? 

You’ll master microblading techniques from basic to advanced, understand skin and color science, learn client communication, and uphold high hygiene and safety standards.

Is hands-on training included in the course?

Our course provides extensive hands-on training with live models, allowing you to practice and refine your skills in a real-world setting.

Who are the instructors at Brows & Lips? 

Our instructors are experienced and passionate microblading artists who provide personalized feedback, support, and mentorship throughout your training.

What are the course fees and potential earnings? 

The course fees are AED 12,000 for beginners and AED 8,000 for professionals. With microblading sessions in Dubai costing between AED 1,000 and AED 2,000, you can quickly recoup your investment.

How do I enroll in the KHDA-certified Microblading Course? 

Contact us today to schedule a consultation and discover how we can help you achieve your microblading aspirations.

Sculpting Your Brow Masterpiece

Sculpting Your Brow Masterpiece

Table of Contents

Sculpting Your Brow Masterpiece: The Essential Brow Shaping Tools from Brows & Lips

At Brows & Lips, we recognize that eyebrows are more than just hair; they’re the frame that defines your face and accentuates your unique beauty. Whether you’re a brow aficionado who meticulously grooms your arches or a professional artist seeking to create stunning brow transformations, having the right tools at your disposal is paramount.

The Significance of Brow Shaping in Enhancing Your Features

Your eyebrows hold the power to transform your entire look. A well-groomed brow can instantly lift your eyes, accentuate your bone structure, and even create the illusion of a more youthful appearance. Conversely, neglected or poorly shaped brows can disrupt your facial harmony and diminish your natural allure.

Whether your preference leans towards bold and bushy or sleek and arched, mastering the art of brow shaping is key to achieving a polished and confident look. It’s about enhancing what nature gave you, not masking it. By investing in the right tools and techniques, you can unlock a new level of self-expression and embrace your unique beauty.

The Must-Have Tools for DIY Brow-Shaping Enthusiasts

  • Tweezers: A high-quality pair of tweezers is an absolute essential for any brow enthusiast. Look for slanted-tip tweezers, as they offer the precision and control needed to pluck stray hairs and maintain your desired brow shape.
  • Spoolie Brush: This versatile tool is a game-changer for brow grooming. Use it to brush your brow hairs upwards and outwards, revealing their natural shape and identifying any areas that need trimming or filling. It also helps to blend brow makeup seamlessly for a natural-looking finish.
  • Brow Scissors: For those with longer brow hairs, a pair of brow scissors is essential for trimming and shaping. Choose a pair with small, sharp blades designed specifically for brow hair to avoid over-trimming and ensure a clean, precise cut.
  • Brow Pencil or Powder: Fill in sparse areas and define your brow shape with a brow pencil or powder that complements your natural hair color. Opt for a product that is buildable, allowing you to create a look that ranges from subtle to bold, depending on your preference.
  • Brow Gel: Keep your brows in place all day long with a clear or tinted brow gel. This essential tool tames unruly hairs, adds subtle definition, and provides a polished finishing touch that lasts.
  • Highlighter Pencil: Add a touch of radiance to your brow bone with a highlighter pencil. This simple step can instantly lift your eyes and create a more awake and refreshed look.

Elevating Your Brow Artistry: Professional Tools for Expert Results

A more extensive toolkit is essential for professional brow artists to deliver flawless and customized brow transformations for clients.

  • Brow Mapping String: This tool is indispensable for creating symmetrical and balanced brow shapes. It allows you to measure and mark the key points of the brows, ensuring a consistent and flattering result for each client.
  • Calipers: Calipers are precise measuring tools that help you determine the distance between your client’s eyebrows, ensuring that they are evenly spaced and perfectly aligned for a balanced look.
  • Angle Meter: An angle meter enables you to measure the angles of the brows in relation to the client’s facial features. This ensures the brow shape complements their unique bone structure and enhances their natural beauty.
  • Waxing Kits and Threading Tools: Waxing and threading are both effective methods for removing unwanted hair and shaping brows. A professional waxing kit should include wax, wax strips, applicators, and soothing after-wax lotion. For those who prefer threading, essential tools include cotton thread and a numbing gel to minimize discomfort.
  • Brow Tint and Henna: Brow tinting and henna are semi-permanent solutions for adding color and definition to brows. These treatments can help create fuller-looking brows, enhance their natural shape, and provide a more polished appearance.

Taking Your Brow Game to the Next Level: Advanced Tools & Techniques

Beyond the essential tools, there are additional techniques and products that can elevate your brow game:

  • Brow Stencils: Stencils can be a helpful guide for those new to brow shaping or for achieving perfectly symmetrical brows. Choose stencils that offer a variety of shapes to suit different face shapes and preferences.
  • Brow Lamination: This popular treatment involves straightening and setting the brow hairs in a desired direction, creating a fuller, more defined look that lasts for weeks.

At Brows & Lips, we offer a wide range of brow shaping tools and products, catering to both DIY enthusiasts and professional artists. Our expert brow artists are also available for consultations to help you choose the right tools and techniques for your specific needs. We’re committed to empowering you to achieve your brow goals and enhance your natural beauty.

permanent makeup proud portfolio

1. What are the essential tools needed for DIY brow shaping?

Essential tools for DIY brow shaping include tweezers, a spoolie brush, brow scissors, a brow pencil or powder, brow gel, and a highlighter pencil.

2. How do I choose the right tweezers for brow grooming?

Look for slanted-tip tweezers as they offer precision and control needed to pluck stray hairs and maintain your desired brow shape.

3. What is the purpose of a spoolie brush in brow grooming?

A spoolie brush is used to brush your brow hairs upwards and outwards, revealing their natural shape and helping to blend brow makeup seamlessly for a natural-looking finish.

4. How can I fill in sparse areas of my eyebrows?

You can fill in sparse areas using a brow pencil or powder that matches your natural hair color. Opt for a buildable product to create a look that ranges from subtle to bold.

5. What is brow mapping and why is it important for professional artists?

Brow mapping is a technique used to create symmetrical and balanced brow shapes by measuring and marking the key points of the brows, ensuring a consistent and flattering result for each client.

Skin Conditions

Skin Conditions and Brow Tattooing at Brows & Lips

Skin Conditions and Brow Tattooing

Table of Contents

Mastering Your Brows: The Ultimate Guide to Skin Conditions and Brow Tattooing at Brows & Lips

Beautiful, well-defined eyebrows are the frame to your face, enhancing your natural beauty and boosting your confidence. Brow tattooing, or permanent makeup (PMU), is a popular solution for achieving flawless brows that last. However, understanding your skin’s unique characteristics and any existing conditions is crucial for successful and long-lasting results.

Your Skin: The Canvas for Your Brow Masterpiece

Just as a painter carefully selects their canvas, our skilled PMU artists at Brows & Lips meticulously assess your skin before embarking on your brow transformation journey. Here’s how different skin types and conditions can impact your brow tattoo:

  • Normal Skin: This well-balanced canvas readily accepts pigment and heals beautifully, making it ideal for a variety of brow tattoo techniques, from microblading to powder brows.
  • Oily Skin: With larger pores and increased sebum production, oily skin can pose a challenge for pigment retention. Techniques like powder brows or combo brows (a combination of microblading and shading) are better suited to withstand excess oil and ensure longer-lasting results.
  • Dry Skin: Often characterized by tightness, flakiness, and fine lines, dry skin can hold pigment well but may require extra care during healing. Diligent moisturization and sun protection are essential to prevent pigment fading and achieve a smooth outcome.
  • Combination Skin: This complex skin type requires a customized approach, with different techniques employed for oily and dry areas to create a harmonious and natural look.
  • Sensitive Skin: Prone to redness, irritation, and reactions, sensitive skin requires gentle techniques and hypoallergenic pigments. A patch test is crucial to assess potential sensitivities and tailor the treatment accordingly.

Navigating Skin Conditions for Beautiful, Healthy Brows

Beyond skin type, various skin conditions can influence the suitability and outcome of brow tattooing. Here’s what you need to know:

  • Rosacea: This inflammatory condition requires a gentle touch and calming pigments to minimize irritation. Skilled PMU artists understand how to work with rosacea-prone skin to ensure a comfortable and successful experience.
  • Eczema and Psoriasis: These chronic conditions can present challenges with dryness, flakiness, and inflammation. Consulting a dermatologist before permanent makeup is crucial for assessing your skin’s readiness and discussing any necessary precautions.
  • Sun Damage: Prolonged sun exposure can weaken skin integrity and lead to pigment migration and fading. Clients with sun-damaged skin may require more frequent touch-ups. Rigorous sun protection is paramount to safeguarding your investment.
  • Acne: Active acne breakouts should be completely healed before undergoing brow tattooing to avoid complications. Open communication with your brow artist is essential, allowing them to adapt the treatment and aftercare plan accordingly.
  • Scars and Keloids: Tattooing over these areas requires specialized expertise due to potential variations in texture and pigment uptake. An experienced artist can assess the feasibility and recommend the most appropriate approach.

The Brows & Lips Promise: Personalized Care for Your Unique Skin

At Brows & Lips, we believe in a personalized approach to beauty. We recognize that your skin is as unique as you are, and we’re committed to tailoring our services to your individual needs.

During your comprehensive consultation, our skilled brow artists will carefully assess your skin, discuss your desired outcome, and answer any questions you may have. We’ll work collaboratively with you to create a customized treatment plan that takes into account your skin type, condition, and personal preferences.

Our commitment to excellence doesn’t end with the procedure. We provide comprehensive aftercare guidance to ensure optimal healing and longevity of your brow tattoo. We’ll be with you every step of the way, supporting you on your journey to beautiful, confident brows.

Achieve Your Brow Goals with Confidence

Whether you’re looking to fill in sparse brows, define their shape, or correct asymmetry, permanent makeup can be a transformative solution. With the expertise and dedication of Brows & Lips, you can achieve stunning, natural-looking results that enhance your natural beauty and simplify your daily routine.

Don’t let skin conditions hold you back from achieving your brow goals. Contact us today to schedule a personalized consultation and discover how we can tailor a brow tattoo solution that works best for you.

Semi Permanent Eyebrows Aftercare

permanent makeup proud portfolio

Frequently Asked Questions

What is brow tattooing?

Brow tattooing, also known as permanent makeup (PMU), involves using pigments to create the appearance of fuller, well-defined eyebrows.

Can oily skin affect brow tattooing results?

Yes, oily skin can affect pigment retention. Techniques like powder brows or combo brows are better suited for oily skin.

Is brow tattooing suitable for sensitive skin?

Yes, but it requires gentle techniques and hypoallergenic pigments. A patch test is crucial to assess any potential sensitivities.

Can I get brow tattooing if I have rosacea?

Yes, but it requires a gentle approach and calming pigments to minimize irritation and ensure a comfortable experience.

Should I avoid brow tattooing if I have active acne?

Yes, active acne breakouts should be completely healed before undergoing brow tattooing to avoid complications.

How does sun damage affect brow tattooing?

Sun damage can weaken skin integrity, leading to pigment migration and fading. Rigorous sun protection is crucial to maintain results.

What aftercare is required for brow tattooing?

Aftercare includes diligent moisturization, sun protection, and following the specific guidance provided by your brow artist for optimal healing.

Brow Lamination

Microblading & Brow Lamination at Brows & Lips

Table of Contents

Microblading & Brow Lamination at Brows & Lips: The Ultimate Brow Power Couple

In the world of beauty, brows have emerged as the unsung heroes of facial expression. They frame your eyes, enhance your features, and convey emotions with subtle nuances. Today, achieving the perfect brow look goes beyond simple tweezing and filling. At Brows & Lips, we’re at the forefront of the latest brow enhancement techniques, offering a dynamic duo that can revolutionize your brow game: microblading and brow lamination.

Microblading: Crafting Your Brow Blueprint

Microblading isn’t just a trend; it’s a transformative art form that has redefined the world of semi-permanent makeup. This meticulous technique involves using a specialized tool to deposit pigment into the skin’s superficial layers, creating incredibly realistic hair-like strokes that blend seamlessly with your natural brows.

But microblading is more than just aesthetics; it’s about empowering you to embrace your unique beauty. Whether you have sparse brows, asymmetrical arches, or simply desire a more defined shape, microblading can give you the confidence to flaunt your features with pride. It’s a testament to the power of beauty to enhance self-esteem and create a lasting impact on your overall appearance.

Brow Lamination: Unleashing Your Brows’ Full Potential

Imagine waking up to perfectly groomed, fluffy brows every day that’s the magic of brow lamination. This non-invasive treatment involves lifting and setting your brow hairs in a desired direction, creating a fuller, more polished look. It’s like a perm for your brows, taming unruly hairs and giving them a sleek, uniform appearance that lasts for weeks.

Brow lamination isn’t just about aesthetics; it’s about embracing the natural beauty of your brows. By lifting and setting the hairs, we can create the illusion of fuller, more defined brows without the need for additional pigment or makeup. It’s a subtle yet impactful way to enhance your brows and boost your confidence.

The Perfect Pairing: Why Microblading & Brow Lamination Work Wonders Together

While microblading focuses on adding definition and filling in gaps, brow lamination complements this by enhancing the texture and direction of your existing brow hairs. This harmonious blend of artistry and enhancement results in brows that are both visually stunning and incredibly natural-looking.

This dynamic duo is particularly transformative for individuals with:

  • Sparse or thin brows: Microblading provides the foundation of realistic hair strokes, while lamination adds the illusion of density and volume.
  • Unruly or downward-growing hairs: Lamination tames unruly hairs and sets them in a flattering upward direction, instantly opening up the eyes and lifting the face.
  • Asymmetrical brows: Microblading can artfully correct asymmetry, while lamination further enhances symmetry by unifying the direction of hair growth.

The Brows & Lips Experience: Your Personalized Brow Journey

At Brows & Lips, we believe that your brows deserve personalized attention. Our experienced brow artists will carefully assess your unique brow goals, preferences, and facial features. We’ll work collaboratively with you to create a bespoke brow treatment plan that combines microblading and brow lamination to achieve your desired look.

Our commitment to excellence goes beyond the treatment itself. We provide detailed aftercare instructions to ensure your brows heal beautifully and maintain their stunning appearance. We’re also available for follow-up appointments to address any questions or concerns you may have.

Embrace Your Brow Potential with Brows & Lips

Your brows are a canvas for self-expression, and at Brows & Lips, we’re here to help you create a masterpiece. Whether you dream of bold and bushy brows or prefer a more subtle, natural look, our combination of microblading and brow lamination can unlock your brow potential and give you the confidence to face the world with a radiant smile.

Contact us today to schedule a consultation and embark on your journey to beautiful, effortlessly stylish brows. Let Brows & Lips be your partner in achieving brow perfection.

Semi Permanent Eyebrows Aftercare

permanent makeup proud portfolio

Frequently Asked Questions

What is microblading?

Microblading is a semi-permanent makeup technique that creates natural-looking hair strokes by depositing pigment into the skin.

How long does microblading last?

Microblading typically lasts 1-2 years, depending on skin type and aftercare.

What is brow lamination?

Brow lamination is a non-invasive treatment that lifts and sets brow hairs for a fuller, more defined look.

Can I combine microblading and brow lamination?

Yes, combining both treatments can create brows that are both defined and naturally voluminous.

Is microblading painful?

Microblading involves minimal discomfort, similar to a light scratching sensation. A numbing cream is applied for comfort.

How long does brow lamination last?

Brow lamination results typically last 6-8 weeks, depending on your hair growth cycle and aftercare.

What aftercare is required for microblading?

After microblading, avoid getting the brows wet, avoid makeup on the brows, and follow the provided aftercare instructions to ensure proper healing.

Different Skin types

Understanding Your Skin Type for Flawless Permanent Makeup

Different Skin types

Table of Contents

Decoding Your Skin: A Guide to Understanding Your Skin Type for Flawless Permanent Makeup

At Brows & Lips, we believe that beautiful permanent makeup begins with a deep understanding of your skin. Knowing your skin type is essential for tailoring your skincare routine and ensuring the best possible results for your microblading, lip blush, or other PMU procedures.

What’s Your Skin Type? Why It Matters for Permanent Makeup

Your skin is as unique as you are, and it plays a crucial role in how your permanent makeup will look and heal. Different skin types have varying levels of oil production, pore size, and sensitivity. These factors can influence how pigments are absorbed, how quickly your skin heals, and ultimately, how long your permanent makeup lasts.

Unveiling the Different Skin Types

  • Oily Skin: If your skin often feels greasy, has visible pores, and is prone to breakouts, you likely have oily skin. This skin type can benefit from oil-free skincare and specific permanent makeup techniques to ensure longevity.
  • Dry Skin: Does your skin feel tight, look flaky, or show fine lines easily? You probably have dry skin. For this skin type, proper hydration and aftercare are essential to prevent pigment fading and ensure a smooth, even result.
  • Normal Skin: If your skin is balanced, not too oily or dry, with few imperfections, you’re fortunate to have normal skin. This type generally responds well to most permanent makeup techniques and requires minimal adjustments.
  • Combination Skin: Combination skin is a mix of oily and dry areas, typically with an oily T-zone (forehead, nose, and chin) and drier cheeks. A customized approach to skincare and PMU application is key for achieving optimal results.
  • Sensitive Skin: If your skin is easily irritated, reacts to new products, or experiences redness and inflammation, you likely have sensitive skin. Gentle, hypoallergenic products and techniques are crucial for minimizing discomfort and ensuring a positive experience.

Discover Your Skin Type: A Simple At-Home Test

Identifying your skin type is easier than you think. Follow these simple steps:

  1. Cleanse: Wash your face with a gentle cleanser and pat it dry.
  2. Observe: Allow your skin to air dry for 30-60 minutes without applying any products.
  3. Evaluate: Gently touch your face. Does it feel tight and dry? Oily or shiny? Or perhaps a combination of both? This observation will give you a good indication of your skin type.

Seeking Professional Guidance

If you’re still unsure about your skin type, our experienced professionals at Brows & Lips are here to help. We offer personalized consultations where we assess your skin, discuss your concerns, and recommend the most suitable permanent makeup techniques and aftercare routines tailored to your specific needs.

Your Skin, Your Masterpiece

By understanding your skin type and working with a skilled permanent makeup artist, you can achieve the flawless, long-lasting results you desire. At Brows & Lips, we are dedicated to helping you enhance your natural beauty and feel confident in your own skin.

permanent makeup proud portfolio

FAQs on Understanding Your Skin Type for Permanent Makeup

1. Why is it important to know my skin type before getting permanent makeup? 

Knowing your skin type helps tailor your skincare routine and ensures the best possible results for permanent makeup procedures like microblading and lip blush.

2. How does oily skin affect permanent makeup? 

Oily skin, which is prone to greasiness and breakouts, may require specific techniques to ensure the longevity of permanent makeup.

3. What are the characteristics of dry skin? 

Dry skin often feels tight, looks flaky, and shows fine lines easily. Proper hydration and aftercare are essential to prevent pigment fading.

4. What defines normal skin, and how does it respond to permanent makeup? 

Normal skin is balanced, not too oily or dry, with few imperfections. It generally responds well to most permanent makeup techniques with minimal adjustments.

5. What is combination skin, and how should it be treated for permanent makeup? 

Combination skin has oily areas (usually the T-zone) and dry areas (typically the cheeks). A customized approach is necessary for optimal permanent makeup results.

6. How can I tell if I have sensitive skin? 

Sensitive skin is easily irritated, reacts to new products, and often experiences redness and inflammation. Gentle, hypoallergenic products and techniques are crucial.

7. What simple test can I do at home to determine my skin type? 

Cleanse your face, let it air dry for 30-60 minutes, then gently touch your face. Your skin’s feel—tight, dry, oily, or a combination—indicates your skin type.

8. Can Brows & Lips help me determine my skin type? 

Yes, Brows & Lips offers personalized consultations where professionals assess your skin, discuss concerns, and recommend the best permanent makeup techniques and aftercare routines.

9. How does understanding my skin type contribute to flawless permanent makeup? 

By understanding your skin type and working with a skilled artist, you can achieve long-lasting, beautiful results tailored to your unique skin needs.

10. What makes permanent makeup at Brows & Lips special? 

At Brows & Lips, we focus on enhancing your natural beauty through a deep understanding of your skin, ensuring personalized and flawless permanent makeup results.

best treatments-for-bags-under-eyes-cover

Under-Eye Bags: From Home Remedies to Professional Treatments

best treatments for bags under eyes

Table of Contents

Under-Eye Bags: From Home Remedies to Professional Treatments

Explore the ultimate strategies to diminish under-eye bags, leveraging both innovative professional techniques and effective at-home practices.

Introduction to Under-Eye Bags

Under-eye bags, a prevalent concern among adults, manifest as swelling or puffiness beneath the eyes. Various factors, including genetics, aging, lifestyle habits, and lack of sleep, contribute to their appearance. While typically benign, they can affect one’s aesthetic, leading many to seek solutions.

Professional Remedies for Under-Eye Bags

For those seeking long-term solutions, professional treatments offer promising results. These procedures, ranging from non-invasive to surgical options, target the underlying causes of under-eye bags.

Laser Resurfacing

Laser resurfacing employs concentrated light beams to remove damaged skin layers, stimulating collagen production. This method effectively reduces under-eye bags by tightening the skin and improving its overall texture.

Microneedling

Microneedling involves tiny needles that create micro-injuries on the skin, promoting natural healing processes that enhance collagen and elastin production. This treatment reduces the appearance of under-eye bags and improves skin firmness.

Filler Injections

Filler injections, such as hyaluronic acid, can restore volume to the under-eye area, reducing the appearance of bags. This minimally invasive procedure offers immediate results with minimal downtime.

At-Home Strategies for Managing Under-Eye Bags

Several at-home remedies can effectively manage under-eye bags, offering temporary relief and complementing professional treatments.

Cold Compresses

Applying cold compresses to the eye area can reduce swelling and constrict blood vessels, offering quick relief from under-eye bags. Items like chilled spoons, cucumber slices, or commercial ice globes can be used.

Proper Sleep and Hydration

Ensuring adequate sleep and hydration plays a crucial role in preventing under-eye bags. Elevating the head during sleep can also reduce fluid accumulation in the under-eye area.

Healthy Diet

A diet rich in antioxidants and vitamins, particularly vitamin C and E, supports skin health and can mitigate the appearance of under-eye bags. Reducing salt intake can also prevent fluid retention.

Conclusion

While under-eye bags are a common concern, a combination of professional treatments and at-home care can significantly reduce their appearance. Consulting with a skincare professional can help determine the most effective strategy based on individual needs.

This guide is intended for informational purposes only. Always consult a healthcare provider or dermatologist to choose the treatment that is right for you.

Semi Permanent Eyebrows Aftercare

permanent makeup proud portfolio

FAQs on Under-Eye Bags Treatments

What causes under-eye bags?

Under-eye bags can be caused by various factors including genetics, aging, lifestyle habits, and lack of sleep.

Can laser resurfacing permanently remove under-eye bags?

Laser resurfacing can significantly reduce the appearance of under-eye bags by tightening the skin and improving texture, but results may vary based on individual skin conditions.

Is microneedling painful?

Microneedling is generally considered a minimally invasive and low-pain procedure, often performed with topical anesthetics to reduce discomfort.

How long do filler injections for under-eye bags last?

Filler injections for under-eye bags typically last between 6 to 12 months, depending on the type of filler used and individual metabolism rates.

Are cold compresses effective for reducing under-eye bags?

Yes, cold compresses can help reduce swelling and constrict blood vessels, offering temporary relief from under-eye bags.

How can sleep affect under-eye bags?

Lack of sleep can exacerbate under-eye bags, while adequate rest and proper head elevation during sleep can help reduce their appearance.

What dietary changes can help reduce under-eye bags?

A diet rich in antioxidants, vitamins C and E, and low in salt can support skin health and reduce the appearance of under-eye bags.

Can under-eye bags be a sign of a medical condition?

While under-eye bags are usually harmless, they can sometimes indicate underlying medical conditions such as thyroid issues. Consult a healthcare provider for a proper diagnosis.

How often should laser treatments be repeated?

The frequency of laser treatments varies based on the specific procedure and individual skin response, typically ranging from every few months to annually.

Are there any natural remedies for under-eye bags?

Yes, natural remedies such as cucumber slices, tea bags, and essential oils can offer temporary relief from under-eye bags by reducing swelling and improving skin health.

How to Choosing the Best Eyebrow Shape for Men

mens eyebrow shapes

Table of Contents

How to Choosing the Best Eyebrow Shape for Men

In the world of grooming and style, eyebrows play a pivotal role in framing the face and enhancing overall appearance. For men, finding the right eyebrow shape can be a game-changer. This comprehensive guide is dedicated to helping you discover the best eyebrow shape that complements your facial features and personal style.

Understanding Your Face Shape

The first step in determining the best eyebrow shape for you is to understand your face shape. Different face shapes are complemented by different eyebrow shapes.

  • Oval Face: If you have an oval face, consider yourself lucky. This face shape is well-balanced and suits almost any eyebrow shape. A soft, natural arch works best, enhancing the face’s natural symmetry.
  • Round Face: For a round face, the goal is to add definition. A higher arch in the eyebrow can create an illusion of a longer face, providing a more balanced look.
  • Square Face: Square faces have strong jawlines. A softer curved eyebrow can help soften the angular features, creating a more harmonious look.
  • Long Face: If you have a long face, a flat eyebrow shape can help to horizontally balance the face, making it appear shorter and more proportionate.
  • Heart-Shaped Face: For heart-shaped faces, a rounded eyebrow can help soften the forehead’s width, balancing the face’s upper and lower halves.

Eyebrow Thickness and Length

The thickness and length of your eyebrows also play a crucial role in shaping your look.

  • Thickness: The thickness of your eyebrows should be in harmony with your facial features. If you have delicate features, a thinner eyebrow might be more suitable, whereas, for more pronounced features, a thicker eyebrow can provide balance.
  • Length: The ideal length of your eyebrows should align with specific points on your face. The start of the eyebrow should align with the bridge of your nose. The arch should be about two-thirds of the way out, and the tail should end in a line extended from the corner of the nose through the corner of the eye.

Grooming Techniques

Proper grooming is essential for maintaining the ideal eyebrow shape.

  • Trimming: Regular trimming helps to keep the eyebrows neat. Use a comb to brush the hairs upwards and trim any excess length.
  • Tweezing: Tweezing is a precise way to shape the eyebrows and remove stray hairs. Focus on the area below the eyebrow and be careful not to over-pluck.
  • Waxing and Threading: For a more defined shape, waxing or threading can be effective. These methods provide a cleaner, sharper look and are best done by professionals.

Color and Definition

Enhancing the color and definition of your eyebrows can further improve their appearance.

  • Eyebrow Pencils and Gels: Use eyebrow pencils or gels to fill in sparse areas and define the shape. Choose a color that closely matches your natural eyebrow color.
  • Tinting: Eyebrow tinting is a semi-permanent option that can give fuller and more defined eyebrows. It’s particularly useful for those with lighter or graying eyebrows.

Lifestyle Considerations

Your lifestyle and daily routine should also influence your eyebrow grooming choices.

  • Active Lifestyle: If you have an active lifestyle, opt for low-maintenance and natural-looking eyebrows that require minimal grooming.
  • Professional Environment: In a professional setting, well-groomed and neatly shaped eyebrows can enhance your overall appearance and make you look more polished.

Common Mistakes to Avoid

Avoid common eyebrow grooming mistakes to ensure the best results.

  • Over-plucking: Over-plucking can lead to sparse and uneven eyebrows. It’s crucial to maintain a natural shape and only remove stray hairs.
  • Ignoring Natural Arch: Each person’s eyebrows have a natural arch. Working with, rather than against, this natural arch will yield the best results.
  • Neglecting Regular Maintenance: Regular maintenance is key to keeping your eyebrows in their best shape. Neglecting this can lead to unruly and unkempt eyebrows.

Conclusion

Choosing the right eyebrow shape for men is a blend of understanding your face shape, grooming techniques, and personal style. By following these guidelines, you can enhance your facial features and elevate your overall look. Remember, well-groomed eyebrows can significantly impact your appearance, boosting confidence and style.

mens brow shapes kinds
Semi Permanent Eyebrows Aftercare

permanent makeup proud portfolio

1. What is the best eyebrow shape for an oval face?

For an oval face, almost any eyebrow shape works well. A soft, natural arch is typically the most flattering, enhancing the face’s natural symmetry.

2. How can I determine my face shape for eyebrow styling?

To determine your face shape, look at the width of your forehead, cheekbones, jawline, and the overall length of your face. Compare these aspects to typical face shapes like oval, round, square, long, and heart-shaped.

3. What eyebrow shape is recommended for a round face?

For a round face, a higher arch in the eyebrow is recommended to create an illusion of a longer face and provide a more balanced look.

4. Can eyebrow shape impact my overall appearance?

Yes, the shape of your eyebrows can significantly impact your overall appearance. Well-groomed eyebrows can enhance facial features, balance facial symmetry, and improve overall facial aesthetics.

5. How often should I trim my eyebrows?

The frequency of eyebrow trimming depends on individual growth rates. Generally, a light trim every 3-4 weeks is recommended to maintain shape and neatness.

6. Is it better to tweeze, wax, or thread eyebrows?

The choice between tweezing, waxing, or threading depends on personal preference and skin sensitivity. Tweezing offers precision, while waxing and threading provide cleaner, sharper shapes.

7. What should I do if I over-pluck my eyebrows?

If you over-pluck your eyebrows, allow them time to grow back. In the meantime, you can use eyebrow pencils or gels to fill in sparse areas and maintain a natural look.

8. How do I choose the right color for eyebrow pencils or gels?

Choose an eyebrow pencil or gel color that closely matches your natural eyebrow color. This ensures a more natural and cohesive look.

9. Can eyebrow tinting be a good option for me?

Eyebrow tinting can be a great option, especially for those with lighter or graying eyebrows. It provides a fuller and more defined look and is a semi-permanent solution.

10. What are the common mistakes to avoid in eyebrow grooming?

Common mistakes to avoid include over-plucking, ignoring your natural arch, and neglecting regular maintenance. It’s important to maintain a natural shape and keep up with regular grooming.
vitamin c serum after chemical peel

How to Use Vitamin C Serum After a Chemical Peel

vitamin c serum after chemical peel

Table of Contents

How to Use Vitamin C Serum After a Chemical Peel

Introduction to Post-Chemical Peel Skincare

After undergoing a chemical peel, your skin enters a delicate phase of healing and rejuvenation. It’s crucial to understand the right skincare practices to ensure optimal recovery and enhance the benefits of the peel. One common question is whether it’s safe and beneficial to use Vitamin C serum post-peel. This article delves into the intricacies of incorporating Vitamin C serum into your post-chemical peel skincare routine.

Understanding Chemical Peels and Their Effects on Your Skin

What is a Chemical Peel?

A chemical peel is a dermatological procedure designed to improve skin texture and appearance. It involves applying a chemical solution to the skin, which exfoliates and eventually peels off, leaving behind smoother, less wrinkled skin.

The Healing Process Post-Peel

After a chemical peel, the skin goes through a healing process that includes:

  • Initial Redness and Peeling: This phase lasts for a few days to a week, depending on the intensity of the peel.
  • Skin Sensitivity: Post-peel, the skin becomes more sensitive and vulnerable to external factors.
  • Regeneration Phase: New skin cells regenerate, leading to improved skin texture and appearance.

The Role of Vitamin C in Skin Health

Vitamin C, a potent antioxidant, plays a significant role in skin health. It’s known for:

  • Collagen Production: It helps in the synthesis of collagen, vital for skin elasticity and firmness.
  • Brightening Effect: Vitamin C reduces pigmentation and evens out skin tone.
  • Protective Properties: It protects against damage from UV rays and pollution.

Incorporating Vitamin C Serum After a Chemical Peel

When to Introduce Vitamin C Serum Post-Peel

It’s advisable to wait until the initial healing phase (redness and peeling) is complete. This period typically lasts from a few days to a week. Introducing Vitamin C serum too early can irritate the sensitive post-peel skin.

How to Apply Vitamin C Serum

  1. Step 1: Cleanse your skin gently with a mild, pH-balanced cleanser.
  2. Step 2: Apply a small amount of Vitamin C serum, gently patting it onto the skin.
  3. Step 3: Follow up with a moisturizer to hydrate the skin and lock in the serum.

Choosing the Right Vitamin C Serum

Select a serum with:

  • Stable Form of Vitamin C: Look for L-ascorbic acid, which is highly effective.
  • Appropriate Concentration: Start with a lower concentration (around 10%) to gauge skin tolerance.
  • Additional Beneficial Ingredients: Ingredients like vitamin E and ferulic acid enhance the efficacy of vitamin C.

Precautions and Tips for Using Vitamin C Post-Chemical Peel

  • Patch Test: Always do a patch test to check for any adverse reactions.
  • Sun Protection: Use a broad-spectrum sunscreen, as Vitamin C can make your skin more sun-sensitive.
  • Hydration is Key: Keep your skin well-hydrated to support the healing process.

Conclusion: Enhancing Your Skincare Post-Chemical Peel

Incorporating Vitamin C serum into your post-chemical peel routine can significantly benefit your skin, aiding in healing, brightening, and providing antioxidant protection. By following the guidelines on when and how to apply it, along with choosing the right product, you can safely enjoy the advantages of Vitamin C serum after your chemical peel.

Semi Permanent Eyebrows Aftercare

permanent makeup proud portfolio

Frequently Asked Questions

Can I use Vitamin C serum after a chemical peel?

Yes, you can use Vitamin C serum after a chemical peel, but it’s recommended to wait until the initial healing phase of redness and peeling is over, typically a few days to a week.

What are the benefits of using Vitamin C serum post-chemical peel?

Vitamin C serum post-chemical peel aids in healing, brightens the skin, and provides antioxidant protection, enhancing the peel’s benefits.

How should I apply Vitamin C serum after a chemical peel?

After a chemical peel, cleanse your skin gently, apply a small amount of Vitamin C serum, and follow up with a moisturizer to hydrate the skin and lock in the serum.

What type of Vitamin C serum should I choose post-chemical peel?

Choose a Vitamin C serum with a stable form of Vitamin C, like L-ascorbic acid, an appropriate concentration for your skin, and additional beneficial ingredients like vitamin E and ferulic acid.
best microblading pigments

Best Microblading Pigments: A Detailed Guide by Brows & Lips

best microblading pigments

Table of Contents

Best Microblading Pigments: A Comprehensive Guide by Brows & Lips

Introduction to Microblading

Microblading is a popular cosmetic procedure that involves the manual application of semi-permanent pigments to the eyebrow area. This technique creates the appearance of fuller, well-defined brows by mimicking natural hair strokes. The success of microblading largely depends on the quality of pigments used, making the choice of the best microblading pigments crucial for both artists and clients.

Types of Microblading Pigments

There are various types of microblading pigments available in the market, each with unique characteristics. These include organic-based pigments, which are known for their vibrant colors, and inorganic pigments, favored for their stability and longevity. The choice of pigment can affect the color retention, healing process, and overall appearance of the microbladed eyebrows.

Top Picks for Best Microblading Pigments

  1. PhiBrows SUPER Microblading Pigments: These pigments stand out for their quality and color intensity. They offer a warm-fading-proof formula, ensuring longevity and consistency in results.
  2. Perma Blend LUXE Pigments for Brows: Known for their concentrated color and stability, these pigments are a premium choice, offering lasting results with fewer applications.
  3. BIOTEK Milano More Than Ever Pigments: Made in Italy, these pigments are celebrated for their durability and consistent color retention, packaged in innovative airless bottles.
  4. Mellie Microblading Pigments: Offering ease of use and reliable results, Mellie pigments are an affordable option without compromising on quality.
  5. Madluvv Deluxe Ink Set for Microblading: These versatile pigments are ideal for both microblading and machine work, known for their high pigment retention and ease of application.
  6. Evenflo Eyebrow Pigments: Originally designed for machine use, these pigments also excel in manual microblading, offering a high pigment load and a versatile color range.

Conclusion

Choosing the best microblading pigments is essential for achieving optimal results in microblading. Brows & Lips recommends considering factors like color intensity, longevity, and pigment type to ensure a successful microblading experience. Whether you’re a professional artist or a client looking for quality results, understanding the different pigment options and their characteristics can lead to more informed decisions and satisfying outcomes.

Semi Permanent Eyebrows Aftercare

permanent makeup proud portfolio

Frequently Asked Questions about Best Microblading Pigments

What are microblading pigments?

Microblading pigments are specialized inks used in the microblading process to enhance the appearance of eyebrows. They are semi-permanent and come in various shades to match different skin tones and hair colors.

How long do microblading pigments last?

Microblading pigments typically last between 18 to 30 months, but this can vary depending on factors like skin type, pigment color, and aftercare.

Are microblading pigments safe?

Yes, when used correctly by a trained professional, microblading pigments are generally safe. However, it’s important to ensure that the pigments are of high quality and meet safety standards.

Can microblading pigments cause allergic reactions?

While rare, some individuals may have allergic reactions to certain pigment ingredients. A patch test before the procedure can help identify any potential allergies.

How are microblading pigments chosen?

Pigments are chosen based on the client’s skin tone, hair color, and personal preferences. A skilled microblading artist can help select the best shade for natural-looking results.

What is the difference between microblading and tattoo pigments?

Microblading pigments are designed to fade over time for a more natural look, whereas tattoo pigments are permanent and can change color as they age.

Can microblading pigments be removed?

Yes, microblading pigments can be removed or faded with laser treatments or other removal techniques, but it’s a process that should be done by professionals.

Do microblading pigments fade uniformly?

Microblading pigments generally fade uniformly, but this can vary based on the pigment quality, skin type, and exposure to factors like sunlight.

Is it possible to change the color of microblading pigments after application?

Adjusting the color after application is possible during touch-up sessions, but it’s limited to the extent that the existing pigment shade can be modified.

How often should microblading pigments be refreshed?

It’s typically recommended to refresh microblading pigments every 12 to 18 months to maintain the color and shape of the eyebrows.

scalp micropigmentation guide

Understanding Scalp Micropigmentation: A Comprehensive Guide

non surgical face lift

Table of Contents

Understanding Scalp Micropigmentation: A Comprehensive Guide

Brought to you by Brows & Lips Permanent Makeup Studio

What is Scalp Micropigmentation (SMP)?

Scalp Micropigmentation, commonly known as SMP, is an advanced cosmetic procedure targeting hair loss. It involves applying natural pigments to the scalp, simulating the appearance of hair follicles. This technique benefits individuals with thinning hair, bald patches, or complete baldness, enhancing both appearance and confidence.

The Safety and Efficacy of SMP

SMP is a non-invasive procedure, involving superficial injections into the skin’s epidermal layer. This minimizes risks, making SMP a safe option for hair restoration. It also ensures no further hair loss by not damaging existing hair follicles.

The Procedure: What to Expect

SMP is typically completed over 2-3 sessions, each spaced about 10-14 days apart. This approach allows for the creation of a natural-looking density and fullness, tailored to individual needs. The procedure is quick and requires minimal downtime.

Longevity and Maintenance of SMP

SMP results can last up to six years, influenced by the procedure’s quality and aftercare. While considered permanent, SMP may fade over time, with touch-ups available to restore its appearance.

SMP Removal: Options and Considerations

For those wishing to reverse SMP, laser removal is the most common method, though it can be complex and costly. An alternative method involves fading the pigment using an electric needle device.

Potential Risks and How to Mitigate Them

While generally safe, SMP can have side effects like allergic reactions, itching, or redness. Choosing a qualified practitioner is essential to minimize these risks and ensure a successful outcome.

SMP and Hair Transplants: A Synergistic Approach

SMP can be combined with hair transplant procedures like FUE for enhanced results. This combination provides a more natural look, covering scars and improving hair appearance.

Choosing the Right SMP Practitioner

Selecting a reputable SMP practitioner is crucial. Look for professionals with a proven track record, positive reviews, and appropriate certifications to ensure safety and aesthetically pleasing results.

Conclusion

Scalp Micropigmentation offers a promising solution for hair loss. Its safety, efficacy, and longevity make it an attractive option. However, success in SMP largely depends on choosing the right practitioner and understanding the procedure’s details.

Semi Permanent Eyebrows Aftercare

permanent makeup proud portfolio

Frequently Asked Questions about Scalp Micropigmentation

What is Scalp Micropigmentation (SMP)?

Scalp Micropigmentation is a cosmetic procedure that applies natural pigments to the scalp, creating the appearance of hair follicles. It’s used to address hair loss in men and women.

Is Scalp Micropigmentation Safe?

Yes, SMP is a safe, non-invasive procedure involving superficial injections into the skin’s epidermal layer, minimizing risks and not damaging existing hair follicles.

How Long Does SMP Last?

SMP results can last up to six years, depending on the procedure’s quality and aftercare. Touch-ups are available to maintain its appearance.

Can SMP Be Combined with Hair Transplants?

Yes, SMP can be effectively combined with hair transplant procedures like FUE to enhance overall hair appearance and cover scars.

How to Choose the Right SMP Practitioner?

Choosing a reputable SMP practitioner is crucial. Look for professionals with a proven track record, positive reviews, and appropriate certifications.

non surgical face lift

Non-Surgical Face Lift Options

non surgical face lift

Table of Contents

Exploring Non-Surgical Face Lift Options: A Comprehensive Guide

In the quest for youthful, radiant skin, non-surgical face lift options have emerged as a cornerstone in the realm of aesthetic enhancement. At Brows & Lips Permanent Makeup Studio, we specialize in providing cutting-edge, non-invasive treatments that rejuvenate and revitalize your appearance without the need for surgery. This comprehensive guide delves into the most effective non-surgical face lift alternatives, offering insights into their benefits, processes, and outcomes.

Understanding Non-Surgical Face Lifts

Non-surgical face lifts are cosmetic procedures designed to lift, tighten, and enhance the facial structure without the invasiveness of traditional surgery. These treatments offer a blend of convenience, minimal downtime, and noticeable results, making them a popular choice for those seeking to counteract the signs of aging.

Key Benefits of Non-Surgical Face Lifts

  • Minimal Downtime: Unlike surgical procedures, non-surgical options require little to no recovery time.
  • Cost-Effectiveness: Generally more affordable than surgical face lifts.
  • Lower Risk: Non-surgical methods carry fewer risks and complications.
  • Immediate Results: Many treatments offer immediate improvements with progressive enhancement over time.
  • Customizability: Treatments can be tailored to address specific concerns and areas.

Top Non-Surgical Face Lift Options

1. Thread Lifts

How It Works:

  • Procedure: Medical-grade threads are inserted under the skin using fine needles.
  • Effect: These threads lift and tighten the skin, stimulating collagen production.
  • Duration: Results can last up to 18 months.

2. Ultherapy

How It Works:

  • Procedure: Utilizes ultrasound technology to target deeper layers of the skin.
  • Effect: Promotes collagen production, leading to firmer, more youthful skin.
  • Duration: Results can last for a year or more.

3. Dermal Fillers

How It Works:

  • Procedure: Involves injecting hyaluronic acid or similar substances beneath the skin.
  • Effect: Adds volume and smooths out wrinkles and fine lines.
  • Duration: Effects typically last 6 to 18 months.

4. Radiofrequency (RF) Treatments

How It Works:

  • Procedure: Uses radiofrequency energy to heat the deeper layers of the skin.
  • Effect: Encourages collagen and elastin production, leading to tighter skin.
  • Duration: Results can vary but often last for several months.

5. Laser Skin Resurfacing

How It Works:

  • Procedure: Involves the use of targeted laser energy to remove the outer layer of skin.
  • Effect: Stimulates new skin growth, resulting in smoother and firmer skin.
  • Duration: Can last several years, depending on the individual’s skin type and care.

Personalized Treatment Plans

At Brows & Lips Permanent Makeup Studio, we understand that each individual’s skin is unique. We offer personalized consultations to determine the most suitable non-surgical face lift option based on your skin type, age, and specific aesthetic goals.

Aftercare and Maintenance

To maximize the longevity of your non-surgical face lift results, we recommend a tailored skincare routine, regular follow-up treatments, and lifestyle adjustments that promote skin health.

Conclusion

Non-surgical face lifts offer a safe, effective, and convenient way to achieve a youthful and revitalized appearance. At Brows & Lips Permanent Makeup Studio, we are committed to providing the highest quality of care and the latest in non-invasive cosmetic treatments. Contact us today to explore how we can help you achieve your aesthetic goals with minimal downtime and maximum results.

Semi Permanent Eyebrows Aftercare

permanent makeup proud portfolio

Non-Surgical Face Lift FAQs

What are Non-Surgical Face Lifts?

Non-surgical face lifts are cosmetic treatments that lift, tighten, and enhance facial structure without surgery, offering minimal downtime and immediate results.

What are the Benefits of Non-Surgical Face Lifts?

Key benefits include minimal downtime, cost-effectiveness, lower risk, immediate results, and customizability to address specific concerns.

How Long Do Non-Surgical Face Lift Results Last?

The duration varies by treatment: Thread lifts can last up to 18 months, Ultherapy over a year, dermal fillers 6-18 months, RF treatments several months, and laser skin resurfacing several years.

Are There Any Aftercare Recommendations for Non-Surgical Face Lifts?

Aftercare includes a tailored skincare routine, regular follow-up treatments, and lifestyle adjustments to promote skin health and maximize results.

How Do I Know Which Non-Surgical Face Lift is Right for Me?

Brows & Lips Permanent Makeup Studio offers personalized consultations to determine the most suitable treatment based on individual skin type, age, and aesthetic goals.

permanent eyeliner aftercare guide

Comprehensive Guide to Semi-Permanent Eyeliner Aftercare

Table of Contents

Comprehensive Guide to Semi-Permanent Eyeliner Aftercare

Ensuring the longevity and vibrancy of your semi-permanent eyeliner procedure is paramount. Proper aftercare is the key to achieving the best results. Here’s a detailed guide to help you through the process.

Precare Recommendations

1. Dietary Precautions

Consume a meal before your appointment to maintain stable blood sugar levels.

2. Alcohol and Caffeine

Refrain from excessive alcohol or caffeine 24 hours before the procedure. They can thin the blood, leading to increased sensitivity and potential bruising.

3. Sun Exposure

Avoid sun tanning for at least a week before the procedure.

4. Medications

Steer clear of blood-thinning medications 24 hours prior. This includes Aspirin, Niacin, Vitamin E, Advil/Ibuprofen, and fish oil tablets. Always consult with your physician regarding any medication concerns.

5. Eyelash Care

Eyelash extensions should be removed at least 3 days before the procedure. Avoid eyelash perms or tinting 3 days prior. If using eyelash growth serums like Latisse, discontinue use 3-6 months before treatment.

6. Cosmetic Procedures

Discontinue Retin-A one week prior. Avoid Botox around the eyes 2 weeks before the procedure.

7. Day of the Procedure

Come in without any eye makeup. If you wear contact lenses, opt for glasses instead.

Post Procedure Care (Day 1-7)

1. Immediate Aftercare

Rinse your eyes with water to remove any pigment residue right after the procedure. Gently pat dry with a clean tissue.

2. Cleaning

Cleanse the skin around the eyes twice daily using a gentle, unscented soap. Pat dry gently.

3. Ointment Application

For thick eyeliner, apply ointment 2-3 times a day for up to 7 days. This step can be skipped for lashline enhancements.

4. Scabbing

Scabs will form and take about 7-10 days to peel off. Avoid picking at them or peeling them prematurely.

5. Color Fading

The color will fade approximately 30-50% once the scabs fall off. This is a normal part of the healing process.

6. Makeup and Activities

Refrain from using eye makeup until the scabs have completely fallen off. Avoid activities that induce sweating, such as hot saunas, hot yoga, and swimming.

7. Scab Care

If scabs form on the lashes, ensure they are soft before attempting to remove them. A mascara brush can aid in this process.

8. Swelling Management

Active blinking for 2 minutes in the morning can help reduce swelling. Soft gel ice packs can also be used to alleviate swelling.

For any concerns or questions, always consult with a professional. Proper aftercare ensures the longevity and vibrancy of your semi-permanent eyeliner, making the entire process worthwhile.

Semi Permanent Eyebrows Aftercare

permanent makeup proud portfolio

What should I eat before my semi-permanent eyeliner procedure?

It’s recommended to consume a meal before your appointment to maintain stable blood sugar levels.

How should I prepare regarding alcohol and caffeine?

Refrain from excessive alcohol or caffeine 24 hours before the procedure to prevent thinning of the blood.

What medications should I avoid before the procedure?

Avoid blood-thinning medications 24 hours prior, including Aspirin, Niacin, Vitamin E, and Advil/Ibuprofen.

How should I care for my eyelashes before the procedure?

Eyelash extensions should be removed 3 days prior, and eyelash perms or tinting should be avoided 3 days before the procedure.

Are there any cosmetic procedures to avoid?

Yes, discontinue Retin-A one week prior and avoid Botox around the eyes 2 weeks before the procedure.

How should I care for my eyes immediately after the procedure?

Rinse your eyes with water to remove any pigment residue and pat dry gently with a clean tissue.

How often should I clean the skin around my eyes post-procedure?

Cleanse the skin around the eyes twice daily using a gentle, unscented soap.

What should I expect regarding scabbing?

Scabs will form and take about 7-10 days to peel off. It’s crucial to avoid picking at them or peeling them prematurely.

Will the color of the eyeliner fade after the procedure?

Yes, the color will fade approximately 30-50% once the scabs fall off, which is a normal part of the healing process.

How can I manage swelling after the procedure?

Active blinking for 2 minutes in the morning can help reduce swelling. Soft gel ice packs can also be used to alleviate swelling.

Facials After Microblading: Comprehensive Guide on Dos and Don’ts

Table of Contents

Facials After Microblading: Comprehensive Guide on Dos and Don’ts

Microblading has emerged as a revolutionary semi-permanent makeup technique, offering individuals the luxury of perfectly shaped eyebrows without the daily hassle of filling them in. However, post-procedure care is crucial to ensure the longevity and vibrancy of the results. One of the common concerns is the compatibility of facials with freshly microbladed eyebrows. In this guide, we delve deep into the intricacies of facials post-microblading, highlighting what you should embrace and what you should steer clear of.

The Healing Process: Understanding the Timeline

Before diving into the specifics of facials, it’s essential to comprehend the healing timeline of microbladed eyebrows.

  • Days 1-4: The eyebrows appear darker and more defined. Minor redness and swelling are normal.
  • Days 5-7: The eyebrows start to itch and will begin to lightly scab over.
  • Days 8-10: Scabs start to flake off, revealing lighter and softer brows underneath.
  • Days 11-28: The color of the brows stabilizes, and the final results become evident.

Facials to Embrace Post-Microblading

Gentle Cleansing

A mild facial cleanser can be used after the first week. Ensure that the product is free from alcohols, acids, and exfoliants. Gently cleanse the face, avoiding direct contact with the eyebrows.

Hydrating Masks

After the initial healing phase (approximately 10 days), you can indulge in hydrating masks. These masks nourish the skin and don’t interfere with the microblading pigment.

Facials to Avoid Post-Microblading

Chemical Peels

Chemical peels involve the use of acids that can potentially fade the microblading pigment. It’s advisable to wait at least a month before considering this treatment.

Microdermabrasion

This exfoliating treatment can be abrasive on freshly microbladed eyebrows. Hold off on microdermabrasion for at least four weeks post-microblading.

Steam and Sauna

The heat and moisture from steam rooms and saunas can hinder the healing process. It’s best to avoid these for the first two weeks.

Conclusion

Microblading is a delicate procedure, and the post-care regimen plays a pivotal role in achieving the desired results. By understanding the healing timeline and being discerning about facial treatments, you can ensure that your eyebrows remain in pristine condition. Always consult with your microblading technician for personalized advice tailored to your specific needs.

Semi Permanent Eyebrows Aftercare

permanent makeup proud portfolio


What is microblading?

Microblading is a revolutionary semi-permanent makeup technique that offers individuals perfectly shaped eyebrows without the daily hassle of filling them in.

How long does the healing process for microblading take?

The healing process for microbladed eyebrows typically takes between 11 to 28 days for the color to stabilize and final results to become evident.

Can I use a facial cleanser after microblading?

Yes, a mild facial cleanser can be used after the first week, ensuring it’s free from alcohols, acids, and exfoliants.

Are hydrating masks safe post-microblading?

Yes, after the initial healing phase (approximately 10 days), hydrating masks can be used as they nourish the skin without interfering with the microblading pigment.

Should I avoid chemical peels after microblading?

Yes, it’s advisable to wait at least a month before considering chemical peels as they can potentially fade the microblading pigment.

Is microdermabrasion safe after microblading?

No, it’s recommended to hold off on microdermabrasion for at least four weeks post-microblading as it can be abrasive on freshly microbladed eyebrows.

Can I visit steam rooms or saunas after microblading?

It’s best to avoid steam rooms and saunas for the first two weeks post-microblading as the heat and moisture can hinder the healing process.

How do freshly microbladed eyebrows appear in the first few days?

In the first few days post-microblading, the eyebrows appear darker and more defined with minor redness and swelling.

When do microbladed eyebrows start to scab?

Microbladed eyebrows start to itch and begin to lightly scab over between days 5 to 7 post-procedure.

Should I consult with my microblading technician for post-care?

Yes, always consult with your microblading technician for personalized advice tailored to your specific needs.


constellation-freckle-tattoos

Constellation Freckle Tattoos: The Celestial Beauty Trend

Table of Contents

Constellation Freckle Tattoos: The Celestial Beauty Trend

Introduction: The Rise of Astro Freckles

In recent years, the beauty industry has witnessed a surge in the popularity of constellation freckle tattoos, commonly known as “astro freckles.” These tattoos, inspired by the vast expanse of the night sky, are a unique blend of art and astrology, allowing individuals to wear their zodiac signs and celestial patterns with pride.

The Allure of Constellation Tattoos

A Personal Connection to the Cosmos

Astro freckles offer a deep, personal connection to the cosmos. For many, the stars and planets hold significant meaning, often guiding life choices, personalities, and destinies. By getting a constellation tattoo, individuals can carry a piece of the universe with them, symbolizing their unique place in the vast cosmic tapestry.

A Timeless Beauty Trend

While beauty trends come and go, the allure of the stars remains timeless. Constellation freckle tattoos, with their delicate and intricate designs, add a touch of elegance and sophistication, making them a perennial favorite among beauty enthusiasts.

The Process of Getting Astro Freckles

Choosing the Right Design

The first step in getting astro freckles is selecting the right design. Whether it’s the constellation of one’s zodiac sign, a favorite celestial body, or a unique star pattern, the possibilities are endless. It’s essential to choose a design that resonates personally and holds special significance.

The Tattooing Procedure

Once the design is finalized, the next step is the tattooing procedure. Using specialized equipment, the artist carefully inks the chosen constellation pattern onto the skin. The process is meticulous, ensuring that each freckle is perfectly placed to create a stunning celestial masterpiece.

Caring for Your Constellation Tattoo

Immediate Aftercare

After getting the tattoo, it’s crucial to follow the artist’s aftercare instructions. This usually involves keeping the tattooed area clean, avoiding direct sunlight, and refraining from picking or scratching the tattoo.

Long-term Maintenance

To ensure that the astro freckles remain vibrant and clear, regular moisturizing and protection from UV rays are essential. Using a high SPF sunscreen can help prevent fading and keep the tattoo looking fresh for years to come.

The Future of Astro Freckles

With the continued fascination with the cosmos and the desire for unique beauty trends, the popularity of constellation freckle tattoos shows no signs of waning. As more individuals seek to express their cosmic connection, astro freckles will undoubtedly remain a sought-after beauty trend for the foreseeable future.

Conclusion

Constellation freckle tattoos, or astro freckles, are more than just a beauty trend. They are a celebration of one’s connection to the universe, a testament to the timeless allure of the stars. As individuals continue to seek unique ways to express themselves, astro freckles will remain a shining example of the perfect blend of art, beauty, and cosmic wonder.

Semi Permanent Eyebrows Aftercare

permanent makeup proud portfolio

What are constellation freckle tattoos?

Constellation freckle tattoos, also known as “astro freckles,” are tattoos inspired by the night sky, representing zodiac signs and celestial patterns.

Why are astro freckles popular?

Astro freckles offer a personal connection to the cosmos and are a timeless beauty trend, blending elegance and sophistication.

How do I choose the right design for my constellation tattoo?

Choose a design that resonates personally, whether it’s your zodiac sign, a favorite celestial body, or a unique star pattern.

How is the tattooing procedure done?

Using specialized equipment, the artist inks the chosen constellation pattern onto the skin, ensuring each freckle is perfectly placed.

How do I care for my tattoo immediately after getting it?

Follow the artist’s aftercare instructions, which usually involve keeping the area clean, avoiding sunlight, and not picking or scratching the tattoo.

How can I maintain the vibrancy of my astro freckles in the long term?

Regularly moisturize and protect the tattoo from UV rays using a high SPF sunscreen to prevent fading.

Will the popularity of astro freckles fade soon?

Given the continued fascination with the cosmos and unique beauty trends, astro freckles are expected to remain popular for the foreseeable future.

Are constellation tattoos just a beauty trend?

No, they are more than a trend. They symbolize one’s connection to the universe and the timeless allure of the stars.

Can I get a constellation tattoo even if I don’t believe in astrology?

Absolutely! While many choose designs based on astrology, others opt for astro freckles purely for their aesthetic appeal and personal significance.

How long does it take for a constellation tattoo to heal?

Healing times can vary, but typically, it takes a few weeks for the skin to fully heal. Always follow the aftercare instructions provided by the tattoo artist.

Comprehensive Insights into PMU Eyeliner Mapping

Table of Contents

Comprehensive Insights into PMU Eyeliner Mapping

PMU eyeliner is a transformative cosmetic procedure that offers a lasting solution for those seeking defined and captivating eyes without the daily hassle of makeup application. The key to achieving impeccable results lies in mastering the art of eyeliner mapping. In this detailed guide, we delve deep into the intricacies of PMU eyeliner mapping, its significance, techniques, and expert tips to ensure perfection.

Understanding PMU Eyeliner Mapping

PMU eyeliner mapping, often referred to as pre-draw, is the meticulous process of sketching a precise outline of the desired eyeliner shape prior to the application of permanent makeup. This step is paramount as it sets the foundation for the entire procedure.

The objective of eyeliner mapping is to design a shape that accentuates the client’s eye structure and facial aesthetics. Proper mapping not only ensures a harmonious look but also significantly reduces the likelihood of errors during the tattooing phase.

Why Eyeliner Mapping is Crucial

1. Achieving Perfect Symmetry

  • Our facial features are inherently asymmetrical. This means our eyes might differ slightly in size or shape. Eyeliner mapping is the tool that helps bridge this asymmetry, ensuring that both eyes showcase a balanced and harmonious design.

2. Tailoring a Custom Look

  • Every individual has unique preferences and eye structures. Eyeliner mapping facilitates the creation of a design tailored to the client’s desires, be it a subtle lash enhancement or a dramatic statement.

3. Ensuring Precision in Application

  • Given that PMU eyeliner is essentially a cosmetic tattoo, rectifying any post-application discrepancies can be challenging. Mapping acts as a blueprint, guiding the artist and minimizing potential errors.

Techniques for PMU Eyeliner Mapping

Freehand Pre-Draw Technique

For understated eyeliner styles, many professionals prefer the freehand pre-draw method. This technique offers flexibility and is particularly favored for its adaptability.

To execute this method:

  1. Start with a high-quality mapping pencil on a clean canvas.
  2. Initiate from the eye’s outer corner, sketching a fine line along the upper lash line.
  3. Follow the eyelid’s natural curve, ensuring a smooth trajectory.
  4. For winged styles, begin by shaping the wing, aligning it with the lower waterline, and then connecting it to the eye’s inner corner.

String PMU Eyeliner Mapping

This technique employs an inked mapping string to delineate the desired eyeliner shape.

To employ this method:

  1. Measure the distance between the eyes’ inner and outer corners.
  2. Position the string from the inner corner towards the eyebrow’s start, maintaining a 90-degree angle.
  3. Gently press the string along the upper lash line, tracing the eyelid’s contour.
  4. For winged designs, extend the string from the eye’s outer corner, shaping the wing as per the client’s preference.

Expert Tips for Flawless PMU Eyeliner Mapping

  • Precision is Key: Always work in fine strokes, gradually building the design. This approach makes corrections simpler.
  • Symmetry Check: After mapping, have the client sit up and use tools like calipers to ensure both eyes mirror each other perfectly.
  • Consider Aging: As we age, our skin sags. Ensure the wing remains within the natural eye crease to prevent it from drooping over time.
  • Camouflaging Fine Lines: For mature clients, a shaded eyeliner look can mask fine lines on the eyelids. Opt for a short, angled wing to impart a lifted appearance.

In Summary

Eyeliner mapping is the cornerstone of the PMU eyeliner application. It guarantees symmetry, precision, and a design tailored to each client. Whether using a pre-inked mapping string or freehand drawing, practice and open dialogue with clients are pivotal to crafting the ideal PMU eyeliner look.

Semi Permanent Eyebrows Aftercare

permanent makeup proud portfolio

What is PMU eyeliner mapping?

PMU eyeliner mapping, often referred to as pre-draw, is the meticulous process of sketching a precise outline of the desired eyeliner shape prior to the application of permanent makeup.

Why is eyeliner mapping crucial?

Eyeliner mapping ensures perfect symmetry, tailors a custom look to individual preferences, and ensures precision in the PMU eyeliner application.

What techniques are used for PMU eyeliner mapping?

The two primary techniques are the Freehand Pre-Draw Technique and the String PMU Eyeliner Mapping.

How does the Freehand Pre-Draw Technique work?

This method involves using a high-quality mapping pencil to sketch the desired eyeliner design on a clean canvas, following the eyelid’s natural curve.

How is the String PMU Eyeliner Mapping technique executed?

This technique employs an inked mapping string to delineate the desired eyeliner shape, tracing the eyelid’s contour and shaping the wing as per preference.

Why is precision important in PMU eyeliner mapping?

Precision ensures that the design is built gradually with fine strokes, making corrections simpler and resulting in a flawless look.

How can one ensure symmetry in PMU eyeliner mapping?

After mapping, it’s recommended to have the client sit up and use tools like calipers to ensure both eyes mirror each other perfectly.

What considerations should be made for aging clients?

For aging clients, it’s important to ensure the wing remains within the natural eye crease to prevent it from drooping over time. Additionally, a shaded eyeliner look can mask fine lines on the eyelids.

How can PMU eyeliner mapping camouflage fine lines?

For mature clients, a shaded eyeliner look can mask fine lines on the eyelids. Opting for a short, angled wing can also impart a lifted appearance.

What is the cornerstone of the PMU eyeliner application?

Eyeliner mapping is the cornerstone of the PMU eyeliner application as it guarantees symmetry, precision, and a design tailored to each client.

microblading-without-numbing-cream

Microblading Without Numbing Cream: A Comprehensive Guide

Table of Contents

Microblading Without Numbing Cream: A Comprehensive Guide

Microblading is a semi-permanent makeup procedure that has gained immense popularity in recent years. While the procedure itself is relatively straightforward, the decision to use or skip numbing cream can significantly impact the experience and results. In this article, we delve deep into the pros and cons of microblading without numbing cream, providing you with a holistic understanding to make an informed choice.

Advantages of Microblading Without Numbing Cream

1. Enhanced Control Over Depth

Microblading without numbing cream allows artists to have better control over the depth of their strokes. Softened skin, due to numbing creams, can make it challenging to determine the pressure applied. By avoiding numbing creams initially, artists can achieve more natural-looking outcomes.

2. Reduced Allergic Reaction Risk

While numbing creams are generally considered safe, there’s a slight risk of allergic reactions, especially for clients with sensitive skin. By forgoing numbing creams, artists can offer a safer experience, albeit with some discomfort.

3. Simplified Compliance with State Laws

In the US, the use of numbing cream for permanent makeup varies by state. Most states stipulate that numbing creams should not contain more than one numbing agent and that the agent’s percentage should not exceed 5%. By avoiding numbing creams, artists can easily adhere to these regulations.

4. Quicker Procedures

Numbing creams can take up to 30 minutes to take effect, prolonging the microblading procedure. Some artists prefer to skip numbing cream to save time.

5. Improved Client Communication

Effective communication between the artist and client is vital. Some artists believe that slight discomfort during the procedure without numbing cream facilitates better feedback from clients regarding pressure and sensation.

How Numbing Cream Influences Microblading Results

Numbing creams, particularly primary anesthetics, can alter the skin’s texture, impacting pigment retention and the final appearance of the brows. These anesthetics can make the skin feel overly moist, which isn’t ideal for microblading. The skin should remain crisp and taut but not overly dry.

Addressing Pain Concerns

If clients find the discomfort unbearable, artists can use secondary numbing products suitable for broken skin. These products are typically in gel or liquid form, are non-moisturizing, and absorb quickly into the skin.

Potential Drawbacks of Microblading Without Numbing Cream

1. Pain and Discomfort

The most evident downside is the potential discomfort experienced by the client. Pain tolerance varies, and while some clients may not require any numbing, others might find the procedure intolerable without it.

2. Risk of Uneven Application

Clients might involuntarily move or twitch during the procedure without numbing cream, leading to uneven application.

3. Extended Recovery Period

Clients might experience increased redness and swelling post-procedure, extending the recovery period.

Conclusion: Is Microblading Without Numbing Cream Right for You?

Choosing to undergo microblading without numbing cream is a decision that should be made collaboratively between the artist and the client. It’s crucial to weigh the benefits against potential drawbacks, keeping individual pain tolerance in mind.

Note: Always ensure that you comply with local regulations and prioritize client comfort and safety above all else.

Semi Permanent Eyebrows Aftercare

permanent makeup proud portfolio

What is microblading?

Microblading is a semi-permanent makeup procedure that involves creating fine, hair-like strokes on the eyebrows to enhance their appearance.

Why would someone choose microblading without numbing cream?

Choosing microblading without numbing cream can offer enhanced control over depth, reduced risk of allergic reactions, compliance with state laws, quicker procedures, and improved client communication.

How does numbing cream influence microblading results?

Numbing creams, especially primary anesthetics, can alter the skin’s texture, affecting pigment retention and the final appearance of the brows.

What are the drawbacks of microblading without numbing cream?

Potential drawbacks include pain and discomfort, risk of uneven application, and an extended recovery period.

Is microblading without numbing cream suitable for everyone?

The decision should be made collaboratively between the artist and the client, considering individual pain tolerance and desired outcomes.

How can pain concerns be addressed during microblading without numbing cream?

Artists can use secondary numbing products suitable for broken skin to alleviate discomfort during the procedure.

How long does the microblading procedure take without numbing cream?

The procedure might be quicker without the use of numbing cream since there’s no waiting time for the cream to take effect.

Are there any regulations regarding the use of numbing cream for microblading?

In the US, the use of numbing cream for permanent makeup varies by state, with stipulations on the type and percentage of numbing agents used.

What is the risk of allergic reactions with numbing cream?

While numbing creams are generally safe, there’s a slight risk of allergic reactions, especially for clients with sensitive skin.

How can artists ensure the best results in microblading without numbing cream?

Artists should prioritize effective communication with clients, maintain a steady hand, and adhere to best practices and local regulations.

Retinol for Lips: Unveiling the Secrets to Luscious Lips

Table of Contents

Retinol for Lips & Dark Lips: Unveiling the Secrets to Luscious, Even-Toned Lips

Retinol, a cornerstone in the skincare realm, has now ventured into the domain of lip care. But what sets it apart for your lips, especially dark lips? Dive deep into this comprehensive guide that sheds light on retinol’s transformative effects on lips, its myriad benefits, potential risks, and our handpicked list of top products.

Why Retinol is a Game-Changer for Your Lip Care Routine

A derivative of vitamin A, retinol boasts a range of benefits for the lips:

  1. Tackling Lip Pigmentation: Navigate towards a harmonious lip shade as retinol targets hyperpigmentation.
  2. Erasing Fine Lines: Amplify collagen production and diminish those subtle lines framing the lips.
  3. Texture Revamp: Relish the sensation of buttery smooth lips, courtesy of retinol’s exfoliating attributes.

Dark Lips? Here’s How Retinol Can Help

Retinol’s prowess isn’t limited to just enhancing lip texture and reducing fine lines. It’s also a potent ally for those grappling with dark lips:

  • Evening Out the Tone: Retinol aids in lightening dark lips, paving the way for a more balanced lip color.
  • Safety Measures: While retinol can be beneficial for dark lips, it’s crucial to start with a lower concentration and monitor for any adverse reactions.

Navigating the Intricacies of Lip Retinol: Safety Paramount!

While retinol’s benefits are manifold, it’s imperative to exercise caution:

  • Tender Terrain: The skin on the lips is delicate. Begin with a gentler retinol concentration and be on the lookout for any signs of discomfort.
  • Sun Protection: Retinol heightens sun sensitivity. An SPF lip balm is non-negotiable when incorporating retinol.
  • Balance is Essential: Initiate your retinol regimen by applying it a few times weekly, progressively increasing its frequency as your lips acclimatize.

Showcasing Top Lip Retinol Products

Verso Skin Care Moisturizing Lip Serum with Retinol

Melding luxury with efficacy, this lip serum is tailored for all skin types. It synergizes retinol’s potency with hydration, offering a dual benefit for your lips.

Crafting an Optimal Retinol-Infused Lip Care Strategy

To harness retinol’s full potential for your lips:

  1. Gradual Introduction: Incorporate retinol slowly, starting with applications a few nights a week.
  2. Prioritize Hydration: Pair retinol with a moisturizing lip balm to mitigate potential dryness.
  3. Stay in Tune with Your Lips: At any indication of discomfort or redness, take a breather and consider consulting a dermatologist.

In summation, retinol emerges as a formidable tool for those aspiring for plush, radiant, and even-toned lips. By judiciously selecting products and adhering to a thoughtful regimen, you can unlock retinol’s myriad benefits for your lips.

Semi Permanent Eyebrows Aftercare

permanent makeup proud portfolio

What is retinol and its significance for lips?

Retinol is a derivative of vitamin A and is renowned for its skincare benefits. For lips, retinol can tackle pigmentation, erase fine lines, and improve texture, making them appear more youthful and even-toned.

How can retinol help with dark lips?

Retinol aids in lightening dark lips by targeting hyperpigmentation, leading to a more balanced and even lip color.

Are there any precautions to consider when using retinol on lips?

Yes, it’s essential to start with a lower concentration of retinol, always pair it with an SPF lip balm due to increased sun sensitivity, and apply it moderately, beginning a few times a week.

How often should I apply retinol to my lips?

Start by applying retinol a few times a week, and gradually increase its frequency as your lips adjust to it.

What type of lip balm should be used with retinol?

It’s crucial to use an SPF lip balm when incorporating retinol to protect the lips from heightened sun sensitivity.

Can retinol cause irritation on the lips?

Yes, the skin on the lips is delicate, and retinol can cause irritation. It’s essential to monitor for signs of discomfort and consult a dermatologist if needed.

Is retinol suitable for all skin types?

Retinol can be suitable for most skin types, but it’s always recommended to start with a lower concentration and monitor for any adverse reactions, especially on sensitive skin.

How does retinol improve the texture of the lips?

Retinol possesses exfoliating properties that can lead to smoother and softer lips, enhancing their overall texture.

What are the anti-aging benefits of retinol for lips?

Retinol promotes collagen production, which can reduce the appearance of fine lines on and around the lips, giving them a more youthful look.

Can retinol be used daily on the lips?

While retinol can be beneficial, it’s recommended to start by applying it a few times a week and then gradually increasing its use as the lips acclimate to prevent potential irritation.

breast-numbness-and-areola-tattooing

The Comprehensive Guide to Breast Numbness, Nipple Tattoos, and Their Impact.

Table of Contents

The Comprehensive Guide to Breast Numbness, Nipple Tattoos, and Their Impact on Tattooing

Breast numbness is a phenomenon that many individuals experience, especially after undergoing surgical procedures. Understanding its implications, especially when considering tattooing, is crucial. In this guide, we delve deep into the intricacies of breast numbness, its causes, and its effects on tattooing.

Nipple Tattoos: Understanding Breast Numbness

Breast numbness refers to the loss of sensation in the breast area. This can be temporary or permanent, depending on the underlying cause.

Causes of Breast Numbness and Implications for Nipple Tattoos

  1. Surgical Procedures: Mastectomies, breast augmentations, and reductions can lead to numbness due to nerve damage during the procedure.
  2. Trauma: Injuries to the chest or breast area can lead to numbness.
  3. Medical Conditions: Certain conditions, such as diabetes or multiple sclerosis, can result in numbness in various parts of the body, including the breasts.
anatomy-behind-post-surgery-breast-numbness

Nipple Tattoos: The Intersection of Breast Numbness and Tattooing

Tattooing over numb areas presents unique challenges and considerations.

Sensation, Pain Perception, and Nipple Tattoos

While numb areas lack sensation, it doesn’t mean the tattooing process will be pain-free. Surrounding areas might still feel discomfort due to the vibrations and needle movements.

Healing, Aftercare, and Nipple Tattoos

Numb areas might not send the usual signals of discomfort or itching that typically indicate healing. It’s essential to be diligent with aftercare to prevent complications.

Tattoo Precision, Outcome, and Nipple Tattoos

Tattooing on numb skin might feel different for the tattoo artist. Ensuring you choose an experienced artist familiar with tattooing over numb areas is crucial for optimal results.

The Beauty of Nipple Tattoos Post-Surgery

Many individuals choose to get tattoos after mastectomies or other breast surgeries as a form of self-expression, empowerment, or to reclaim their bodies. These tattoos can range from intricate designs to nipple tattoos that recreate the appearance of a natural nipple.

The Rise of Paramedical Tattooing and Nipple Tattoos

Paramedical tattooing is a specialized field where artists use tattooing techniques to camouflage scars, recreate nipples, and more. This form of tattooing can be transformative, helping individuals regain confidence and feel more at home in their bodies.

Semi Permanent Eyebrows Aftercare

permanent makeup proud portfolio

Conclusion

Breast numbness, while challenging, doesn’t have to be a barrier to expressing oneself through tattoos. With the right precautions, knowledge, and an experienced tattoo artist, one can achieve beautiful results that empower and inspire.


What is breast numbness?

Breast numbness refers to the loss of sensation in the breast area, which can be temporary or permanent based on the underlying cause.

Why might someone experience breast numbness after surgery?

Surgical procedures like mastectomies, breast augmentations, and reductions can lead to numbness due to potential nerve damage during the operation.

Are nipple tattoos painful on numb breasts?

While the numb areas lack sensation, the tattooing process might still cause discomfort in the surrounding areas due to vibrations and needle movements.

What precautions should be taken when getting a nipple tattoo on numb skin?

It’s essential to consult with a healthcare provider, choose an experienced tattoo artist, and follow aftercare instructions diligently.

What is paramedical tattooing?

Paramedical tattooing is a specialized field where artists use tattooing techniques to camouflage scars, recreate nipples, and address other medical-related aesthetic concerns.

Why do some individuals opt for nipple tattoos post-surgery?

Many individuals choose nipple tattoos post-surgery as a form of self-expression, empowerment, or to reclaim and beautify their bodies after medical procedures.

How long does it take for a nipple tattoo to heal?

The healing process for a nipple tattoo typically takes a few weeks, but it’s essential to follow the artist’s aftercare instructions for the best results.

Can trauma lead to breast numbness?

Yes, injuries to the chest or breast area can result in numbness due to potential nerve damage or other related issues.

Are there any risks associated with nipple tattoos?

As with any tattoo, there’s a risk of infection, allergic reactions, or unsatisfactory results. It’s crucial to choose a reputable artist and follow aftercare instructions.

How can one ensure the best results for nipple tattoos?

To ensure the best results, always consult with a healthcare provider, choose an experienced and reputable tattoo artist, and diligently follow aftercare instructions.

ombre-brows-on-dark-skin

Ombre Brows on Black Skin: A Comprehensive Guide to Mastery

Table of Contents

Ombre Brows on Black Skin: A Comprehensive Guide to Mastery

Welcome to Brows & Lips Permanent Makeup Studio. As experts in the realm of permanent makeup, we’ve garnered unparalleled experience and insights into ombre brows, especially for black skin. This comprehensive guide elucidates the nuances of this technique, providing intricate details, recommended pigments, and professional tricks.

1. Understanding Ombre Brows

Ombre brows, distinct from traditional tattooed brows, employ a specialized technique producing a soft, shaded look. This method gives the brow a gradient appearance, starting lighter at the front and progressively darkening towards the tail.

Advantages of Ombre Brows for Black Skin

  • Natural Appearance: Ombre brows mimic the natural brow gradient, providing an understated elegance.
  • Durability: These brows retain their charm longer than other methods, reducing frequent touch-ups.
  • Versatility: Suitable for almost all skin types, ombre brows particularly stand out on black skin, accentuating its richness.

2. Best Practices for Ombre Brows on Black Skin

Preliminary Skin Assessment

Every skin is unique. Hence, it’s pivotal to:

  • Determine the skin’s undertone: Warm, cool, or neutral.
  • Evaluate skin oiliness, which can affect pigment retention.

Technique Mastery

Precision is paramount. Key steps include:

  • Beginning with lighter strokes at the brow front.
  • Gradually intensifying pressure towards the tail.
  • Ensuring even distribution of the pigment for uniform shading.

3. Optimal Pigments for Black Skin

Selecting the perfect pigment ensures vibrancy and longevity.

  • Deep Browns: For a subtle yet pronounced look.
  • Charcoal: Ideal for those desiring a bolder appearance.
  • Chocolate Browns: Perfect for those seeking a warm undertone complement.

4. Expert Tricks for Lasting Results

  • Aftercare Regime: Post-procedure, avoid direct sunlight and rigorous activities for at least a week.
  • Moisturizing: Hydrate the brow area with recommended ointments to promote healing and enhance pigment retention.
  • Touch-up Sessions: Periodic touch-ups (typically after 12-18 months) ensure the brows retain their vibrancy.

5. Real-life Examples

Witnessing real-life examples furnishes tangible insights. We proudly showcase numerous clients who’ve reaped the benefits of our expertise, manifesting in exquisitely crafted ombre brows.

6. Diagrammatic Illustration

This simple flowchart illustrates the systematic process we adhere to, ensuring impeccable results every time.

Conclusion

At Brows & Lips Permanent Makeup Studio, our commitment is unwavering. Ombre brows on black skin demand finesse, expertise, and a deep understanding of unique skin characteristics. Trust in our proficiency and be assured of brows that not only enhance your natural beauty but also stand the test of time.

Semi Permanent Eyebrows Aftercare

permanent makeup proud portfolio


FAQs on Ombre Brows for Black Skin by Brows & Lips

What exactly are ombre brows?

Ombre brows use a specialized technique that creates a soft, shaded brow look. It results in a gradient effect, starting lighter at the front and becoming darker towards the tail.

Why are ombre brows suitable for black skin?

Ombre brows provide a natural, long-lasting, and versatile appearance, making them apt for all skin types. On black skin, they accentuate the beauty, complementing its richness and depth.

What considerations are essential before opting for ombre brows on black skin?

It’s crucial to determine the skin’s undertone (be it warm, cool, or neutral) and gauge the level of skin oiliness, as it can influence pigment retention and appearance.

What pigment shades are optimal for black skin?

For black skin, it’s often recommended to go for deep browns, rich charcoal, and sumptuous chocolate brown shades for a harmonious and natural look.

What post-procedure care is advised for ombre brows?

After the procedure, it’s best to avoid direct sun exposure and rigorous activities for a minimum of one week. Keeping the brow area moisturized with recommended ointments is also crucial.

How often should ombre brows be touched-up?

Typically, a touch-up is suggested after 12-18 months to maintain the vibrancy and definition of the brows.

Does Brows & Lips Permanent Makeup Studio showcase real-life examples of their ombre brow work?

Yes, at Brows & Lips Permanent Makeup Studio, there’s a proud display of numerous satisfied clients who have experienced the artistry and precision of our ombre brow services.

What is the mission of Brows & Lips Permanent Makeup Studio when it comes to ombre brows for black skin?

Brows & Lips Permanent Makeup Studio’s unwavering commitment is to deliver top-tier ombre brows for black skin, combining finesse, deep expertise, and an understanding of unique skin nuances.

Why prefer ombre brows over traditional tattooed eyebrows?

Ombre brows offer a more naturally gradient appearance as compared to the often stark and defined traditional tattooed eyebrows. They enhance the natural beauty and impart subtle elegance.

How do ombre brows ensure a gradient and not a blocky appearance?

The technique behind ombre brows is meticulous. It starts with gentle strokes at the brow’s front and gradually intensifies towards the tail. This ensures an even pigment distribution for a seamless shading effect.


textured-eyebrows-uae

Permanent Makeup Studio: The Definitive Guide to Textured Eyebrows

textured-eyebrows-dubai

Table of Contents

Permanent Makeup Studio: The Definitive Guide to Textured Eyebrows

Introduction: Revolutionizing the Beauty Regimen

At Permanent Makeup Studio, we firmly believe in enhancing natural beauty using the most innovative techniques. Among the latest trends gaining traction, textured eyebrows stand out as a game-changer in the world of facial aesthetics. Through this guide, dive deep into the realm of textured eyebrows, how to attain them, and the best ways to maintain their elegance.

What are Textured Eyebrows?

Textured eyebrows are the epitome of sophistication and organic charm. Unlike conventional methods that offer a single shade or a uniform shape, textured brows celebrate uniqueness. They display multiple tones and employ strategic hairstrokes to create a fuller, yet natural appearance, mimicking the look of real hair.

The Process Behind Achieving Textured Eyebrows

Consultation

We always start with a thorough consultation. This initial step ensures that the outcome aligns perfectly with your expectations.

  1. Discussion: Understand the desired shape, thickness, and tone.
  2. Skin Type Analysis: Determine which technique will offer the best results.

Pre-Procedure Care

Proper preparation is key. This includes:

  • Avoiding direct sunlight or tanning 48 hours prior.
  • Ceasing the use of any retinoids or AHA skincare products a week ahead.
  • Abstaining from alcohol or caffeine 24 hours before the procedure.

Procedure

Our licensed technicians employ a variety of techniques, tailored to individual needs:

  1. Microblading: Uses tiny, fine-point needles to deposit pigment simultaneously, mimicking natural hairs.
  2. Microshading: Best for those seeking a soft, powdered effect, resembling eyebrow makeup.
  3. Ombre Powder Brows: Creates a soft, misty, powder-filled brow similar to the look of makeup.

Post-Procedure Care

Optimal results are achieved with correct aftercare:

  • Avoid touching or wetting the eyebrows for the first week.
  • Apply the recommended ointment to alleviate any dryness or itching.
  • Steer clear of makeup or skincare products directly on the treated area for ten days.

Maintaining the Splendor: Tips and Tricks

  • Regular Touch-ups: While permanent makeup lasts longer than traditional methods, periodic touch-ups ensure your brows always look their best.
  • Sun Protection: Shield your brows from direct sunlight to prevent premature fading.
  • Optimal Skincare: Avoid any exfoliating products on the brow area.
Semi Permanent Eyebrows Aftercare

permanent makeup proud portfolio

Conclusion: Textured Eyebrows - The Future of Beauty

The allure of textured eyebrows is undeniable. At Brows & Lips, we are dedicated to offering this revolutionary service with precision and expertise. Trust in our hands, and step out showcasing eyebrows that are nothing short of a masterpiece.

Textured eyebrows celebrate uniqueness by displaying multiple tones and employing strategic hair strokes. This results in a fuller yet natural appearance that mimics the look of real hair, unlike conventional methods that offer a single shade or uniform shape.

The consultation ensures that the outcome aligns with your expectations. It involves a detailed discussion to understand the desired shape, thickness, and tone, as well as a skin type analysis to determine the best-suited technique.

It’s essential to avoid direct sunlight or tanning 48 hours prior, cease the use of any retinoids or AHA skincare products a week ahead, and abstain from alcohol or caffeine 24 hours before the procedure.

Our technicians use a variety of methods tailored to individual needs. This includes Microblading, which uses tiny needles to deposit pigment; Microshading, ideal for a soft, powdered effect; and Ombre Powder Brows, which create a soft, misty look.

To ensure the best results, avoid touching or wetting the eyebrows for the first week, apply the recommended ointment to alleviate any dryness or itching, and refrain from using makeup or skincare products on the treated area for ten days.

While permanent makeup lasts longer than traditional methods, periodic touch-ups ensure your brows always look pristine and maintain their elegance.

best-spf-lip-balm

The Ultimate Guide to SPF Lip Balm: Protecting Your Lips from Sun Damage

best-spf-lip-balm

Table of Contents

The Ultimate Guide to SPF Lip Balm: Protecting Your Lips from Sun Damage

Lips are one of the most delicate parts of our body, yet they often go unnoticed when it comes to sun protection. Just as we shield our skin from the harmful rays of the sun, our lips too need that layer of protection. SPF lip balm plays a pivotal role in ensuring that our lips remain healthy, soft, and unharmed by UV rays.

Why SPF Lip Balm is an Essential

Our lips are susceptible to the harmful effects of the sun, more than we realize. Their skin is thinner and lacks the protective melanin that our skin has. This makes them more vulnerable to sunburns, premature aging, and even skin cancers. Here’s why an SPF lip balm is non-negotiable:

  • Prevents Sunburns: Lips can easily get sunburned, leading to redness, peeling, and pain. Regular application of SPF lip balm can help avoid this discomfort.

  • Avoids Premature Aging: Exposure to UV rays can lead to premature aging signs like fine lines and wrinkles on the lips. SPF lip balm acts as a barrier, preventing these early signs of aging.

  • Reduces Cancer Risk: Chronic sun exposure without protection can increase the risk of lip cancers. Using lip balms with SPF can significantly reduce this risk.

Choosing the Right SPF Lip Balm

When selecting an SPF lip balm, it’s not just about the sun protection factor. Consider the following:

  • Broad Spectrum Protection: Ensure your lip balm offers protection against both UVA and UVB rays.

  • Water Resistance: For those beach days or poolside relaxations, a water-resistant SPF lip balm can be beneficial.

  • Natural Ingredients: Opt for lip balms with natural moisturizing ingredients like shea butter, vitamin E, or aloe vera. This ensures not just protection but also nourishment.

Ingredients to Avoid in SPF Lip Balm

It’s essential to be aware of certain ingredients that might be harmful:

  • Oxybenzone and Octinoxate: These chemical sunscreens can cause allergic reactions in some individuals.

  • Artificial Fragrances and Colors: These might irritate sensitive lips.

Semi Permanent Eyebrows Aftercare

permanent makeup proud portfolio

How to Apply SPF Lip Balm Effectively

  1. Frequency: Reapply lip balm every two hours, especially after eating or drinking.
  2. Amount: Ensure you’re applying a generous amount to cover your entire lips.
  3. Night-time Care: Even after the sun goes down, keep your lips moisturized with a hydrating lip balm to repair any damage.

The Connection Between Hydration and Lip Health

Drinking ample water keeps the skin and lips hydrated. When your body is hydrated, the lips are less likely to crack or become dry. Along with SPF lip balm, ensure you’re drinking at least 8 glasses of water a day for optimal lip health.

Conclusion

Our lips are a reflection of our overall health and well-being. Just as we invest time and money in skincare, our lips too deserve the same attention. Incorporating SPF lip balm into our daily routine can make a world of difference, ensuring that our lips remain soft, supple, and safe from the detrimental effects of the sun. Remember, sun protection is not just for beach days; it’s a daily necessity. So, don’t forget to swipe that SPF lip balm every day!

SPF lip balm is crucial for protecting the lips from sunburns, premature aging, and reducing the risk of lip cancers due to its thinner skin and lack of melanin.

While regular lip balms provide moisture, SPF lip balms contain sun protection factors to shield lips from harmful UVA and UVB rays.

It’s ideal to choose lip balms with broad-spectrum protection, natural moisturizing ingredients like shea butter, vitamin E, and aloe vera, and those that are water-resistant.

Yes, avoid lip balms containing oxybenzone, octinoxate, and artificial fragrances and colors as they might cause allergic reactions or irritate sensitive lips.

It’s recommended to reapply SPF lip balm every two hours, especially after eating or drinking.

Absolutely! Drinking ample water helps keep the skin and lips hydrated. When the body is well-hydrated, the lips are less likely to become dry or crack, complementing the effects of SPF lip balm.

Screatch Mark Camouflage Dubai

Inkless Stretch Mark Camouflage Aftercare

Screatch Mark Camouflage Dubai

Table of Contents

Inkless Stretch Mark Camouflage Aftercare

Inkless Stretch Mark Camouflage and Revision (ISR) is a groundbreaking treatment that significantly enhances the appearance of stretch marks by improving their tone, texture, and color. The overwhelming majority of patients experience substantial improvement after just a single session, although the total number of treatments can vary up to three or four times. The unique journey of every individual is carefully monitored through photographs, ensuring clear communication regarding progress and the potential need for further appointments.

Post-Treatment Immediate Effects

Expectations After the Treatment: After undergoing ISR treatment, it’s typical to observe redness and swelling in the stretch mark area, making it look inflamed. This condition, which lasts for about two weeks, is a normal and expected part of the healing process.

Essential Aftercare Tips:

  • Refrain from wearing tight clothing for the initial 2 to 3 days.
  • Avoid scratching or peeling the area to steer clear of infection and discoloration.
  • Limit exposure to water pressure and refrain from excessive sweating for the first week.
  • Postpone tanning, swimming, and the use of perfumed products for the specified period.

Detailed Day-by-Day Aftercare Plan

Day 1-4:

  • Steer clear of Advil for the next 24 hours.
  • The area will experience redness, swelling, and a sunburn-like feeling.
  • Avoid heat exposure; however, gentle showering is permitted after 12 hours.
  • Clean the area with a mild cleanser and apply recommended aftercare products like Cereve or Coconut Oil to keep it hydrated.

Day 3-7:

  • The treated skin will start to dry and may flake or scab slightly.
  • Continue the application of aftercare cream twice daily.

Important Reminder: Always protect the treated area with sunscreen when exposed to sunlight!

Weekly Aftercare Overview

Week One:

  • Expect the skin to be dry, flaky, and irritated.

Week Two:

  • Noticeable reduction in inflammation and swelling.
  • Optional: Use Cicaplast (La Roche Posay) twice daily for added moisturization.

Even after two weeks, some redness or hyperpigmentation may persist. Continue monitoring and documenting the progress by sending photos at 2-4 week intervals.

Semi Permanent Eyebrows Aftercare

permanent makeup proud portfolio

Moving Forward: Next Steps and Additional Sessions

Post two weeks, even as the skin continues to return to its normal state, certain areas may exhibit sustained redness and/or hyperpigmentation. Every individual’s healing rate is distinct and influenced by various factors including overall health, metabolism, and lifestyle. Slow healers might have their next session scheduled around the 60-day mark to ensure optimal healing before proceeding.

Inkled Camouflage: For cases requiring more than three sessions, and qualifying for inked camouflage, this option can be explored for enhanced results.

Special Note for Darker Skin Types: Individuals with darker skin tones should ideally wait for 2-4 months between treatments to ensure complete healing and minimize the risk of intense hyperpigmentation.

In conclusion, dedicated adherence to this comprehensive aftercare guide ensures optimal healing and results from the ISR treatment, promising improved appearance and texture of stretch marks, and enhancing overall skin health and confidence.

Post-treatment, it’s common to notice redness, swelling, and an inflamed appearance in the treated area. This condition is a regular part of the healing process and typically lasts for about two weeks.

Yes, it’s crucial to avoid tight clothing, scratching, or peeling the area and limit water and heat exposure for specified periods. Additionally, the consistent application of recommended aftercare products is vital for optimal healing.

Avoid taking Advil, and stay away from all things hot, such as saunas and hot tubs. It’s advised to gently cleanse the treated area and apply aftercare products like Cereve or Coconut Oil to keep it hydrated.

During the first week, expect the skin to be dry, flaky, and irritated. Continue to follow the aftercare regimen strictly, including protecting the area with sunscreen when exposed to sunlight.

Even after two weeks, some redness or hyperpigmentation may remain. Keep monitoring the skin and send progress photos at 2-4 week intervals for proper assessment and further guidance.

The requirement for additional sessions depends on individual healing rates. For those healing slowly, the next session might be scheduled around the 60-day mark. It’s essential to ensure complete healing before proceeding with further treatment.

lip-anatomy-pmu

Master the Intricacies of Lip Anatomy for Unmatched Permanent Makeup Results

lip-anatomy-pmu

Table of Contents

Master the Intricacies of Lip Anatomy for Unmatched Permanent Makeup Results

Hey there! In the dazzling domain of permanent makeup, getting up close and personal with lip anatomy is not just important, it’s essential. Let’s navigate the delicate pathways of the lips’ structure, a journey that promises spectacular and authentically beautiful outcomes. Ready to dive deep into the world of lip anatomy for PMU artists? Let’s traverse each aspect, observing every detail with precision and care.

Lip-Anatomy
Source: pmuhub.com

Unveiling the Layers of the Lip

Delving into the lips, did you know they are composed of three main layers?

  • The Outer Layer (Epidermis): It might be thin, but it’s mighty, providing a shield and adding to the lips’ texture.
  • The Middle Layer (Dermis): Filled with collagen and elastic fibers, this layer gives lips their form and flexibility.
  • The Inner Layer (Mucous Membrane): This is the hydration hero, keeping the lips moisturized.

The Significance of the Vermilion Border

Spot the clear line between the lips and the neighboring skin? That’s the Vermilion Border, a pivotal reference for PMU artists, assuring pinpoint accuracy in application.

Philtrum and Cupid’s Bow: The Aesthetics Anchors

The Philtrum and Cupid’s Bow are monumental in achieving that perfect lip symmetry and allure. Sharpening their definition can drastically enhance the overall lip look, making them crucial focus points for PMU artists.

Semi Permanent Eyebrows Aftercare

permanent makeup proud portfolio

Navigate the Lip Zones

  • Dry and Wet Vermilion:
    • Dry Vermilion: Comparable to skin and visible outside the mouth.
    • Wet Vermilion: Nestled inside the mouth, it’s moist and primarily mucosal.
  • The Oral Commissures: This is where the upper and lower lips unite, crucial for outlining lip shape and dimensions.
lip-veins-anatomy
Source: pmuhub.com

Advanced Techniques for Flawless PMU Application

  • Precision in Lip Mapping: Essential for symmetrical and balanced outcomes, marking the lips designates areas for color application and enhancement.
  • Selecting the Right Needle: Choosing the perfect needle for PMU guarantees optimal pigment deposit and minimal lip trauma.

Exploring the Lip Color Theory

For PMU artists, grasping the lip color theory is pivotal. It empowers the selection of shades that harmonize with individual skin tones and preferences, assuring every client walks away smiling.

Source: pmuhub.com

Final Reflections on Lip Anatomy for PMU Artists

Conquering the world of lip anatomy is foundational for superb PMU results. A detailed understanding of lip layers, the vermilion border, and specific zones, amalgamated with superior application techniques, guarantees unmatched precision, symmetry, and aesthetic allure in every PMU procedure. So why wait? Elevate your artistry, embrace the exhaustive knowledge of lip anatomy, and emerge as a standout PMU artist in the industry.

Understanding lip anatomy ensures every PMU procedure is a masterpiece of precision, symmetry, and aesthetic appeal.

Certainly! They are the epidermis, dermis, and mucous membrane.

It’s the distinct margin between the lips and the surrounding skin.

Lip mapping is all about marking the lips to specify areas for color application and enhancement.

The right needle ensures maximum pigment deposit and minimum trauma to the lips, making it a crucial choice for every PMU artist.

fordyce-spots-on-lips

Fordyce Spots on Lips: Comprehensive Causes and Effective Treatments

fordyce-spots-on-lips

Table of Contents

Fordyce Spots on Lips: Comprehensive Causes and Effective Treatments

Fordyce spots, often recognized for their minuscule, yellow-white appearance, predominantly arise on the lips and can be a cosmetic concern for many. Though they’re medically harmless, understanding their origin and methods of treatment can be reassuring for those who experience them.

What Are Fordyce Spots?

Fordyce spots, or Fordyce granules, are small, painless, pale bumps that measure between 1-3 millimeters in diameter. These ectopic sebaceous glands are not attached to hair follicles and, hence, appear more prominent than other sebaceous glands.

Causes of Fordyce Spots on Lips

Natural Development

  • Sebaceous Glands: The primary cause behind Fordyce spots is the sebaceous glands’ misplacement. These glands are typically found in association with hair follicles but can occasionally develop in areas without hair, such as the lips.

  • Genetics: A predisposition to Fordyce spots can be inherited. If family members display these spots, there’s a possibility you might develop them as well.

Hormonal Changes

Fluctuations in hormones, especially during puberty, can lead to the enlargement or increased prominence of these spots.

Symptoms and Diagnosis

Though Fordyce spots are asymptomatic, their distinctive appearance can make them easily recognizable:

  • Pale, yellow-white bumps
  • Smooth surface
  • Located on the lips’ inner surface or the vermillion border

A visual examination is generally adequate for diagnosis. However, in rare cases, a biopsy might be conducted to rule out other potential conditions.

Semi Permanent Eyebrows Aftercare

permanent makeup proud portfolio

Treatments and Remedies

Medical Procedures

Electrodesiccation

A process that employs electrical currents to dehydrate the Fordyce spots, leading to their eventual removal.

Laser Treatments

CO2 laser and pulsed dye lasers are frequently utilized for treating Fordyce spots. They work by targeting the blood vessels within the spots, thereby reducing their appearance.

Micro-punch Surgery

This technique involves using a microscopic device to excise the spots individually.

Paramedical Treatments

Lip Blushing

Lip blush is a cosmetic tattooing procedure that enhances the natural color and shape of the lips. However, it’s essential to note that lip blush itself is not a treatment for Fordyce spots.

Fordyce spots are sebaceous glands that appear on the lips, and while they can be a cosmetic concern, they are not harmful. The lip blush procedure can potentially camouflage the appearance of Fordyce spots by giving the lips a more uniform color, but it does not eliminate or reduce Fordyce spots in any way. It is a cosmetic enhancement and should be considered as such.

For individuals considering lip blush to disguise Fordyce spots, it’s crucial to have realistic expectations and consult with a qualified professional to discuss potential outcomes and other more effective treatments for Fordyce spots.

Topical Treatments

Retin-A (Tretinoin)

A derivative of vitamin A, Retin-A can aid in decreasing the prominence of Fordyce spots by hastening cell turnover.

Chemical Peels

Mild chemical peels, containing glycolic acid or salicylic acid, can help in reducing the appearance of the spots.

Natural Remedies

Coconut Oil and Essential Oils

A blend of coconut oil and essential oils such as lavender or tea tree can hydrate the lips and reduce irritation.

Jojoba Oil and Argan Oil

These oils resemble natural skin oils and can diminish the spots by moisturizing and nourishing the skin.

Tips for Preventing Fordyce Spots

  • Hydrate: Drinking ample water keeps the skin hydrated and potentially reduces the occurrence of the spots.

  • Balanced Diet: Incorporating foods rich in vitamins and minerals, especially vitamin A, E, and K, can bolster skin health.

  • Lip Care: Regularly moisturizing lips can keep them nourished, thereby potentially minimizing the risk.

Conclusion

Fordyce spots on lips, although benign, can be a cosmetic concern for many. Through a combination of medical procedures, topical treatments, and natural remedies, the prominence of these spots can be diminished. With the right knowledge and approach, managing Fordyce spots becomes a straightforward task.

Fordyce spots, or Fordyce granules, are small, painless, pale bumps that are ectopic sebaceous glands. They are not attached to hair follicles, making them more noticeable.

The primary cause is the misplacement of sebaceous glands. They can also be influenced by genetics and hormonal changes, especially during puberty.

They are mostly diagnosed through a visual examination due to their distinctive appearance. In rare scenarios, a biopsy might be required.

No, Fordyce spots are medically harmless and are typically asymptomatic. They can, however, be a cosmetic concern for some.

Medical procedures include electrodesiccation, laser treatments, and micro-punch surgery.

Yes, topical treatments such as Retin-A (Tretinoin) and mild chemical peels can help reduce their appearance.

Natural remedies include using a blend of coconut oil with essential oils or applying jojoba and argan oils for nourishment.

Staying hydrated, maintaining a balanced diet rich in certain vitamins, and regular lip care can potentially reduce their occurrence.

can-you-kiss-after-lip-blush

The Ultimate Guide to Lip Blush Post-Care: Can You Kiss After the Treatment?

kiss-after-lip-blush

Table of Contents

Lip Blush Post-Care: Can You Kiss After the Treatment?

Lip blush is an increasingly popular cosmetic procedure known for its ability to deliver natural-looking tinted lips. As with any cosmetic procedure, there are post-care guidelines that ensure optimal results and longevity. One common question we receive at our Permanent Makeup Studio is, “Can you kiss after getting a lip blush?” Let’s delve into the details.nn

Understanding the Lip Blush Procedure

Lip blush is a form of semi-permanent makeup that uses micropigmentation to infuse the lips with a natural, subtle color. The procedure involves:

  1. Consultation: Assessing the natural lip color and determining the desired shade.
  2. Numbing: Applying a numbing cream to reduce discomfort.
  3. Pigmentation: Using specialized equipment to deposit the chosen pigment into the lips.
  4. Finalizing: Cleaning the treated area and giving post-care instructions.

Post-Lip Blush: The Immediate Aftercare

Why Kissing is a No-No

After the lip blush procedure, the lips are essentially a treated wound. Engaging in activities like kissing can introduce bacteria, leading to potential infections or complications. Moreover, the pressure from kissing can cause the freshly deposited pigment to shift, compromising the final appearance.

The First 48 Hours: Crucial Care Steps

  • Avoid Kissing: For the reasons mentioned above, refrain from any lip-to-lip contact.
  • Stay Hydrated: Drink ample water, but be cautious not to wet the treated area.
  • Don’t Touch: Resist the urge to touch, scratch, or peel any flaking skin.
  • Avoid Hot Foods & Drinks: This can cause unnecessary irritation.

How Long to Wait Before Kissing After Lip Blush?

The general recommendation is to wait at least 7-10 days post-treatment before engaging in any lip activities, including kissing. This gives the lips adequate time to heal and the pigment to settle properly. However, always follow the specific instructions provided by your technician.

Semi Permanent Eyebrows Aftercare

permanent makeup proud portfolio

Enhancing and Prolonging Your Lip Blush Results

Regular Lip Care

Invest in a good lip balm or moisturizer to keep the lips hydrated. This not only ensures the pigment looks its best but also extends the longevity of the lip blush.

Protect from UV Rays

Exposure to the sun can cause the pigment to fade faster. Always apply a lip balm with SPF when heading outdoors.

Regular Touch-Ups

Over time, the lip blush may start to fade. Regular touch-ups, usually once a year, can help maintain the vibrancy and freshness of the color.

Conclusion

Lip blush is a transformative procedure that can enhance one’s natural beauty. Proper aftercare is paramount to ensure impeccable results. At the Permanent Makeup Studio, we prioritize our clients’ well-being and satisfaction. Adhering to the guidelines and understanding the healing process is the key to a successful lip blush experience.

Lip blush is a semi-permanent makeup technique that infuses the lips with a natural, subtle color using micropigmentation.

Typically, a lip blush procedure takes between 1.5 to 2 hours, including consultation and numbing time.

The Eyebrow Stamp Stencil Kit by OETUIOW offers the most versatility with 24 different stencils to choose from, making it suitable for various brow shapes and styles.

Most clients experience minimal discomfort, especially since a numbing cream is applied prior to the procedure. However, individual pain thresholds may vary.

Lip blush generally lasts between 1 to 3 years, depending on individual skin types, lifestyle, and aftercare adherence.

Absolutely! During the consultation, you’ll discuss your desired shade with the technician, ensuring a color that complements your natural lip tone.

For the first 48 hours, it’s crucial to avoid kissing, touching the treated area, consuming hot foods and drinks, and wetting the lips excessively.

It’s generally safe to resume regular lip activities after 7-10 days, but always consult with your technician for personalized advice.

Yes, to maintain the vibrancy and freshness of the color, it’s recommended to have regular touch-ups, usually once a year.

Some individuals may experience slight swelling, redness, or flaking after the procedure. These are common and usually subside within a week. However, if you notice any signs of infection or prolonged discomfort, it’s important to consult with your technician.

Regular lip care, including hydration, protection from UV rays with an SPF lip balm, and adhering to the aftercare guidelines provided by your technician, will help prolong and maintain the results.

Best Eyebrow Stamp Kits of 2023 pros and cons

The Ultimate Guide to the Best Eyebrow Stamp Kits of 2023

Best Eyebrow Stamp Kits of 2023

Table of Contents

The Ultimate Guide to the Best Eyebrow Stamp Kits of 2023: Pros, Cons, and More

Introduction

Achieving the perfect eyebrows can be a daunting task, especially when you’re doing it at home. Traditional methods like pencils and pomades require a steady hand and a lot of practice. If you’re looking for a simpler, more foolproof way to get those brows on fleek, eyebrow stamp kits might be your new best friend. Here’s our comprehensive guide to the best eyebrow stamp kits available in 2023, complete with pros and cons to help you make an informed decision.

Why Choose an Eyebrow Stamp Kit?

Ease of Use

Eyebrow stamp kits are incredibly user-friendly. They come with a stamp and stencil that you simply press onto your brow area, eliminating the need for freehand drawing.

Time-Saving

These kits can significantly cut down the time you spend on your brows, making them ideal for those busy mornings.

Affordability

Compared to other trendy eyebrow solutions, stamp kits are relatively affordable and offer great value for money.

Top Picks for 2023

1. MADLUVV Eyebrow Stencil Kit

Pros

  • Comes in 8 different colors to match your natural brows.
  • Includes 6 different stencils for various looks.
  • Certified by PETA as cruelty-free and vegan.

Cons

  • The most expensive option on our list.

2. iMethod Eyebrow Stamp and Eyebrow Stencil Kit

Pros

  • Offers 11 color options.
  • Includes a spoolie, a brush, 10 stencils, a brow pomade, and a sponge applicator.
  • Long-lasting and waterproof pomade.

Cons

  • Some users report that the colors appear darker than they seem online.

3. Eyebrow Stamp Stencil Kit by OETUIOW

Pros

  • Features an impressive 24 stencils for maximum versatility.
  • Comes with 6 color options.
  • Smudge- and waterproof pomade.

Cons

  • Users report that the pomade tends to rub off easily.

4. i-ENVY Brow Stamp by KISS

Pros

  • Highly affordable.
  • Extremely easy to use with a straightforward design.

Cons

  • Limited to just two shapes.
  • Difficult to clean.

How to Use an Eyebrow Stamp Kit

  • Remove any existing brow products.
  • Choose a stencil that matches your desired shape.
  • Align the stencil with your natural brow, starting from the tail.
  • Press the stamp onto the stencil.
  • Lift the stencil gently.
  • Use a spoolie to brush and blend.
  • Fill in any gaps with additional products.
  • Repeat for the other brow.
Semi Permanent Eyebrows Aftercare

permanent makeup proud portfolio

Conclusion

Eyebrow stamp kits offer a convenient and efficient way to achieve perfect brows. Whether you’re a beginner or a makeup pro, these kits can simplify your beauty routine and give you the confidence to face the day with impeccable brows. Choose the one that best suits your needs and enjoy hassle-free grooming!

Would you like to know more about semi-permanent brow options or have any other questions? Feel free to ask!

Eyebrow stamp kits offer ease of use, time-saving convenience, and affordability. They are perfect for those who want to achieve flawless brows without spending too much time or money.

To use an eyebrow stamp kit, you’ll need to remove any existing brow products, choose a stencil, align it with your natural brow, press the stamp onto the stencil, and then lift it gently. Use a spoolie to brush and blend, and fill in any gaps with additional product.

The Eyebrow Stamp Stencil Kit by OETUIOW offers the most versatility with 24 different stencils to choose from, making it suitable for various brow shapes and styles.

Yes, both the MADLUVV Eyebrow Stencil Kit and the iMethod Eyebrow Stamp and Eyebrow Stencil Kit are certified by PETA as cruelty-free and vegan.

Consider factors like the number of color options, the variety of stencils, whether the product is cruelty-free, and user reviews regarding the product’s longevity and ease of use.

The i-ENVY Brow Stamp by KISS is a highly affordable option that offers quality comparable to high-end brands, making it a great choice for those on a budget.

Choosing the Best Sunscreen for Microbladed Eyebrows and PMU

best-sunscreen-for-microbladed-eyebrows-and-other-pmu

Table of Contents

Choosing the Best Sunscreen for Microbladed Eyebrows and PMU

When it comes to caring for your microbladed eyebrows or permanent makeup (PMU), selecting the right sunscreen is paramount. The delicate skin in these areas requires special attention and protection from the sun’s harmful rays. In this comprehensive guide, we will delve into the nuances of choosing the best sunscreen for microbladed eyebrows and PMU to ensure that your investment in beauty stays vibrant and long-lasting.

Understanding the Importance of Sunscreen for Microbladed Eyebrows and PMU

Microblading and PMU procedures involve semi-permanent pigments applied to the skin’s surface. Over time, exposure to UV rays can cause these pigments to fade and break down. This not only affects the longevity of your enhanced features but can also lead to undesirable color changes and unevenness.

Factors to Consider

SPF Rating

When selecting a sunscreen, it’s crucial to opt for one with a high SPF rating. SPF (Sun Protection Factor) measures a product’s ability to shield your skin from harmful UVB rays, which are responsible for burning. For microbladed eyebrows and PMU, SPF 30 or higher is recommended to provide ample protection.

Broad-Spectrum Protection

Look for sunscreens labeled as “broad-spectrum.” These formulations safeguard against both UVB and UVA rays. UVA rays can cause premature aging and contribute to pigment fading, making them a particular concern for microbladed and PMU-treated areas.

Water-Resistance

As these procedures are often in areas prone to sweat and moisture, a water-resistant sunscreen is advantageous. It ensures that your protection remains intact, even if you perspire or come into contact with water.

Sunscreen Types

Mineral Sunscreens

Mineral sunscreens, containing zinc oxide or titanium dioxide, form a physical barrier on the skin’s surface, reflecting and scattering UV rays. They are gentle on sensitive skin and ideal for microbladed eyebrows and PMU as they offer immediate protection upon application.

Chemical Sunscreens

Chemical sunscreens, such as avobenzone or octisalate, work by absorbing UV rays and converting them into heat, which is then released from the skin. While effective, some individuals with sensitive skin may experience irritation.

Semi Permanent Eyebrows Aftercare

permanent makeup proud portfolio

Application Tips

Apply Generously

For adequate protection, apply sunscreen generously to your microbladed eyebrows and PMU-treated areas. A dime-sized amount should suffice for each eyebrow. Be sure to cover every exposed part, including the tail and arch of your brows.

Reapply as Needed

Sunscreen’s effectiveness diminishes over time, especially when exposed to sunlight. Reapply every two hours when outdoors, and more frequently if swimming or sweating. Don’t forget to reapply after wiping or rubbing the area.

Sunscreen and Makeup Compatibility

Many people wonder if sunscreen can be used with makeup. The answer is yes, but it requires a specific approach. Opt for a sunscreen with a lightweight, non-greasy formula to avoid interfering with your makeup application. Alternatively, some makeup products now include SPF, providing an added layer of protection.

Avoiding Common Pitfalls

Avoid Oils and Greasy Products

Products like facial oils and heavy moisturizers can break down sunscreen and reduce its effectiveness. Opt for oil-free or matte-finish products to keep your microbladed eyebrows and PMU looking flawless.

Be Cautious with Exfoliation

Avoid aggressive exfoliation treatments near treated areas, as they can accelerate pigment fading. Opt for gentle exfoliation methods and consult with your technician for guidance.

Conclusion

In conclusion, the key to preserving your microbladed eyebrows and PMU is choosing the right sunscreen and using it correctly. By selecting a high SPF, broad-spectrum sunscreen, applying it generously, and reapplying as needed, you can ensure that your enhanced features stay vibrant and beautiful. Remember to exercise caution with makeup products and exfoliation, and your microbladed eyebrows and PMU will remain a stunning and long-lasting investment in your beauty regimen.

To learn more about our services please visit the price list page or contact us directly.

Lip Blushing Dubai UAE

Embrace a New Shade of Beauty: A Dive into Lip Blushing

Lip Blushing Dubai

Table of Contents

Embrace a New Shade of Beauty: A Dive into Lip Blushing

Welcome to Brows & Lips, your trusty companion on this vibrant journey of beauty and self-expression. Today, we’re shedding light on a cosmetic gem that has been gaining traction, transforming smiles, and capturing hearts worldwide—lip blushing.

Awaken Your Beauty: Understanding Lip Blushing

Lip blushing is your ticket to an ever-lasting, kissable pout, no daily touch-ups needed! Imagine a semi-permanent solution that graces your lips with added fullness, vibrancy, and youthful charm. With its delicate use of organic pigments, lip blushing enhances your natural lip color, smoothens out asymmetry, and lends an illusion of fullness—an artist’s stroke on the canvas of your charm.

The Art Meets Science: Demystifying the Lip Blushing Process

Lip blushing is as much an art as it is science. Your journey begins with a heart-to-heart consultation to uncover your beauty aspirations and handpick the pigment shade that harmonizes with your skin tone.

The Symphony of Lip Blushing

he lip blushing process sings a four-part harmony:

  1. The Prelude – Consultation and Color Selection: A warm-up chat to understand your lip goals, medical history, and select the perfect color match.
  2. The Crescendo – Preparation: A gentle application of a topical numbing cream to keep you comfortable.
  3. The Chorus – Pigmentation: A symphony of delicate strokes using a digital machine and a sterile, single-use needle, infusing the chosen pigment into your lips.
  4. The Finale – Healing: A soothing balm is applied, setting the stage for a successful healing process.
Semi Permanent Eyebrows Aftercare

permanent makeup proud portfolio

The Enduring Charm: Longevity of Lip Blushing Results

Just like a beautiful melody, lip blushing lingers. You can expect your new radiant smile to last between 2-5 years, with occasional touch-ups to keep the vibrancy alive.

The Tender Aftercare: Ensuring the Perfect Outcome

Loving care in the days following the procedure ensures your new blush blooms beautifully. Some heartfelt advice includes:

  • Opting for mild foods and cooler beverages for a few days
  • Taking a brief break from swimming or any activities that could excessively wet the lips
  • Resisting the temptation to pick at your lips as they heal

The Grand Reveal: Before and After Lip Blushing

Just like a master artist reveals their masterpiece, we invite you to witness the transformative power of lip blushing. Visit our comprehensive gallery of before and after images right here.

At Brows & Lips, we aim to be the guiding light on your path to beauty. With our comprehensive guide on lip blushing, we hope to have kindled your curiosity and fueled your understanding of this exciting procedure. Remember, every beauty journey is a unique masterpiece, just like the ever-changing patterns of a kaleidoscope. And so is yours—let’s cherish it together!

To know more about our services please visit price list page or contact us directly.

Microblading in Dubai

Path to Perfect Brows: A Comprehensive Guide to Microblading

Microblading in Dubai

Your Path to Perfect Brows: A Comprehensive Guide to Eyebrow Microblading and Semi-Permanent Tattoos

Welcome, beauty enthusiasts! Have you ever wondered how your favorite celebrities manage to sport perfect eyebrows all the time? Here’s their secret – Eyebrow Microblading and Semi-Permanent Tattoos. Today, we’re here to be your guiding light, leading you through this intricate world of beauty, one detail at a time.

The Fascinating Realm of Eyebrow Microblading: What It Is and Why You'll Love It

Think of Eyebrow Microblading as the stroke of an artist’s brush on your brows. This semi-permanent tattoo procedure uses precise, custom strokes to create the illusion of natural eyebrow hair. From mimicking your hair color to matching the unique growth pattern of your brows, this is all about customization.

Unsure about what brow shape would suit you the best? Our Eyebrow Shape Guide has you covered.

The Allure of Semi-Permanent Tattoos: An Artistic Revolution

Semi-permanent tattoos are for those who believe in the beauty of change. These tattoos give you the freedom to experience the allure of ink without committing for a lifetime. The secret lies in the vegetable-based ink and the shallower penetration that allows the tattoos to fade away naturally in 1-2 years.

The Journey of Eyebrow Microblading: A Step-by-Step Voyage

Embark with us on this exciting journey to achieving the brows of your dreams:

  1. Consultation: This is your first step to transformation. Discuss your vision with our certified microblading artist who will guide you through a tailored solution just for you.

  2. Outline and Measurement: Your artist will expertly design your brows using specialized tools to complement your facial structure.

  3. Numbing the Area: With a special numbing cream, we ensure a comfortable and pain-free experience.

  4. Microblading: Watch the magic unfold as your artist crafts each stroke on your brows.

  5. Aftercare: We’ll provide you with detailed aftercare instructions to keep your brows looking fabulous for longer.

Discover more about the process in our detailed Microblading Guide.

Semi Permanent Eyebrows Aftercare

permanent makeup proud portfolio

The Yin and Yang of Microblading

Like all things in life, Microblading comes with its own set of pros and cons:

Pros:

  • Designed to complement your unique facial features
  • Say goodbye to daily eyebrow makeup
  • Enjoy the beauty of long-lasting brows

Cons:

  • May require occasional touch-ups
  • Not suitable for certain skin types
  • Comes with a healing period

Preserving Your Microbladed Brows: The Secret of Aftercare

Protect the beauty of your new brows with our aftercare tips:

  • Keep water away from the treated area for a week
  • Apply a healing balm as recommended
  • Shield your brows from the sun

Unsure how to manage it all? Check out our Aftercare Guide.

Picking Your Microblading Artist: Your Partner in Beauty

When seeking the perfect microblading artist, consider their certification, portfolio, and client reviews. The right professional will help you achieve brows that perfectly frame your face and enhance your natural beauty.

Your journey to attaining flawless, semi-permanent brows starts here. With our comprehensive guide, we hope you’re better equipped to step into the world of eyebrow microblading and semi-permanent tattoos with confidence and poise.

To know more about our services please visit price list page or contact us directly.

eyebrow trends natural

Eyebrow Trends – What To Expect From This Season

Eyebrow Trends - What To Expect From This Season

It can be difficult to keep up with eyebrow trends. We have all heard horror stories about permanent eyebrow modifications caused by excessive plucking. Bella Hadid brought back skinny brows from the ’90s earlier this year, which raised eyebrows (and made us wait for the outcome).

1. Lamination of the eyebrows (also known as brow lift)

One of the most popular eyebrow trends for 2022 is brow lamination or brow lift. Semi-permanent treatments result in perfectly positioned and brushed up eyebrows that last for months. As part of the process, the eyebrows are basically restructured and set into the most desirable shape using a set-up product that helps straighten curved hairs and improves the symmetry of the eyebrows. Also, brushing up your eyebrows can help fill in gaps and give the appearance of fuller, thicker brows. A number of high-profile celebrities are also fans of this trend, including Gigi Hadid and Dua Lipa.

2. Brows that are natural

Natural brows are the second most popular brow style. The goal of this trend is to keep your natural shape, just a bit more groomed. The design is not too skinny or too thick to wear, but rather simplistic and minimalist.

3. A fluffy brow

It seems that fluffy eyebrows are staying put for 2023 for the second year in a row. There has been a spotting of Billie Eilish wearing this trend. In this method, the brow hairs are brushed up while still remaining relaxed and natural. Consequently, penciling them in takes less time than applying eyebrow powder.

Semi Permanent Eyebrows Aftercare

permanent makeup proud portfolio

4. An eye-catching feathered brow

Micro-feathering differs from semi-permanent tattooing. As opposed to fluffy eyebrows, these brows are inspired by feathers. To achieve a full, airy look with a lightweight look, use a spoolie to define and flick the eyebrows out.

5. Bleached eyebrows

The bleached brow trend has been tried out by celebrities such as Kim Kardashian, Lady Gaga, and Kendall Jenner. Despite the fact that bleached brows sound terrifying, there is a sneaky hack making its way around TikTok. Without committing to bleached brows, this hack gives the appearance of bleached brows.

6. Transplantation of eyebrows

As an alternative to wearing so much makeup, Chrissy Teigen announced on Instagram she had eyebrow transplants. You can enhance the fullness of your eyebrows by transplanting a hair graft (or plug) from the back of your head. What advice would she give Gen Z if she was a Gen Z? She believes it’s more of a commitment than buying a new eyebrow gel. You don’t want to do what I did and pluck them all off at once!”

7. Eyebrows that are straight

The tail is straighter and the arch is minimal, a classic style Audrey Hepburn loved and still popular with Zendaya and Cara Delevigne today.

8. Colored eyebrows

The addition of color to your eyebrows is an easy way to spice up your makeup and is definitely not boring. It is a good choice for makeup enthusiasts who enjoy experimenting, playing, and having fun.

9. The eyebrows of the 1990s

Is Bella Hadid right on trend with her skinny, low-arched brows from the ’90s?

10. Fox brow

Fox brows are a new trend, but they utilize a makeup technique that makeup artists have been using for decades. Using tape to make brows flatter is part of a side hustle that includes reshaping the face and lifting eyebrows. In addition to elongating the ends of their eyebrows with brow pencils, TikTok users have recreated the look in order to resemble Kaia Gerber or Kendall Jenner.

To know more about our services please visit price list page or contact us directly.

Microblading in Dubai

Microblading in Dubai – Getting the most out of it: Pros and Cons of the procedure​

Microblading in Dubai

Microblading in Dubai - Getting the most out of it: Pros and Cons of the procedure​

There is no doubt that you have heard about the eyebrow microblading in Dubai trend that has been shaking up the beauty industry for several years now.

This non-invasive procedure transforms sparse, light, and uneven eyebrows into natural-looking ones.

Microblading can give you flawless eyebrows, just as it does for celebrities and socialites. If you ever felt like you had brow envy and wondered how they achieved it, it’s probably because they’ve had their eyebrows done.

You’re probably wondering, what are the pros and cons of microblading? Before booking your microblading appointment, read this article to learn everything you need to know.

What Is Microblading, in a Nutshell?

This brow tattoo technique involves making thin incisions on the skin and imitating natural brow hairs using a microblading tool – a blade with several tiny needles. In microblading, artists can create brow hairs that mimic the length, color, thickness, and shape of the client’s natural brow hairs.

A tattoo won’t last forever – it fades over time and can be refreshed to prolong its life.

Here are some pros and cons of microblading

Despite its permanent nature, microblading fades over time. Several factors affect fade, such as your skin type and lifestyle, but most importantly, how rigorously you follow the aftercare routine prescribed by your technician.

If you are considering making an appointment with us, we strongly recommend that you take into consideration both the advantages and disadvantages. The following are some of the most important pros and cons of microblading that will assist you in making your decision.

What's great about Microblading in Dubai

A few of the most important benefits of microblading include its time and money savings, its long-lasting results, its waterproof properties, and the fact that it hides scars effectively. Here’s how it works:

Saves you time and money

Having your eyebrows microbladed eliminates the need for eyebrow products, which can be a real-time saver when applying makeup.

Additionally, you will save money on brow products and makeup removers by speeding up your morning routine. If you’re not particularly good at shaping your brows, you won’t have to worry about it anymore.

The results are long-lasting

With microblading, you can achieve the brows you’ve always wanted for months and even years. It is possible for microblading results to last up to 18 months or even longer if you follow proper aftercare routines and touch them up regularly.

Microblading Dubai

With waterproof eyebrows, you won't have to worry

The summer heat (especially in Dubai! ) isn’t the best time to wear eyebrow products if you have sparse eyebrows.

Getting your eyebrows microbladed makes sweating and getting wet a thing of the past. Finally, you won’t have to worry about smudging your eyebrows while swimming and diving.

Semi Permanent Eyebrows Aftercare

permanent makeup proud portfolio

Scars or hair loss can be covered with it

Scars on the eyebrows can be reduced in prominence by microblading. Those suffering from alopecia or cancer treatment-related brow hair loss can also benefit from it. The procedure is a great way to regain your confidence and achieve natural-looking results.

Here are the cons of Microblading

It’s important to look at both the pros and cons of microblading.

Microblading has a few cons to consider, such as healing and aftercare, infection and allergic reactions, being not the best option for oily skin, and being hard to remove. In more detail, here is what you need to know:

Healing can be a challenge

It is important to note that the healing process after your microblading treatment can last a period of six to eight weeks and can be an uncomfortable experience for some.

Your eyebrows can be itchy throughout this period and there will be some scabbing, so it is extremely important that you follow the aftercare instructions and avoid touching your eyebrows during this time in order to achieve the best results.

There is a risk of infection and allergy

Even though allergic reactions and infections are rare after microblading, they can occur.

Preventing allergic reactions can be achieved by performing a patch test beforehand. An infection can develop as a result of poor technique or inadequate aftercare. The signs of an infection are typically heavy scabbing, followed by inflammation, redness, and/or pus. Microblading is not an easy procedure and you need to make sure that you choose a professional artist and a professional place! 

If your skin is oily, microblading won't be a good choice

When it comes to microblading in oily skin, it usually does not last as long as it does on skin that is normal to dry.

As a result, it is also difficult to achieve crisp, defined strokes as well as the results start fading much sooner than they normally would have in a normal situation. It is still possible for you to get your eyebrows microbladed with an experienced artists, even if you have oily skin, but nano brows or powder brows are generally much better PMU options for you.

The removal process is not easy

Make sure you understand all the risks involved in microblading your eyebrows, as you might have to live with them for many years. The microblading on your eyebrows cannot be removed by yourself, but they will fade over time and can be professionally removed.

Are you a good candidate for microblading?

Consider the pros and cons of microblading before getting PMU and don’t make an impulsive decision.

If you don’t have the skill to make your eyebrows look even or just want to save some time when doing your makeup, microblading is a great option. If you have naturally thin and sparse eyebrows or are going through brow hair loss, this treatment is useful.

As long as you have normal to dry skin, you should be able to enjoy all the benefits of microblading and achieve the brow look of your dreams.

It should be noted, however, that microblading may not be a good option if you have oily skin. As an alternative, you can opt for machine brow treatments such as powder brows and nano brows since these treatments last longer and are particularly suitable for people with sensitive or oily skin.

Click here to learn more about microblading and other PMU treatments that are available.

Where to get microblading in Dubai?

Brows & Lips offer professional microblading and permanent makeup services, performed by the leading experts in the field in Dubai, United Arab Emirates. Each of our talented artists is extremely experienced and friendly. Our goal is to make you feel your best and make your life easier through permanent makeup. We don’t take this job lightly. Only the highest quality and care for our clients.

Please find the healing process and aftercare instructions here in our blog.

To know more or book a consultation or appointment please follow this microblading service link.

Fluffy Brows Dubai

The latest trend in the brow industry – Fluffy Brows

Fluffy Brows Dubai

The latest trend in the brow industry - Fluffy Brows

It’s no longer acceptable to have thin eyebrows. These days, full, fluffy, and textured eyebrows are in, and we’ll show you how to achieve them! If you have naturally thick or thin brows, we’ve picked out some of the best tools and advice from Senior Makeup Artists to help you achieve those on-point arches.

By the way, what are fluffy eyebrows?

It’s important to note that thick brows aren’t the same as fluffy brows. There is always a demand for the lamination treatment, which produces a brushed-up appearance and is like a perm for your eyebrows. Floppy eyebrows give the impression that they are not well-groomed because the hair hangs in an unruly manner but is properly formed.

Have you grown weary of your perfectly arched brows? You are exactly where you should be.

Despite your brows being naturally full and thick, and your arches being dense and well-formed, their pin-straight texture has always been something that needs improving. The dark hair lies clean and flat, which makes them an excellent choice when you want some fluffiness. In this case, you’re exactly where you’re meant to be.

The Key to Fluffy Brows Is Brow Lamination

This is a three-step procedure that we provide for brow lamination:

Hairs are secured in place by brushing on brow glue and allowed to grow upward.

  1. The hair cuticle is then relaxed with a softening lotion. You can shape your brows however you like since they are pliable.
  2. Professionals finish the procedure by applying a neutralizer (or fixing lotion) after repositioning the hairs. Technically, they work by dissolving and then rebuilding the disulfide bonds that prevent your hair from frizzing. Furthermore, keratin treatment, other hair perms, and lash lifts all operate in the same manner.)
  3. As a final step, your eyebrows are treated with a nourishing treatment that hydrates and conditions them.
Semi Permanent Eyebrows Aftercare

permanent makeup proud portfolio

What makes Brows & Lips special?

Brow lamination is becoming more popular because it can produce feathery, huge eyebrows. Even so, we make sure Brows & Lips procedures are done in a way that suits your brow, not just for fashion reasons.

Keeping the client satisfied means paying attention to the small details listed below.

  • Close gaps
  • Straighten downward-falling hairs
  • Control unruly hairs

Finding a provider for fluffy brows

If you’re interested in brow laminating, consider seeking the assistance of an aesthetician or licensed cosmetic artist. Treatments for brows are offered by these businesses. Find out if potential providers have experience with this particular operation. To discover more about our services, perform a search on our website.

Inquire about the following, regardless of the supplier you choose:

• Suggestions for further testing and potential adverse effects

Conclusion

Describe your perfect eyebrows with a few adjectives. What about “laminated”? You may have heard of terms like “feathery,” “HD,” or “natural.” Probably not. It is becoming increasingly popular to laminate eyebrows, a relatively new procedure. If you would like to wake up with perfectly arched eyebrows, you should look beyond the name.

What are the side effects of ombré brows?

There are no documented side effects of machine shading. The needle penetrates the skin less deeply than with a traditional tattoo. Semi-permanent treatments fade over time. When clients come from other places, we have seen color changes in the pigment under the skin over time. This can be caused by sun exposure or a bad choice of pigment by the brow technician. Be sure to research the establishment and the place you will be visiting before you get serviced.

FAQS

Approximately 30 to 45 minutes are required for the entire procedure. Waiting 48 hours before getting your eyebrows wet can extend the effect’s duration by six to eight weeks.

For those with excessively thin or over-plucked brows or who want a different shape and additional hair on their brows, microblading may be a better choice.

The procedure may be repeated every six to eight weeks. The skin around your eyebrows and the eyebrows themselves may suffer damage if you do this more frequently.

Please find the healing process and aftercare instructions here in our blog.

To know more or book a consultation or appointment please follow this fluffy brows service link.

perfect skintone shade makeup

How to Find the Perfect Shade for Your Skin Tone

perfect skintone shade makeup

How to Find the Perfect Shade for Your Skin Tone

Pink is the perfect shade for every occasion, whether you want a bold or natural-looking lip. Because of this, it may be difficult to find the right shade of foundation for your skin tone. It’s a good thing you have the help of your cosmetic cheerleaders. On top of that, we’ll teach you how

to use your newly acquired knowledge of beauty to find the perfect pink lipstick!

When Choosing a Shade of Makeup, Consider Your Skin Tone First

First, you need to understand your skin’s undertone, which is the colour immediately under your skin. Why? Your undertones determine which colours will best emphasize you’re natural features. If you have this information handy, you’ll be well on finding the perfect match.

MEASURING YOUR VEINS CAN HELP YOU IDENTIFY YOUR UNDERTONES

If you’re unsure about your skin tone, look at your wrist arteries. What color are they?


Streams of blue

Blue veins represent pink undertones.


Veins with a leafy appearance

Green veins show yellow undertones.


Veins that are green and blue

Both blue and green veins suggest neutral undertones (equal parts pink and yellow).


YOU’RE JEWELRY IS A WAY OF IDENTIFYING YOUR UNDERTONES


  • Sterling silver jeweller

Silver jeweller looks best on skin with cooler, pinker undertones.


  • Gold-plated items

Gold jeweller looks best on skin with warmer, yellower undertones, such as tan.

USE YOUR SKIN COLOR AS A GUIDE

After determining your skin tone, the next step is to find the perfect pink lipstick for you. The three most common skin tones are fair, medium, and dark. Alabaster, porcelain, light, and pale are all phrases you’ll see in the name of your foundation if you have fair skin. Continue reading if you aren’t influenced by it.

Semi Permanent Eyebrows Aftercare

permanent makeup proud portfolio

PINK LIPSTICKS FOR FAIR SKIN TONES: WHEN TO USE THEM

When picking a pink lipstick for fair-skinned women, it’s important to know your undertones.

  • FAIR SKIN WITH PINK UNDERTONES

If you have a fair skin tone with pink undertones, use Barbie or candy-coloured pinks to bring out your undertones. Peachy pink, on the other hand, will soften your look by lowering your undertones significantly.

  • FAIR SKIN WITH YELLOW UNDERTONES

Colours like coral are best for ladies with light skin and yellow undertones, according to our experts. You may try many different formulas, from the delicate and sheer to the harsh and intense.

For fair-skinned girls, we’ve made a list of some of our favourite pink lipsticks.

PICKING A PINK LIPSTICK THAT GOES WELL WITH YOUR MEDIUM SKIN TONE

That’s great! You may wear every color under the sun if you have a medium skin tone, sometimes known as an “olive” or “tan” complexion. We can’t help but be envious.

Your skin’s undertones are often neutral, so you don’t have to stress about finding the right shade. Everything is going to look great.

For individuals with medium skin, this is the only option. Pink lipsticks with blue undertones should be avoided. Because of the blue and purple undertones, you will seem washed out. Instead, she recommends opting for a nude-like pink or a sparkling watermelon shade.

IF YOU HAVE A MEDIUM SKIN TONE, CHOOSE ONE OF THESE LIPSTICKS FOR THE PERFECT POUT:

Pink Lipsticks are best for medium skin tones.


The Real Deal in Pale Pink.

Unlike a gloss, Pink in Devotion has a brilliant shine without stickiness. The product contains hyaluronic acid, which seals moisture for up to eight hours. With only one stroke, your lips will feel soft and kissable, thanks to its emollients and antioxidants.


A Pure, Unadulterated Shade of Pink

This pink lipstick is perfect for wearing regularly. Natural lip colour is not as good as lipstick. Just a few of the ingredients in its formula include Omega 3, Vitamin E, and Argan oil. Your lips will be soft and moisturized, and they’ll seem full and lovely.

A GUIDE FOR DARK SKIN TONE GIRLS TRYING TO WEAR PINK LIPSTICK

If you have a dark complexion, try these pink lipsticks:

A Vibrant Shade of Pink

Our compulsion is all things Explicit Pink. Our characteristic formula is antioxidant-rich and very moisturizing, so your lips will look great all day.


Fuschia is a vibrant and eye-catching color.

When experimenting with the color, choose Sensational Creamy Matte Lip Color in Faint For Fuchsia. You’ll receive a smooth, matte finish with a creamy texture. Best of all, the superior oils in this pink lipstick will keep your lips soft and supple all day.

shaded eyeliner permanent

Shaded Eyeliner Treatment is an Effective Solution for Eyeliner Woes

permanent shaded eyeliner

SHADED EYELINER TREATMENT IS AN EFFECTIVE SOLUTION FOR EYELINER WOES​

A semi-permanent method known as Shaded eyeliner may help you obtain a well-defined and shaded look for your eyes. With this approach, applying eyeliner doesn’t have to be a time-consuming procedure. Working with a therapist makes it possible to achieve significant yet natural-looking results.

Shaded Eyeliner: What It Is and How It Can Be UseD

Within a short period, you’ll notice a significant change in how you look. Makeup bags are not completed without kohl, drawing attention to and highlighting a woman’s eye area. Distinct eye shapes necessitate different eye linings. ” Thus, our artists will be the ability to modify your style based on your current traits. Our therapists will use blending talents during the procedure to produce a custom-made lining for your face.

We may now experiment with various eyeliner styles and colours thanks to improvements in the cosmetics sector. Therapists at our spa can aid you in picking the perfect colour and thickness of mascara to match your features. You can rely on us to assist you if you know what you want.

Expectations of healing Process

Most people should know what to expect at each step to speed up the healing process.

  • Scabbing has been a problem for many people.
  • If you observe scabbing on your skin, don’t panic. No issue because it’s a natural component of the healing process.
  • You should only be concerned if the scabbing continues for more than a week.
  • Even if the scab looks attractive, it is essential to avoid scratching or picking at it. Allow the scab to fall off on its own as a result of the injury.
  • There might be swelling, redness, or itching for a few days following the procedure.
  • Avoid touching it in any way as a general rule.
  • Even a little irritation might trigger an infection in the hair follicles.

Techniques

  • Aftercare is more important than preparation when it comes to maintaining the health and beauty.

    Here are some suggestions for Aftercare.

    • There is a chance that sweating might hinder the healing process because it is a kind of water.
    • Applying cosmetics when the skin is healing is the final item to remember.
    • The skin’s pores are clogged by makeup, making it harder for it to repair.
    • If your face is oily, your makeup will wear off more quickly and last less time.
Semi Permanent Eyebrows Aftercare

permanent makeup proud portfolio

EYELINER TATTOO Aftercare

The delicate shading used by our salon’s makeup experts creates a look that is both natural and draws attention to your eyes.

To provide the illusion of thicker lashes and an even waterline, a thin line of colour is painted across your eyelids. To get a darker look, we’ll use blending methods. Your pupils will enlarge even more as a result of this. To create a dramatic look, we first line our eyes with black and then apply a darker shade to our eyelashes. You should avoid using eye irritants like mascara, water, and other cosmetics on your eyes for the first three to seven days after therapy.

You won’t have to spend hours refining your eyeliner appearance with a shaded eyeliner. You can achieve the smoky eyeliner effect without the hassles by using semi-permanent eyeliner.

Please find the healing process and aftercare instructions here in our blog.

brow shaping

Essential Steps to Achieve a Sharp and Tailored Brow Shaping

brow shaping steps

ESSENTIAL STEPS TO ACHIEVE A SHARP AND TAILORED BROW SHAPING

A brow shaping is carefully done by two popular methods – hair removal and hair clipping; both of these methods are used the achieve a perfect look when it comes to personal grooming. For women, eyebrow shaping is a commonly experienced technique. Although males can shape their eyebrows too, women are more interested in achieving a perfect sharp look of their eyebrows that fits with the shape of their face and looks attractive to the public; a lot of methods and techniques are applied in salons for eyebrow shaping and is often practised by women themselves if they become a pro in this act. Regarding eyebrows, it’s about finding the right shape and symmetry that fits exactly how you imagine your face to look.

A Guide to Eyebrow Shapes

Natural-looking full eyebrows.

 No matter what, one should always embrace natural brows first to get perfectly shaped ones. Stray hairs need maintenance and regular plucking from time to time, even if you choose to have a natural-looking entire eyebrow, as it helps you achieve a refined and neat look. 


• Eyebrows that are a little bent or curved. Girls with pointed features and brows, like eyebrows with a slight natural bent or a little rounded, look better with them and need to maintain the arch just like it is, so it doesn’t look rough and the shape is not lost.

• Straighter variety. Straight brows might have a very slight arch, sometimes not even that. Just by little brushing, straight eyebrows look a lot better and refined, but maintenance is always needed and a little experimentation to make them look more attractive while not destroying their original shape. 

Semi Permanent Eyebrows Aftercare

permanent makeup proud portfolio

TOOLS USED IN THE PROCESS OF EYEBROW SHAPING

Appropriate equipment or tools are used for the process of eyebrow shaping. The best quality and adequately functioning tools are on top while shaping the eyebrows, and of course, a perfectionist handles eyebrows with care.

Best quality tweezers with high sharpness

While there are many methods to shape the eyebrows, tweezing is still on top and is the most popular and easy to use, especially when plucking out stray hair. Hair is ideally removed from the root when you are tweezing, and there are higher chances of very slow regrowth of hair once you tweeze them. When using razors, waxing and threading give a lot of pain and discomfort to your eyebrows as it causes the skin to badly expand, although it’s simple and quick to use. Many other disadvantages include broken hair that is hard to touch and damaging the hair follicles. One should take care of the tiniest details so a perfect shape is achieved without damaging the area. That’s why tweezers are always recommended.

A spoolie brush

Messed hair totally ruins the shape of eyebrows, seems very unattractive in public, and also makes a beautiful face look ugly just because the eyebrow isn’t brushed properly, so a spoolie brush is a way to go. An ideally brushed look of the eyebrow will make you look gorgeous beyond everything.

A pair of brow scissors that are both tiny and sharp

Appropriate scissors that are sharp and easy to hold are the most important. Blades must be long enough to cut repeatedly according to the use. Otherwise, you will stop chopping after every second, putting your eyebrow in lousy shape. Scissors aren’t used a lot in this process, only where necessary, so make sure you grab the right one and handle it with extreme care.

3 essential steps that can help you achieve a sharp and tailored look

  •  First, look in the mirror and see whether you have any excess hair.

Grab the last point of tweezers and place it in front of your brows; look at the peak of your brows and make the angle of the tweezers following that.

Once you are done with the mapping process, trim the stray hair from the top of your eyebrows that is not in the symmetry and seems unwanted to you.

Avoid pushing and pulling and consider just trimming the absolute ends with scissors; keep your spoolie brush with you to do it more appropriately, and keep brushing the eyebrows.

  • Tweezing is the second step.

Once you find the angle and map, see what hairs fall out of the map and tweeze them. There is no need for additional treatment for your eyebrows. Make sure you like the look and shape it according to your taste. After all, it is just the best version of the eyebrows that already exist. All you need is trim a few stray hairs that come in the way of making your eyes look perfect. Try not to use a magnifying mirror as it shows too much information that is just a prank and making you a fool.

  • Finally, to maintain a natural appearance, try filling the brows up

Start with filling the middle of your eyebrows, don’t use too much pressure when applying the product to fill your eyebrows, so you don’t put too much strain on it.

 Draw a line with an eyeliner from the top and bottom to achieve the desired look. Add colour or gel according to your taste but don’t overdo it. Fill your eyebrows using an eyebrow pencil or powder. Pick a brow colour of your own choice, and then fill in the brows where you believe it’s needed. Take before and after pictures to help you compare. There is no harm in doing last-moment changes until you achieve the desired look.

Note: Don’t try to tweeze all hair at once. Try tweezing only one at a time, so you don’t destroy the overall look.