Read carefully Aftercare Instruction from Brows & Lips, Permanent Makeup Studio in Dubai.

Correcting Bad PMU from Other Studios: Complete Fix Guide

Correcting Bad PMU from Other Studios: Complete Fix Guide

Investing in permanent makeup should be exciting, not a source of regret. Unfortunately, poorly executed PMU from inexperienced or unqualified artists is more common than you’d think. At Brows & Lips Dubai, we specialize in correcting bad PMU from other studios – transforming botched procedures into beautiful, natural-looking results that restore your confidence.

If you’re unhappy with your permanent makeup – whether it’s uneven brows, unnatural lip color, or poorly placed pigment – this comprehensive guide will walk you through your correction options and what to expect from the fix process.

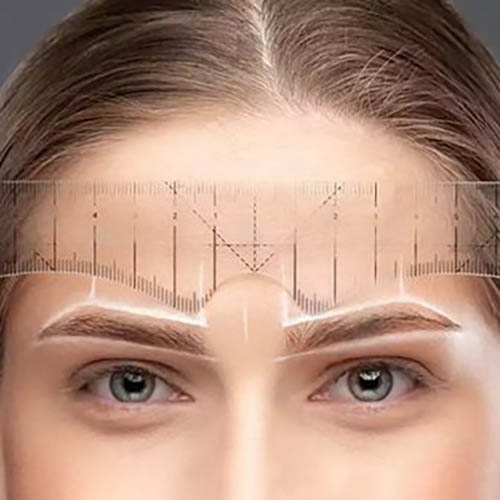
Signs Your PMU Needs Correction

Not every PMU procedure requires correction, but certain issues indicate that professional intervention is needed. Here are the red flags:

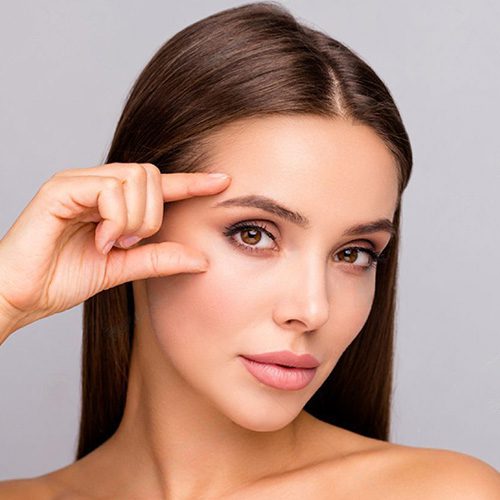
Brow-Related Issues:

  • Uneven or asymmetrical brows – One brow significantly higher, lower, or differently shaped than the other
  • Wrong color tone – Brows turned blue, grey, red, or orange instead of natural brown
  • Too dark or harsh – Brows look drawn-on, blocky, or unnatural
  • Incorrect shape – Shape doesn’t complement your face or bone structure
  • Poor hair stroke technique – Strokes look like solid lines, blur together, or appear unnatural
  • Pigment migration – Color has spread beyond the original brow shape
  • Scarring or skin damage – Visible scars from overly aggressive technique
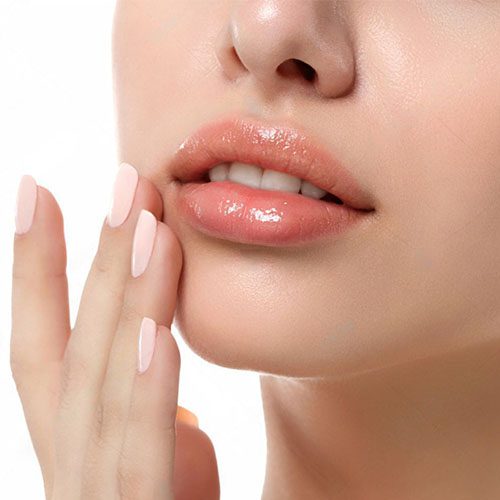
Lip-Related Issues:

  • Uneven lip line – Asymmetrical or crooked lip border
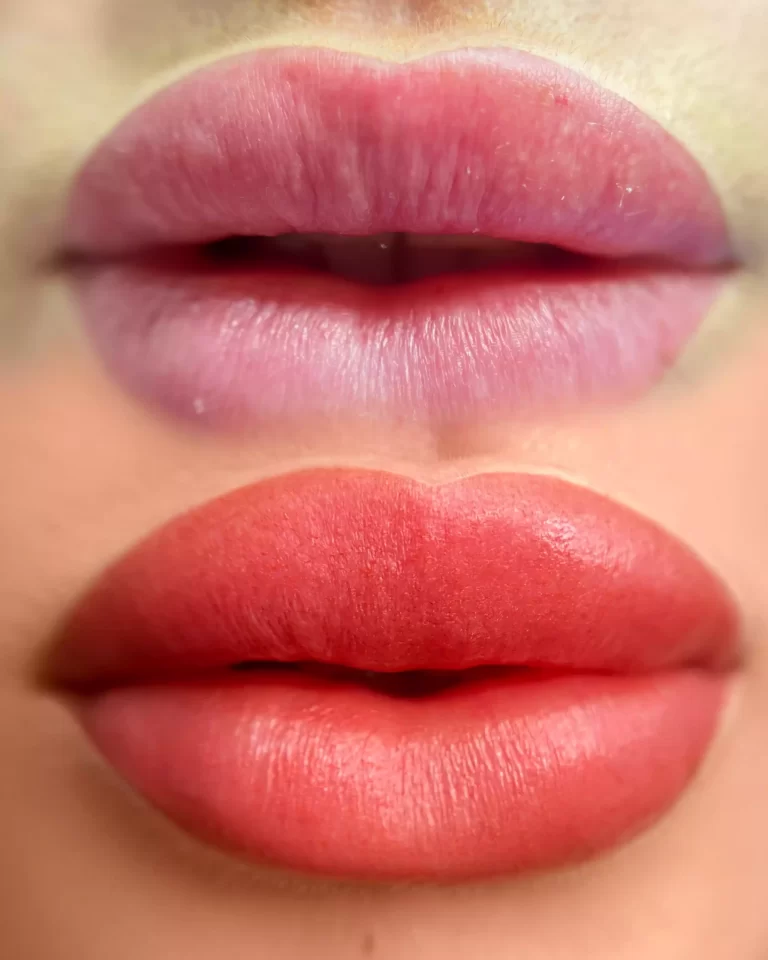
  • Wrong color – Lips turned too dark, too light, or unnatural shade
  • Blurred lip border – Color has spread beyond natural lip line (lip blush “bleeding”)
  • Patchy color – Uneven pigment distribution with visible gaps
  • Too dark or harsh – Lips look unnatural, doll-like, or overly done

General Issues:

  • Faded prematurely – Pigment disappeared within weeks instead of lasting 1-3 years
  • Allergic reactions – Persistent redness, itching, or inflammation
  • Infection signs – Pus, excessive swelling, or prolonged healing
  • Complete dissatisfaction – You simply hate the results

Most Common PMU Mistakes We Fix

After correcting hundreds of botched PMU procedures at Brows & Lips Dubai, these are the most frequent issues we encounter:

1. The “Sharpie Brow” Effect

Problem: Brows look like they were drawn with a permanent marker – solid, blocky, and unnatural.

Cause: Artist used incorrect technique, went too deep, or applied too much pigment.

Fix: Color correction with lighter pigments, partial removal, or strategic camouflage.

2. Blue/Grey Brow Syndrome

Problem: Brows healed to an unnatural blue, grey, or ashy tone instead of warm brown.

Cause: Wrong pigment choice for skin tone, pigment implanted too deep, or low-quality ink.

Fix: Color theory correction using warm orange/peach correctors to neutralize cool tones.

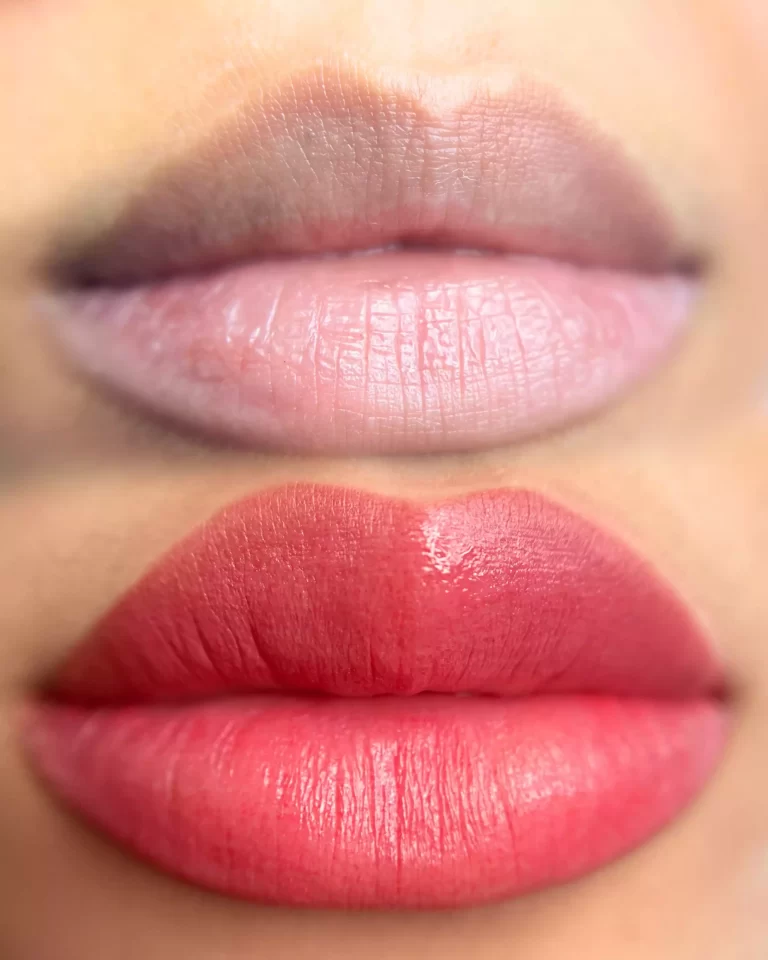
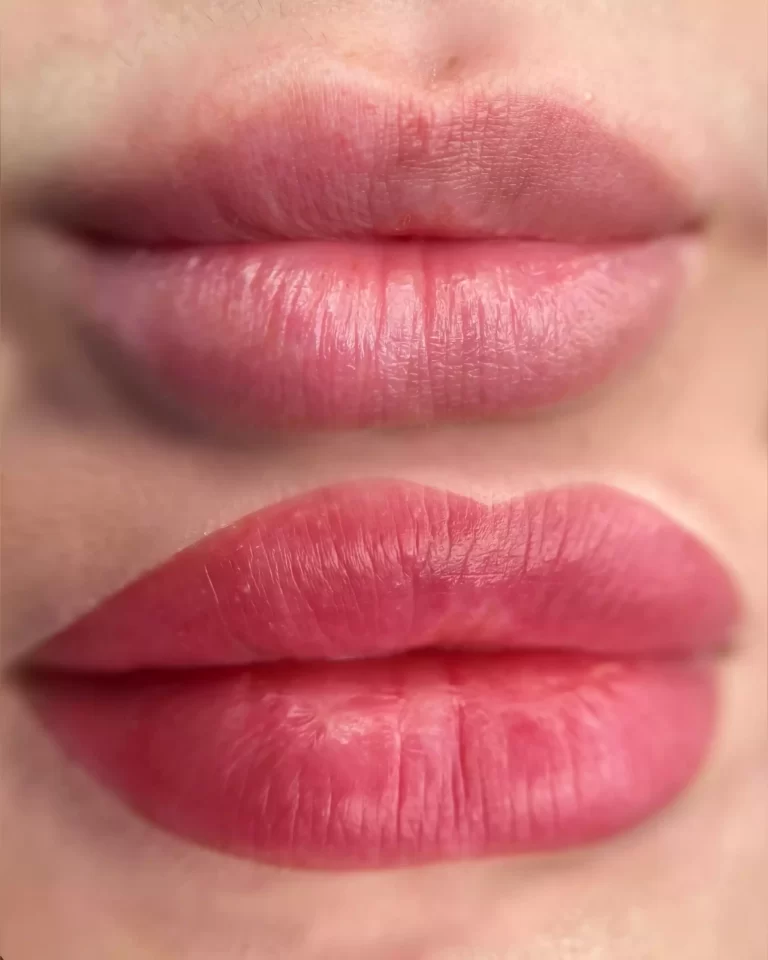
3. The “Lipstick Bleed”

Problem: Lip blush pigment spread beyond natural lip border, creating a blurred, messy edge.

Cause: Artist went outside natural lip line, used incorrect technique, or client has thin/aging skin.

Fix: Laser removal of migrated pigment followed by careful re-application within correct boundaries.

4. The “Uneven Sisters”

Problem: Brows are noticeably asymmetrical – different heights, shapes, or thickness.

Cause: Poor mapping, artist didn’t account for natural facial asymmetry, or rushed procedure.

Fix: Strategic pigment addition to balance asymmetry or partial removal of overdone areas.

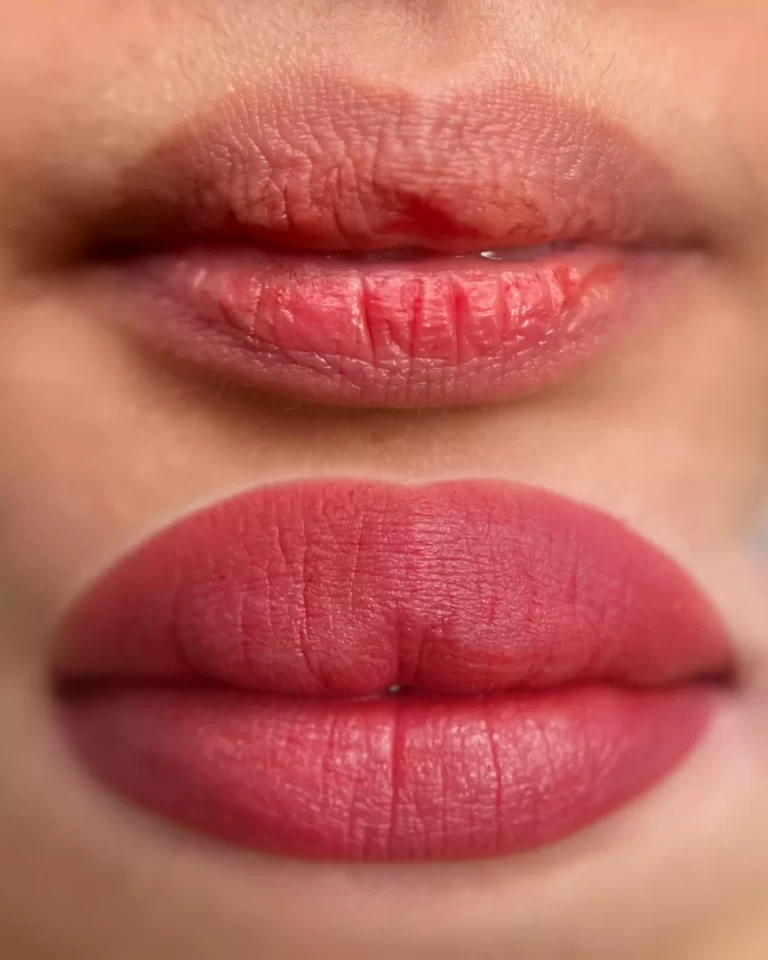
5. The “Too Dark Disaster”

Problem: Brows or lips healed significantly darker than expected or desired.

Cause: Artist used wrong pigment strength, went too deep, or didn’t account for skin tone.

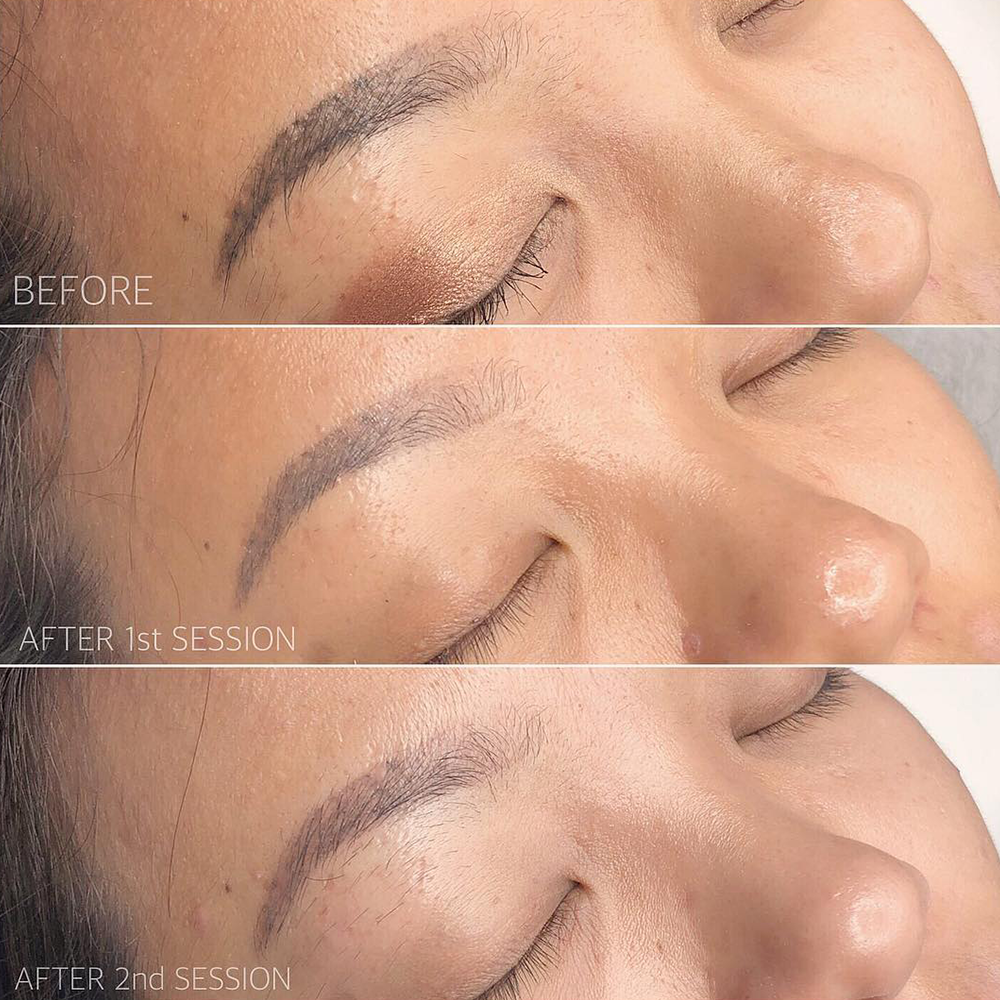
Fix: Lightening sessions, color correction, or gradual fading with targeted removal.

6. The “Patchy Fade”

Problem: Pigment faded unevenly, leaving patchy, inconsistent color.

Cause: Inconsistent pigment implantation, poor aftercare, or low-quality pigments.

Fix: Color boost session to fill in gaps and create even coverage.

PMU Correction Options

Depending on the severity of the issue, several correction approaches are available:

Option 1: Color Correction

Best for: Wrong color tones (blue, grey, red, orange)

Process: Use color theory to neutralize unwanted tones with complementary pigments.

Sessions needed: 1-3 sessions

Recovery: 7-10 days per session

Option 2: Strategic Camouflage

Best for: Minor asymmetry, slight shape issues, uneven color

Process: Add pigment strategically to balance and correct imperfections.

Sessions needed: 1-2 sessions

Recovery: 7-10 days per session

Option 3: Partial Removal + Correction

Best for: Too dark, too thick, or significant shape issues

Process: Remove some pigment (laser or saline) then correct with new PMU.

Sessions needed: 2-4 sessions (removal + correction)

Recovery: 6-8 weeks between sessions

Option 4: Complete Removal + Start Fresh

Best for: Severely botched work, scarring, or complete dissatisfaction

Process: Full removal via laser or saline, complete healing, then new PMU.

Sessions needed: 3-6 removal sessions + 1-2 new PMU sessions

Recovery: 6-8 weeks between sessions, 3-6 months total process

Option 5: Waiting for Natural Fade

Best for: Minor issues, slightly too dark (will fade naturally)

Process: Wait 4-6 weeks for initial healing, then assess if correction needed.

Sessions needed: Possibly 1 correction session after healing

Recovery: N/A (natural process)

Removal vs. Correction: Which Is Right?

Deciding between removal and correction depends on several factors:

Choose CORRECTION When:

  • ✅ Color is slightly off but fixable with color theory
  • ✅ Minor asymmetry that can be balanced
  • ✅ Shape is mostly good but needs refinement
  • ✅ Pigment is too light or patchy
  • ✅ You want faster results (fewer sessions)

Choose REMOVAL When:

  • ❌ Color is severely wrong (bright blue, green, red)
  • ❌ Shape is completely wrong or unnatural
  • ❌ Pigment is too dark and dense
  • ❌ There’s scarring or skin damage
  • ❌ You want to start completely fresh

Our Recommendation:

At Brows & Lips Dubai, we always start with a comprehensive consultation to assess your specific situation. Sometimes what looks like it needs removal can actually be corrected with the right approach. We’ll give you honest, realistic advice about your options.

The Complete Correction Process

Step 1: Initial Consultation

Your correction journey begins with a thorough assessment:

  • Visual examination: We examine your existing PMU under proper lighting
  • Medical history: Discuss any allergies, skin conditions, or previous removal attempts
  • Photography: Document current state for comparison
  • Realistic expectations: Discuss what’s achievable given your specific situation
  • Custom plan: Create personalized correction strategy
  • Cost estimate: Transparent pricing for all required sessions

Step 2: Waiting Period (If Recent PMU)

If your PMU was done within the last 4-6 weeks:

  • Wait for full healing: Pigment settles and true color emerges after 6 weeks
  • Many issues resolve: Some “problems” fix themselves during healing
  • Accurate assessment: We can only properly assess once fully healed

Step 3: Correction Treatment

Depending on your correction plan:

  • Color correction: Apply corrective pigments using color theory
  • Camouflage: Add pigment to balance asymmetry or fill gaps
  • Partial removal: Use laser or saline to lighten specific areas
  • Combination approach: Multiple techniques for complex cases

Step 4: Healing & Assessment

After correction treatment:

  • Follow aftercare: Critical for optimal results
  • Wait 6-8 weeks: Allow complete healing before next session
  • Assess results: Determine if additional sessions needed

Step 5: Additional Sessions (If Needed)

Most corrections require multiple sessions:

  • Session 2: Refine and perfect results
  • Session 3+: For complex cases requiring gradual correction
  • Final assessment: Ensure you’re completely satisfied

Healing Timeline for Corrections

Understanding the healing process helps set realistic expectations:

Week 1: Initial Healing

  • Days 1-3: Mild swelling, tenderness, darker appearance
  • Days 4-7: Flaking begins, color may look patchy
  • Care: Gentle cleansing, healing balm, avoid picking

Weeks 2-3: Color Settling

  • Flaking completes
  • Color appears lighter than expected
  • Pigment continues settling

Weeks 4-6: True Color Emerges

  • Final color visible
  • Can assess if additional correction needed
  • Ready for next session if required

Important Note:

Correction work may take LONGER to heal than initial PMU because we’re working with existing pigment and potentially compromised skin. Patience is crucial!

Choosing the Right Artist for Correction

Correcting bad PMU requires MORE skill than doing initial PMU. Here’s what to look for:

✅ Qualifications to Verify:

  • Specialized training: Artist has specific correction/removal training
  • Portfolio: Before/after photos of actual correction work (not just initial PMU)
  • Experience: Minimum 2-3 years doing corrections specifically
  • Certifications: Valid PMU and bloodborne pathogen certifications
  • Color theory knowledge: Understands how to neutralize unwanted tones

❌ Red Flags to Avoid:

  • Artist who promises “one session fix” for complex corrections
  • No portfolio of correction work
  • Unwilling to discuss limitations or realistic outcomes
  • Prices significantly lower than market rate
  • Pushes for immediate treatment without proper assessment

Questions to Ask:

  1. “How many correction cases have you handled?”
  2. “Can I see before/after photos of similar corrections?”
  3. “What’s your approach for my specific issue?”
  4. “How many sessions do you estimate?”
  5. “What are the risks and limitations?”
  6. “What happens if I’m not satisfied after correction?”

How to Avoid Bad PMU in the First Place

The best correction is prevention. Here’s how to avoid ending up in this situation:

Before Your PMU Appointment:

  1. Research extensively: Don’t choose based on price alone
  2. Check portfolios: Look for consistent, natural-looking results
  3. Read reviews: Google, Instagram, real client testimonials
  4. Verify certifications: Ensure artist is properly trained and licensed
  5. Consultation is mandatory: Never book without meeting artist first
  6. Ask about pigments: Quality brands only (Phi, Permablend, Swisscolor, etc.)
  7. Discuss expectations: Make sure you’re on the same page about results
  8. Trust your gut: If something feels off, walk away

Price Considerations:

Cheap PMU = Expensive Corrections

Quality PMU in Dubai typically costs:

  • Powder Brows: AED 1,500 – 3,500
  • Microblading: AED 1,200 – 2,800
  • Lip Blush: AED 1,200 – 2,500
  • Correction Work: AED 2,000 – 5,000+ (more complex)

Investing in quality upfront is far cheaper than paying for corrections later!

Frequently Asked Questions

How soon can bad PMU be corrected?

Wait at least 6-8 weeks after original procedure for complete healing. Exceptions: severe allergic reactions or infections require immediate medical attention.

Will correction work cost more than original PMU?

Yes, correction work is typically 30-50% more expensive than initial PMU due to increased complexity, time, and skill required.

How many sessions will I need?

Minor corrections: 1-2 sessions. Moderate issues: 2-3 sessions. Severe cases: 3-6 sessions (including removal). Every case is unique.

Can all bad PMU be fixed?

Most cases can be significantly improved, but some severe cases (deep scarring, certain pigment colors) may have limitations. We’ll be honest about what’s achievable.

Does correction hurt more than initial PMU?

Correction work can be slightly more uncomfortable due to working with existing pigment and potentially scarred tissue. We use strong topical anesthetics to minimize discomfort.

What if I have blue/grey brows from old PMU?

Blue/grey tones are very common and very correctable! We use orange/peach color correctors to neutralize cool tones before applying natural brown pigment.

Can you fix lip blush that spread outside my lip line?

Yes, but it typically requires laser removal of migrated pigment first, followed by careful re-application within correct boundaries. This is a multi-session process.

Is laser removal safe for all skin tones?

Laser removal requires different settings for different skin tones. We work with qualified laser technicians who specialize in treating diverse skin types safely.

What’s the success rate for PMU corrections?

With proper technique and realistic expectations, 85-95% of correction cases achieve satisfactory results. Success depends on severity of original issue and adherence to aftercare.

Do you offer guarantees on correction work?

At Brows & Lips Dubai, we stand behind our correction work. While we can’t guarantee specific outcomes (every skin heals differently), we commit to working with you until you’re satisfied.

Don’t Live with Bad PMU – We Can Help!

At Brows & Lips Dubai, we’ve corrected hundreds of botched PMU procedures from other studios. Our certified artists specialize in color correction, camouflage techniques, and working with challenging cases.

Free Correction Consultation: Book a complimentary assessment to discuss your options. We’ll give you honest, realistic advice about what’s achievable.

👉 Book Your Correction Consultation Today

You don’t have to live with poorly executed permanent makeup. Let us help you restore your confidence with natural, beautiful results.


Located in Dubai, UAE | Certified PMU Correction Specialists | 500+ Successful Corrections | Premium Medical-Grade Pigments | 5-Star Rated

Related Articles:

Paramedical Tattooing

Paramedical Tattooing

Paramedical Tattooing

Table of Contents

Paramedical Tattooing: The Art of Healing and Transformation

At Brows & Lips, we believe in the transformative power of permanent makeup for aesthetic enhancement and its ability to heal and restore confidence. Paramedical tattooing is a specialized branch of permanent makeup that focuses on camouflaging scars, restoring areolas, and addressing other skin imperfections. It’s a testament to the versatility of PMU and its potential to impact lives positively.

Understanding Paramedical Tattooing: Where Art Meets Healing

Paramedical tattooing involves using specialized techniques and pigments to camouflage scars, restore areolas after breast surgery, and address other skin concerns such as vitiligo or birthmarks. It’s a delicate art form that requires a deep understanding of skin anatomy, color theory, and advanced PMU techniques.

This specialized field of permanent makeup can be truly life-changing for those who have experienced physical trauma or medical procedures that have left them with visible scars or skin imperfections. Paramedical tattooing can help restore confidence, improve self-esteem, and promote a sense of wholeness.

Choosing the Right PMU Machine for Paramedical Tattooing

The success of paramedical tattooing relies heavily on the precision and control of the PMU machine. At Brows & Lips, we recommend selecting a machine with the following features:

  • Gentle and Precise: Paramedical tattooing often involves working on delicate or sensitive areas, so a machine with gentle vibration and precise needle control is essential.
  • Adjustable Needle Depth: Adjusting needle depth is crucial for achieving optimal pigment implantation and creating natural-looking results.
  • Versatile Settings: A machine with multiple speed settings and needle configurations allows greater versatility in addressing various paramedical tattooing needs.
  • Lightweight and Ergonomic: A comfortable and easy-to-maneuver machine is essential for long procedures and intricate detailing.

Brows & Lips Recommends: Top PMU Machines for Paramedical Tattooing

While the best machine for you will depend on your individual preferences and budget, here are some top-rated options we recommend:

  • Cheyenne Sol Nova Unlimited: This versatile machine is a favorite among paramedical tattoo artists. It offers adjustable needle depth, multiple speed settings, and a cordless design for greater freedom of movement.
  • Bishop Fantom: This powerful yet gentle machine is known for its precision and smooth operation, making it ideal for delicate paramedical procedures.
  • Xion S: This innovative machine boasts a unique motor and needle system that delivers exceptional precision and control, essential for intricate paramedical tattooing.

The Brows & Lips Approach: Expertise and Compassion

At Brows & Lips, our paramedical tattoo artists are skilled technicians and compassionate individuals who understand the emotional impact of scars and skin imperfections. We approach each client with empathy and care, creating a safe and supportive environment where they can feel comfortable and confident.

Our artists undergo extensive training in the latest paramedical tattooing techniques and use only the highest quality pigments specifically formulated for this specialized field. We’re committed to delivering natural-looking results that help restore confidence and improve quality of life.

Embrace the Healing Power of Paramedical Tattooing

Paramedical tattooing is more than just a cosmetic procedure; it’s a transformative experience that can help heal physical and emotional scars. At Brows & Lips, we’re proud to offer this life-changing service, empowering our clients to embrace their beauty and reclaim their confidence.

Contact us today if you want to learn more about paramedical tattooing or scheduling a consultation. We’re here to guide you on your journey to healing and transformation.

permanent makeup proud portfolio

Paramedical Tattooing FAQs

What is paramedical tattooing?

Paramedical tattooing is a specialized type of permanent makeup used to camouflage scars, restore areolas, and cover other skin imperfections.

Can paramedical tattooing help with scars?

Yes, paramedical tattooing is highly effective for camouflaging scars, helping restore confidence and providing natural-looking results.

Is paramedical tattooing painful?

Most clients experience minimal discomfort, as skilled artists use gentle machines and numbing creams to enhance comfort.

How long does paramedical tattooing last?

Results can last several years, but touch-ups may be needed to maintain color and definition.

Who can benefit from paramedical tattooing?

Anyone with scars, areola loss, or skin imperfections from trauma or surgery may benefit from this transformative service.

What should I look for in a PMU machine for paramedical tattooing?

Choose a machine with precise control, adjustable needle depth, and ergonomic design for comfort and effectiveness.

How do I book a paramedical tattooing consultation?

You can contact Brows & Lips directly to schedule a consultation with our trained paramedical tattoo artists.
Oil Gritting

Oil Gritting: Is This TikTok Trend

Oil Gritting

Table of Contents

Oil Gritting: Is This TikTok Trend the Real Deal?

Introduction to Oil Gritting

TikTok has become a breeding ground for viral beauty trends, with the latest phenomenon being “oil gritting.” This skincare method promises to deep clean pores and remove blackheads by combining oil cleansing with physical exfoliation. But is this trend really effective, or is it just another fleeting social media craze? In this article, we will explore the science behind oil gritting, its benefits, potential risks, and how to properly incorporate it into your skincare routine.

What is Oil Gritting?

The Concept Behind Oil Gritting

Oil gritting is a skincare technique that involves massaging an oil cleanser into the skin to dissolve impurities, followed by a manual exfoliation to remove the “grits,” or small, solidified bits of sebum and dirt. Proponents of this method claim that it effectively clears out clogged pores, leaving the skin smooth and radiant.

How It Works?

The process of oil gritting typically follows these steps:

  1. Oil Cleansing: A generous amount of oil (such as jojoba or grapeseed oil) is massaged into dry skin. The oil works to dissolve makeup, excess sebum, and other impurities.
  2. Steam Application: The face is then steamed or covered with a warm towel to open the pores and allow the oil to penetrate deeper.
  3. Exfoliation: After massaging for several minutes, the oil may start to produce “grits”—tiny, solid particles that are said to be impurities or sebum plugs. Some users also incorporate a gentle physical exfoliant at this stage.
  4. Rinse and Moisturize: Finally, the oil is rinsed off, and a moisturizer is applied to restore hydration.

Free Woman in Black Long Sleeve Shirt Holding Black Ceramic Mug Stock Photo

The Science Behind Oil Gritting

Oil Cleansing Method (OCM)

The oil cleansing method, which oil gritting builds upon, is based on the principle that “like dissolves like.” Oils are effective at breaking down the natural oils in the skin that trap dirt and bacteria. Unlike harsh soaps, oil cleansers do not strip the skin of its natural moisture, making them suitable for various skin types, including oily and acne-prone skin.

Sebum Plugs and Blackheads

Sebum plugs, or comedones, occur when excess sebum (the skin’s natural oil) mixes with dead skin cells and clogs the pores. If exposed to air, these plugs oxidize and turn into blackheads. Oil gritting aims to dislodge these plugs by softening them with oil and then physically removing them through massage and exfoliation.

Is It Effective?

While the idea of seeing instant results in the form of “grits” is appealing, there is limited scientific evidence to support the effectiveness of oil gritting as a superior method for pore cleansing. The “grits” that users report could be a mixture of oil, dead skin cells, and possibly some sebum, but it is unclear if this method removes more impurities than traditional cleansing or exfoliation techniques.

Benefits of Oil Gritting

Deep Cleansing

Oil gritting can provide a thorough cleanse, removing makeup, sunscreen, and excess oil from the skin’s surface. For those who wear heavy makeup or have oily skin, this method can be particularly beneficial.

Gentle on the Skin

Unlike harsh scrubs or peels, oil gritting uses the natural properties of oils to cleanse the skin without causing irritation or disrupting the skin barrier. This makes it suitable for sensitive skin types.

Satisfying Results

The tactile sensation of “grits” being removed from the skin can be satisfying for users, giving a sense of accomplishment and perceived effectiveness.

Potential Risks and Drawbacks

Over-Exfoliation

One of the main risks of oil gritting is over-exfoliation. When combined with a physical exfoliant or performed too frequently, this method can lead to skin irritation, redness, and damage to the skin barrier.

Clogged Pores

Ironically, if the oil used in oil gritting is too heavy or not properly rinsed off, it can contribute to clogged pores and breakouts, particularly in acne-prone skin.

No Guaranteed Results

Not everyone will experience the same results with oil gritting. For some, the “grits” may not appear at all, leading to frustration or the false assumption that the method is not working.

Free Close-up of Woman Putting Serum on Her Finger with the Use of a Pipette  Stock Photo

How to Safely Incorporate Oil Gritting Into Your Routine

Choose the Right Oil

Selecting a non-comedogenic oil is crucial to prevent clogged pores. Oils like jojoba, grapeseed, or sunflower oil are good options because they are lightweight and unlikely to cause breakouts.

Limit Frequency

To avoid over-exfoliation, it is advisable to limit oil gritting to once or twice a week. This allows the skin to recover between sessions and reduces the risk of irritation.

Be Gentle

When massaging the oil into your skin, use gentle, circular motions. Avoid using too much pressure, especially if incorporating a physical exfoliant.

Follow with a Hydrating Moisturizer

After rinsing off the oil, apply a hydrating moisturizer to replenish the skin and maintain its moisture barrier.

Conclusion: Is Oil Gritting Worth the Hype?

Oil gritting, while intriguing and potentially effective for some, is not a one-size-fits-all solution. It can provide deep cleansing benefits and a satisfying skincare experience, but it is important to approach it with caution. Over-exfoliation and clogged pores are real risks if the technique is not performed correctly. For those interested in trying oil gritting, starting with a gentle approach and carefully observing your skin’s response is key. As with any skincare trend, results can vary, so it’s essential to tailor your routine to your skin’s unique needs.

permanent makeup proud portfolio

FAQs of Oil Gritting

What is oil gritting?

Oil gritting is a skincare technique that combines oil cleansing with physical exfoliation to deep clean pores and remove blackheads by dissolving impurities and dislodging sebum plugs.

How often should I do oil gritting?

To avoid over-exfoliation and potential skin irritation, it’s recommended to limit oil gritting to once or twice a week.

What are the benefits of oil gritting?

Oil gritting can provide a deep cleanse, remove makeup and excess oil, and leave the skin feeling smooth and clean. It’s also gentle on the skin and suitable for various skin types.

Can oil gritting cause breakouts?

Yes, if the wrong type of oil is used or if the oil is not properly rinsed off, it can contribute to clogged pores and breakouts, particularly in acne-prone skin.

What type of oil should I use for oil gritting?

Non-comedogenic oils like jojoba, grapeseed, or sunflower oil are recommended because they are lightweight and less likely to clog pores or cause breakouts.

Is oil gritting effective for everyone?

Results from oil gritting can vary. Some users may experience the removal of “grits,” while others may not see noticeable results. It is important to tailor the technique to your skin type and observe how your skin responds.

Benzoyl Peroxide

Benzoyl Peroxide: Uses, Side Effects, and Top Products

Table of Contents

Benzoyl Peroxide: Uses, Side Effects, and Top Products

What is Benzoyl Peroxide?

Benzoyl peroxide is a powerful and widely used topical treatment for acne. It belongs to a class of medications known as keratolytics, which work by peeling away the outer layer of the skin, removing dead skin cells, and helping to clear clogged pores. This compound also possesses antibacterial properties, making it highly effective in reducing the bacteria that cause acne, particularly Propionibacterium acnes (P. acnes).

How Benzoyl Peroxide Works

Mechanism of Action

Benzoyl peroxide works in several ways to combat acne:

  1. Antibacterial Action: It kills P. acnes, the bacteria responsible for inflamed acne lesions.
  2. Exfoliation: Benzoyl peroxide acts as an exfoliant, removing dead skin cells and preventing them from clogging pores.
  3. Oil Reduction: It helps reduce excess oil production, a contributing factor to acne development.
  4. Anti-inflammatory Properties: While it primarily targets bacteria, benzoyl peroxide also reduces inflammation, which can decrease the severity of acne.

Types of Acne Treated

Benzoyl peroxide is effective against various forms of acne, including:

  • Mild to Moderate Acne: Typically characterized by whiteheads, blackheads, and inflamed pustules.
  • Inflammatory Acne: Acne with red, swollen pimples and possible pus.
  • Cystic Acne: Deep, painful cysts beneath the skin’s surface, although benzoyl peroxide is often combined with other treatments for severe cases.

How to Use Benzoyl Peroxide

Application Guidelines

To maximize the benefits of benzoyl peroxide and minimize side effects, follow these application steps:

  1. Cleanse Your Skin: Begin with a gentle cleanser to remove dirt, oil, and makeup.
  2. Apply Benzoyl Peroxide: Use a pea-sized amount and apply it to the affected areas. Start with a lower concentration (2.5% or 5%) to assess your skin’s tolerance.
  3. Moisturize: After the treatment absorbs, follow with a non-comedogenic moisturizer to prevent dryness.
  4. Sun Protection: Benzoyl peroxide can make your skin more sensitive to the sun, so apply a broad-spectrum sunscreen during the day.

Woman Applying Face Cream · Free Stock Photo

Frequency of Use

  • Start Slowly: Begin with once-daily application to reduce the risk of irritation. Gradually increase to twice daily if your skin tolerates it well.
  • Adjust Based on Skin Response: If you experience excessive dryness or irritation, reduce the frequency of application or switch to a lower concentration.

Side Effects of Benzoyl Peroxide

Common Side Effects

While benzoyl peroxide is generally safe, some users may experience side effects, particularly during the initial stages of use. These may include:

  • Dryness: Benzoyl peroxide can cause the skin to become dry and flaky, especially when first starting the treatment.
  • Redness and Irritation: Mild redness, itching, or irritation is common as the skin adjusts.
  • Peeling: As the treatment exfoliates the skin, some peeling may occur.

Severe Reactions

In rare cases, benzoyl peroxide can cause more severe side effects, such as:

  • Severe Redness and Swelling: If your skin becomes excessively red, swollen, or painful, discontinue use and consult a dermatologist.
  • Blistering: This indicates a possible allergic reaction and requires immediate medical attention.

Precautions

  • Patch Test: Before using benzoyl peroxide on your face, perform a patch test on a small area of skin to check for an allergic reaction.
  • Avoid Eye and Mouth Area: Benzoyl peroxide can be irritating if it comes into contact with the eyes, mouth, or other sensitive areas.
  • Bleaching Effect: Benzoyl peroxide can bleach fabrics and hair, so be cautious when applying it.

Top Benzoyl Peroxide Products

1. Clean & Clear Persa-Gel 10 Acne Medication

This over-the-counter treatment contains 10% benzoyl peroxide, making it a strong option for those dealing with persistent breakouts. It targets acne at the source and helps prevent future pimples from forming.

2. Neutrogena On-the-Spot Acne Treatment

A milder formula with 2.5% benzoyl peroxide, this treatment is effective for sensitive skin. It treats acne without causing excessive dryness or irritation.

3. PanOxyl Acne Foaming Wash

Containing 10% benzoyl peroxide, this foaming wash is ideal for treating body acne on the chest, back, and shoulders. It deeply cleanses pores and reduces the bacteria that cause acne.

4. La Roche-Posay Effaclar Duo

This dual-action treatment combines benzoyl peroxide with lipo-hydroxy acid (LHA) to unclog pores and smooth the skin’s texture. It’s suitable for both spot treatment and full-face application.

5. AcneFree Terminator 10

A potent spot treatment with 10% benzoyl peroxide, AcneFree Terminator 10 works quickly to reduce the size and severity of pimples. It also contains soothing ingredients like chamomile to minimize irritation.

Combining Benzoyl Peroxide with Other Treatments

Salicylic Acid

Salicylic acid is another common acne treatment that works by exfoliating the skin and unclogging pores. It can be used in conjunction with benzoyl peroxide to target acne from multiple angles. However, this combination can be drying, so it’s important to monitor your skin’s reaction.

Retinoids

Retinoids, such as tretinoin, are often prescribed for more severe acne. They help increase cell turnover, preventing clogged pores and reducing the formation of new acne lesions. When using retinoids and benzoyl peroxide together, apply them at different times of the day (retinoids at night, benzoyl peroxide in the morning) to reduce irritation.

Moisturizers and Sunscreens

Because benzoyl peroxide can be drying, pairing it with a hydrating moisturizer is essential to maintain the skin barrier. Additionally, sunscreen is crucial as benzoyl peroxide can increase sun sensitivity.

Conclusion

Benzoyl peroxide remains a cornerstone in acne treatment due to its effectiveness in reducing acne-causing bacteria and promoting clear skin. While it can cause side effects such as dryness and irritation, these can be managed with proper use and complementary skincare products. Whether you’re dealing with mild breakouts or more severe acne, benzoyl peroxide offers a reliable solution that can be tailored to your specific skincare needs. As with any treatment, consistency and patience are key to achieving the best results.

permanent makeup proud portfolio

Frequently Asked Questions

1. What is Benzoyl Peroxide?

Benzoyl peroxide is a topical treatment used to combat acne by exfoliating the skin, reducing bacteria, and clearing clogged pores.

2. How does Benzoyl Peroxide work?

It kills acne-causing bacteria, exfoliates dead skin cells, reduces oil production, and has anti-inflammatory properties.

3. What types of acne does Benzoyl Peroxide treat?

Benzoyl peroxide is effective against mild to moderate acne, inflammatory acne, and can be used alongside other treatments for cystic acne.

4. What are the common side effects of Benzoyl Peroxide?

Common side effects include dryness, redness, irritation, and peeling, especially during initial use.

5. How should Benzoyl Peroxide be applied?

Start with a small amount on clean skin, once daily, gradually increasing to twice daily as tolerated, and always follow with a moisturizer.

6. Can Benzoyl Peroxide be combined with other acne treatments?

Yes, it can be combined with salicylic acid, retinoids, and moisturizers, but should be used carefully to avoid excessive dryness or irritation.

7. What precautions should be taken when using Benzoyl Peroxide?

Perform a patch test before full use, avoid the eye and mouth area, and be cautious of its bleaching effect on fabrics and hair.

Permanent Makeup for Glasses People

Perfecting Glasse’s Look with Permanent Makeup

Permanent Makeup for Glasses People

Table of Contents

Perfecting Your Look with Permanent Makeup: A Glasses Wearer’s Guide to Effortless Beauty with Brows & Lips

Glasses are more than just a visual aid; they’re a statement piece, a reflection of your personality and style. But let’s face it, wearing glasses can pose unique challenges when it comes to makeup. Smudged eyeliner, disappearing brows, and fading lip color are just a few of the frustrations that glasses wearers often encounter. At Brows & Lips, we understand these struggles and offer a solution that transcends the ordinary: permanent makeup tailored specifically for those who wear glasses.

Enhancing Your Eyes Behind the Frames: Tailored Solutions for Glasses Wearers

Gone are the days of sacrificing beautiful eye makeup because of your glasses. Permanent makeup offers a revolutionary way to enhance your eyes while embracing your frames. Whether your glasses are bold and chunky or sleek and minimalist, there’s a permanent makeup style that will perfectly complement your look.

Subtle Lash Line Enhancement: A delicate touch of pigment along your lash line can create the illusion of thicker, darker lashes, opening up your eyes and making them appear brighter. This understated yet impactful technique works wonders for all frame shapes and sizes, enhancing your natural beauty without competing with your glasses.

Shaded or Smoky Eyeliner: For those who prefer a bolder look, shaded or smokey eyeliner can add depth and dimension to your eyes. The soft, blended pigments create a captivating gradient effect that complements your glasses without overwhelming them. This style is particularly well-suited for those with minimalist frames who want to add a touch of drama.

Delicate Winged Eyeliner: A subtle winged eyeliner can lift your eyes and create a sophisticated, polished look. This classic style works harmoniously with various frame shapes, adding a touch of elegance and definition without overpowering your glasses.

The Power of Brows: Framing Your Face with Confidence

Your eyebrows play a crucial role in framing your face and balancing the visual weight of your glasses. Well-defined brows can make a world of difference, adding structure and expressiveness to your eyes. At Brows & Lips, we offer several brow enhancement options that are ideal for glasses wearers:

  • Powder Brows: This technique creates a soft, filled-in look that mimics the appearance of brow powder. It’s a versatile option that complements all types of glasses and enhances your natural brow shape.
  • Microblading: For those seeking a more natural, hair-like effect, microblading is a fantastic choice. This meticulous technique involves creating individual hair strokes that blend seamlessly with your existing brows, adding density and definition.
  • Combination Brows: Combining the best of both worlds, combination brows offer a hybrid approach that blends powder brows with microblading. This technique creates a multidimensional look that is both natural and defined, ideal for those who want the best of both worlds.

Beyond the Eyes: Enhancing Your Lips with Permanent Makeup

Don’t forget about your lips! A subtle lip blush can add a touch of vibrancy to your face and create a harmonious balance with your glasses. This technique involves depositing a soft, natural-looking pigment into your lips, enhancing their shape and color without looking overdone. It’s the perfect way to complete your look and feel effortlessly polished.

Why Choose Brows & Lips: Your Partner in Permanent Makeup Artistry

At Brows & Lips, we understand the unique needs of glasses wearers. Our team of skilled and experienced permanent makeup artists are experts in enhancing eyes and brows while considering the impact of glasses. We offer personalized consultations to discuss your individual style, preferences, and the specific challenges you face with glasses.

We take pride in our ability to customize our permanent makeup techniques to your specific needs, ensuring that your results not only harmonize with your glasses but also enhance your overall look. We use only the highest quality pigments and state-of-the-art techniques to ensure your satisfaction and long-lasting results.

Embrace Your Unique Beauty with Brows & Lips

Whether you’re seeking a subtle enhancement or a more dramatic transformation, permanent makeup can be a game-changer for glasses wearers. At Brows & Lips, we’re committed to helping you express your unique beauty and feel confident in your own skin.

Contact us today to schedule a personalized consultation and discover how we can help you achieve the perfect permanent makeup look that complements your glasses and enhances your natural features.

permanent makeup proud portfolio

Frequently Asked Questions 

What is permanent makeup?

Permanent makeup is a cosmetic technique where pigments are tattooed onto the skin to enhance facial features like eyes, brows, and lips.

How does permanent makeup benefit glasses wearers?

It prevents makeup smudging and fading, ensuring a consistently polished look that complements your glasses.

Is permanent makeup safe?

Yes, when performed by a trained and certified artist, it is safe and effective, using high-quality pigments and sterilized equipment.

How long does permanent makeup last?

Permanent makeup can last anywhere from 1 to 3 years, depending on skin type, lifestyle, and aftercare.

What is the recovery time after getting permanent makeup

Initial healing takes about 1-2 weeks, with full results visible after a month.

Can I still wear regular makeup after getting permanent makeup?

Yes, you can wear regular makeup to enhance your look even further if desired.

How do I choose the right permanent makeup style for my glasses?

At Brows & Lips, we offer personalized consultations to help you select the perfect style that complements your glasses and personal aesthetic.

Does getting permanent makeup hurt?

Most clients experience minimal discomfort, similar to tweezing, as a topical anesthetic is applied before the procedure.

Best Facial Massagers

Elevate Your Skincare with Facial Massagers

Best Facial Massagers

Table of Contents

Elevate Your Skincare with Facial Massagers: A Guide by Brows & Lips

At Brows & Lips, we believe that radiant skin is an essential canvas for any beauty enhancement. While permanent makeup can transform your features, a consistent skincare routine is key to maintaining a glowing, healthy complexion. One often overlooked yet incredibly effective tool in your skincare arsenal is the facial massager. Let’s delve into the world of facial massage and discover how it can elevate your skincare game.

The Power of Facial Massage: More Than Just Relaxation

Facial massage isn’t just a luxurious treat; it’s a powerful technique with a multitude of benefits for your skin:

  • Enhanced Blood Circulation: Massage stimulates blood flow, delivering essential nutrients and oxygen to your skin cells, promoting a healthy glow.
  • Reduced Puffiness: By aiding lymphatic drainage, facial massage helps reduce puffiness and water retention, leaving your face looking refreshed and contoured.
  • Improved Product Absorption: When you massage your skincare products into your skin, you enhance their absorption, allowing them to penetrate deeper and deliver their benefits more effectively.
  • Relaxation and Stress Relief: Facial massage is a deeply relaxing experience that can melt away tension and promote a sense of well-being. Stress is a known contributor to skin issues, so reducing stress levels can positively impact your complexion.

Choosing Your Ideal Facial Massager

The market is flooded with facial massagers, each boasting unique features and benefits. Selecting the right one can be daunting, so let’s break down the most popular options:

  • Jade Rollers: These cool, smooth stones have been used for centuries in traditional Chinese medicine. Jade rollers are believed to promote lymphatic drainage, reduce inflammation, and improve skin elasticity. They’re a great option for beginners and those seeking a gentle, relaxing massage.
  • Gua Sha Tools: These flat, smooth stones are designed to scrape along the skin, promoting lymphatic drainage and relieving muscle tension. Gua sha can help reduce puffiness, improve circulation, and even sculpt facial contours over time.
  • Microcurrent Devices: These high-tech tools use low-level electrical currents to stimulate facial muscles, improve circulation, and enhance collagen production. Microcurrent devices are often used for reducing wrinkles and firming the skin.
  • Cryo Rollers: These innovative tools combine massage with the cooling power of ice. The chilled roller can help reduce inflammation, tighten pores, and soothe irritated skin.
  • Vibration Massagers: These devices use gentle vibrations to stimulate blood flow and lymphatic drainage. They can be especially effective for reducing puffiness and improving product absorption.

Brows & Lips Recommends: Top Facial Massagers

While the best facial massager for you will depend on your individual needs and preferences, we’ve curated a selection of top-rated options:

  • BeautyBio GloPRO Cryo Roller Duo: This luxurious cryo roller combines the benefits of massage and cooling therapy, making it a fantastic option for reducing puffiness, calming inflammation, and boosting radiance.
  • MAITING Ice Roller for Face and Eye: This affordable ice roller is a great entry-level option for those looking to experience the benefits of cryo massage. It’s perfect for soothing tired eyes and reducing morning puffiness.
  • ReFa S Carat RAY -Deluxe Eye, Lip & Forehead Roller: This sleek, ergonomically designed roller targets delicate areas like the eyes, lips, and forehead, promoting lymphatic drainage and reducing fine lines.

Elevate Your Skincare Routine Today

Incorporating a facial massager into your skincare routine is a simple yet effective way to enhance your skin’s health and radiance. Whether you opt for a jade roller, gua sha tool, or high-tech device, the benefits of facial massage are undeniable.

At Brows & Lips, we believe that beautiful skin is the foundation for any aesthetic enhancement. By investing in your skin’s well-being, you’re not only improving its appearance but also boosting your confidence and overall well-being. So go ahead and treat yourself to the soothing touch of a facial massager your skin will thank you!

jade-roller-for-face

permanent makeup proud portfolio

FAQs on Skincare with Facial Massagers

1. What are the benefits of facial massage? 

Facial massage enhances blood circulation, reduces puffiness, improves product absorption, and promotes relaxation and stress relief.

2. How does facial massage improve blood circulation? 

Massage stimulates blood flow, delivering essential nutrients and oxygen to your skin cells, promoting a healthy glow.

3. What types of facial massagers are available? 

Popular options include jade rollers, gua sha tools, microcurrent devices, cryo rollers, and vibration massagers.

4. What is a jade roller used for? 

Jade rollers promote lymphatic drainage, reduce inflammation, and improve skin elasticity.

5. How do microcurrent devices benefit the skin? 

Microcurrent devices use low-level electrical currents to stimulate facial muscles, improve circulation, and enhance collagen production.

6. What are the benefits of cryo rollers? 

Cryo rollers reduce inflammation, tighten pores, and soothe irritated skin with the cooling power of ice.

7. Which facial massager is recommended for beginners? 

Jade and affordable ice rollers, like the MAITING Ice Roller, are great entry-level options for beginners.

peptide lip treatment

Peptide Lip Treatment: Revolutionizing Lip Care

peptide lip treatment

Table of Contents

The Ultimate Guide to Peptide Lip Treatment: Revolutionizing Lip Care

Introduction to Peptide Lip Treatment

In the realm of skincare and beauty, peptide lip treatments have emerged as a groundbreaking solution for achieving healthier, fuller, and more youthful-looking lips. This innovative approach combines advanced science with nature’s best ingredients to offer a unique and effective lip care experience.

Understanding Peptides and Their Role in Lip Care

What are Peptides?

Peptides are short chains of amino acids, the building blocks of proteins, which are essential for healthy skin and tissue repair. In lip care, peptides play a pivotal role in stimulating collagen production, enhancing elasticity, and providing deep hydration.

How Peptides Benefit Your Lips

  • Collagen Stimulation: Peptides encourage collagen synthesis, leading to fuller, plumper lips.
  • Hydration and Healing: They deeply moisturize the lips and aid in repairing any damage.
  • Anti-Aging Properties: Regular use of peptide-infused lip products can reduce the appearance of fine lines and wrinkles around the lips.

The Best Peptide Lip Treatment Products

When selecting a peptide lip treatment, it’s crucial to choose products that combine peptides with other beneficial ingredients. Here are some top recommendations:

  1. Hydrating Peptide Lip Balm: Infused with hyaluronic acid and vitamin E, this balm offers intense hydration and antioxidant protection.
  2. Plumping Peptide Lip Serum: A blend of peptides and natural oils for a non-invasive plumping effect.
  3. Nourishing Peptide Lip Mask: Overnight treatment enriched with shea butter and peptides to rejuvenate and soften lips.

Step-by-Step Guide to Applying Peptide Lip Treatment

To maximize the benefits of peptide lip treatments, follow this simple routine:

  1. Cleanse: Start with clean, dry lips.
  2. Exfoliate: Gently exfoliate your lips to remove dead skin cells.
  3. Apply Serum: Use a peptide lip serum for deep penetration.
  4. Moisturize: Follow up with a hydrating peptide lip balm.
  5. Night Treatment: Apply a nourishing peptide lip mask before bed.

The Science Behind Peptide Lip Treatment

Peptide lip treatments work at a cellular level. They penetrate the lip tissue, stimulating collagen production and accelerating cell renewal. This process not only enhances the volume and texture of the lips but also strengthens the lip barrier against environmental damage.

Comparing Peptide Lip Treatment with Traditional Lip Care Products

Unlike traditional lip balms and glosses that offer temporary solutions, peptide lip treatments provide long-lasting benefits. They not only address surface-level dryness but also work beneath the skin to promote healthier, more resilient lips.

By following this comprehensive guide to peptide lip treatment, you can ensure your lips receive the best care possible, leading to noticeable improvements in their health and appearance.

Semi Permanent Eyebrows Aftercare

permanent makeup proud portfolio

FAQs on Peptide Lip Treatment

What are the primary benefits of using peptide lip treatments?

Peptide lip treatments primarily benefit the lips by stimulating collagen production, providing deep hydration, and reducing the appearance of fine lines and wrinkles. This results in fuller, plumper, and more youthful-looking lips.

How often should I use peptide lip treatments for best results?

For optimal results, it is recommended to use peptide lip treatments daily. Consistent use is key to achieving and maintaining the full benefits, such as improved lip hydration, texture, and volume.

Are peptide lip treatments suitable for all skin types?

Yes, peptide lip treatments are generally safe and suitable for all skin types, including sensitive skin. They are formulated to be gentle yet effective, without causing irritation.

laser eyebrows tattoo removal

Laser Tattoo Removal Aftercare

Table of Contents

Essential Aftercare for Laser Eyebrow Tattoo Removal

Introduction to Aftercare for Eyebrow Laser Removal

Laser eyebrow tattoo removal is an increasingly sought-after cosmetic procedure for removing unwanted eyebrow tattoos. The key to its success lies not only in the procedure itself but also in meticulous aftercare. This guide aims to provide comprehensive aftercare instructions specific to laser eyebrow tattoo removal.

Understanding Laser Eyebrow Removal

Laser eyebrow tattoo removal uses targeted laser beams to break down the pigment of the eyebrow tattoo. The procedure is delicate, considering the proximity to sensitive eye areas.

Immediate Aftercare: First Steps Post-Procedure

Protecting the Eyebrow Area

  • Cooling: Apply a cold pack to the eyebrows to minimize swelling.
  • Avoid Touching: Refrain from touching or scratching the treated area.

Skincare for the Eyebrow Area

  • Gentle Cleansing: Use a mild, fragrance-free cleanser to clean the area gently.
  • Moisturizing: Apply a suitable, hypoallergenic moisturizer to soothe the skin.

Ongoing Care: Days Following the Treatment

Activity Limitations

  • Avoid Direct Sunlight: Protect the area from sun exposure using a hat or visor.
  • Minimize Straining Activities: Avoid activities that could cause sweating or strain to the eye area.

Monitoring and Managing Side Effects

  • Redness and Swelling: Common but should subside within a few days.
  • Blistering: If it occurs, do not puncture. Keep the area clean and consult your specialist.

Nutritional and Lifestyle Adjustments

Enhancing Recovery with Diet

  • Stay Hydrated: Ample hydration aids in the healing process.
  • Nutrient-Dense Foods: Focus on foods rich in vitamins and minerals.

Lifestyle Changes

  • Refrain from Smoking and Alcohol: These can delay healing.
  • Ensure Restful Sleep: Good sleep supports the body’s repair processes.

Follow-Up and Professional Consultations

Regular Specialist Visits

  • Consistent Follow-Ups: Attend all scheduled appointments for progress assessment.
  • Heed Expert Advice: Always seek guidance from your laser treatment specialist for personalized care.

Long-Term Care Post-Removal

Ongoing Skincare

  • Sustained Sun Protection: Continuous protection from UV rays is essential.
  • Regular Moisturizing: Keep the area moisturized to support skin health.

Conclusion: Achieving Optimal Results

Adhering to these aftercare guidelines is crucial for healing and achieving the best results from laser eyebrow tattoo removal. Through proper care, potential complications can be minimized, and the desired aesthetic outcome can be effectively realized.

Semi Permanent Eyebrows Aftercare

permanent makeup proud portfolio

What immediate steps should be taken after laser eyebrow tattoo removal?

Immediately after the procedure, apply a cold pack to minimize swelling and avoid touching or scratching the area. Gently clean with a mild cleanser and apply a hypoallergenic moisturizer.

How long does redness and swelling last post-treatment?

Redness and swelling are common and usually subside within a few days after the treatment.

Can I expose the treated area to sunlight after the procedure?

Avoid direct sunlight on the treated area. Use a hat or visor for protection when outdoors.

What should I do if blisters form after the treatment?

If blisters occur, do not puncture them. Keep the area clean and consult your specialist.

Are there any specific dietary recommendations to follow post-treatment?

Yes, stay hydrated and focus on a nutrient-dense diet rich in vitamins and minerals to aid healing.

How can smoking and alcohol consumption affect the healing process?

Smoking and alcohol can delay the healing process and should be avoided post-treatment.

Is it necessary to attend follow-up appointments after the treatment?

Yes, attending all scheduled follow-up appointments is crucial for assessing progress and receiving personalized care.

How can I protect my skin long-term after laser eyebrow tattoo removal?

Continuously protect the treated area from UV rays and keep the skin moisturized to maintain its health.

How soon can I return to normal activities post-treatment?

It’s recommended to avoid activities that cause sweating or strain to the eye area for a few days post-treatment.

Can I use makeup on the treated area after the procedure?

Avoid applying makeup on the treated area until it has fully healed to prevent irritation and infection.

under-eye-concealer-aftercare

Permanent Under Eye Concealer Aftercare

Table of Contents

Permanent Under-Eye Concealer Aftercare

After investing in a permanent under-eye concealer procedure, proper aftercare is crucial to ensure the best possible outcome and longevity of your refreshed look. This comprehensive guide is crafted to provide you with all the necessary information to care for your under-eye area following the procedure.

The First Day: Immediate Aftercare Actions

The first 24 hours post-procedure are pivotal for setting the stage for your healing process. It is essential to avoid touching the treated area, except when applying aftercare ointments as advised by your technician. Keeping the area clean and free from potential contaminants is key to preventing infection and ensuring optimal results.

Understanding the Healing Timeline

Healing from permanent under-eye concealer is a gradual process that can take several weeks. During this time, it’s normal to experience a range of sensations, from itching to flaking, as your skin heals. Following the aftercare instructions provided by your technician will support this process and help prevent complications.

Daily Aftercare Regimen

Daily care involves gentle cleaning and application of healing ointments or creams. It’s also crucial to avoid direct sunlight and to use a high-SPF sunscreen to protect the pigments from fading and to support the healing process.

Long-Term Care and Touch-Ups

While permanent under-eye concealer is long-lasting, occasional touch-ups may be necessary to maintain the desired look. Regular check-ups with your technician will help you determine the best schedule for touch-ups.

Troubleshooting Common Aftercare Challenges

It’s important to be aware of the signs that may indicate a problem during the healing process, such as excessive redness, discharge, or pain. Knowing how to respond to these symptoms promptly can prevent more serious complications from developing.

The Emotional Impact of Permanent Under-Eye Concealer

Many clients report a significant boost in confidence and self-esteem following their permanent under-eye concealer procedure. This emotional benefit is a valuable aspect of the permanent makeup experience.

Wrapping Up: Your Journey to Lasting Beauty

In conclusion, the journey to lasting beauty with permanent under-eye concealer is not just about the procedure itself but also about the care that follows. With the right aftercare practices, you can enjoy the full benefits of this transformative beauty solution.

Semi Permanent Eyebrows Aftercare

permanent makeup proud portfolio

What is permanent under-eye concealer?

Permanent under-eye concealer is a cosmetic procedure that uses tattooing techniques to apply pigment under the eyes, reducing the appearance of dark circles and providing a look similar to that of traditional makeup.

How long does the healing process take after getting permanent under-eye concealer?

The healing process for permanent under-eye concealer typically takes several weeks, during which you may experience various stages from swelling to flaking as your skin heals.

What are the immediate aftercare steps following the procedure?

Immediate aftercare steps include avoiding touching the area, keeping it clean, applying recommended ointments, and protecting the area from potential contaminants to prevent infection.

Can I use makeup over my permanent under-eye concealer during healing?

It’s advisable to avoid applying makeup over the treated area until it has fully healed to prevent any interference with the healing process and the potential risk of infection.

How can I protect my permanent under-eye concealer from the sun?

Protecting your permanent under-eye concealer from the sun involves using a high-SPF sunscreen, wearing sunglasses when outdoors, and avoiding direct sun exposure, especially during peak hours.

What should I do if I notice signs of infection?

If you notice any signs of infection such as excessive redness, pain, or discharge, it’s important to contact your technician or a healthcare provider immediately for appropriate care.

How often will I need touch-ups for my permanent under-eye concealer?

The frequency of touch-ups for permanent under-eye concealer can vary based on individual factors, but typically they are recommended every few years to maintain the desired effect.

Are there specific products I should use or avoid during the aftercare period?

During the aftercare period, use gentle, non-irritating products recommended by your technician, and avoid any harsh chemicals, exfoliants, or retinoids that could disrupt the healing process.

What are the long-term care steps for permanent under-eye concealer?

Long-term care includes regular check-ups with your technician, touch-ups if necessary, consistent use of sunscreen, and maintaining a gentle skincare routine.

Can permanent under-eye concealer be removed if I change my mind?

Permanent under-eye concealer can be removed or altered through specific removal techniques. It is best to consult with a professional for safe and effective options.
beard-micropigmentation-aftercare

Beard Micropigmentation Aftercare

Table of Contents

Ultimate Guide to Beard Micropigmentation Aftercare

Essential Aftercare for Beard Micropigmentation

Beard Micropigmentation (BMP) is an innovative cosmetic procedure that enhances the appearance of a fuller beard. Post-procedure aftercare is paramount to maintain the aesthetic quality of your beard micropigmentation. Our guide is meticulously crafted to assist you through the aftercare regimen with precision and care.

Immediate Aftercare: The First 72 Hours

Day 1: Post-Procedure Instructions

  • No Touching: Avoid any contact with the treated area to prevent contamination and irritation.
  • Keep Dry: It’s critical to keep the area completely dry; abstain from activities that induce sweating.

Days 2-3: Maintaining Cleanliness

  • Soft Cleansing: Dab the area with a clean, damp cloth without applying pressure.
  • Shampoo Avoidance: Do not apply any shampoos or facial cleansers to the treated area.

Short-Term Aftercare: Day 4 to the End of Week 1

Day 4 Onwards: Cleansing Routine

  • Gentle Shampoo: Start washing the area with a gentle, chemical-free shampoo.
  • Careful Drying: Pat the area dry; avoid any harsh rubbing.

Exposure to Elements

  • Sun Protection: Shield the treated area from the sun by using SPF 30+ sunscreen or covering it with a scarf.

Long-Term Aftercare: From Week 2 Onwards

Moisturization and Skin Care

  • Regular Moisturizing: Use an alcohol-free moisturizer to prevent dryness.
  • Consistent Cleansing: Maintain a routine of washing with a gentle shampoo and regular moisturization.

Lifestyle Adjustments

  • Physical Activity: Resume normal activities, ensuring to cleanse the area after sweating.
  • Swimming: Postpone swimming in chlorinated or saltwater environments for at least a month.

Beard Micropigmentation Maintenance

Periodic Touch-Ups

  • Scheduled Evaluations: Arrange for yearly evaluations to determine if touch-ups are necessary.
  • Color Revitalization: Address any lightening to preserve the definition and vibrancy of your BMP.

Skin Care

  • Sensitive Skin Products: Opt for products tailored for sensitive skin to minimize irritation.
  • Balanced Diet: Support skin health and color retention with a nutritious diet.

Conclusion

Adhering to a thorough aftercare program is critical for the longevity and appearance of your beard micropigmentation. These comprehensive steps will ensure a natural and lasting BMP result.

Semi Permanent Eyebrows Aftercare

permanent makeup proud portfolio

What is Beard Micropigmentation (BMP)?

Beard Micropigmentation is a cosmetic procedure that uses microneedles to implant pigment into the skin, creating the appearance of a fuller beard.

How do I care for my beard immediately after micropigmentation?

Immediately after the procedure, avoid touching the treated area and keep it dry to prevent infection and irritation.

When can I start washing my beard after BMP?

You can start gently washing the treated area with a chemical-free shampoo on the fourth day following your BMP procedure.

Can I shave my beard after BMP?

It’s recommended to wait at least 10 days before shaving to allow the micropigmented area to fully heal.

How long does beard micropigmentation last?

Beard micropigmentation can last several years, depending on the aftercare and individual skin characteristics, with touch-ups when necessary.

What kind of moisturizer should I use after BMP?

Use an alcohol-free and fragrance-free moisturizer to prevent dryness without causing irritation.

When can I expose my beard to sunlight after BMP?

You should protect the treated area from direct sunlight for at least a week after the procedure, using sunscreen or physical covers.

Is it necessary to schedule touch-ups for BMP?

Yes, scheduling annual check-ups to assess the need for touch-ups is advisable to maintain the appearance of your BMP.

Can I use regular shampoo after BMP?

After the initial healing period, you can use a mild, chemical-free shampoo to cleanse the area.

How can I prevent BMP from fading?

To prevent fading, protect the micropigmentation from excessive sun exposure and follow the aftercare instructions carefully, including regular moisturizing.
pmu-for-vitiligo-camouflage-aftercare

Vitiligo Camouflage Aftercare

Table of Contents

Vitiligo Camouflage Aftercare: A Comprehensive Guide to Healing and Maintenance

Understanding Vitiligo Camouflage Aftercare

Vitiligo, a condition characterized by the loss of skin pigment, can be a source of emotional distress for many. Camouflage techniques have emerged as a beacon of hope, offering a way to restore the appearance of even skin tone. However, the journey doesn’t end with the procedure; it’s the aftercare that plays a pivotal role in the success and longevity of the treatment. In this comprehensive guide, we delve into the nuances of Vitiligo Camouflage Aftercare, providing you with the knowledge and tools to navigate this journey with ease and confidence.

Vitiligo Camouflage Aftercare: An Overview

The Importance of Aftercare in Vitiligo Camouflage

Aftercare is the cornerstone of any medical or cosmetic procedure, and Vitiligo Camouflage is no exception. Proper aftercare ensures not only the longevity of the camouflage but also the health and well-being of your skin. It’s the bridge between the initial procedure and the long-term results you desire.

Initial Steps Post-Procedure

The first 48 hours post-procedure are crucial. This period demands strict adherence to the aftercare instructions provided by your specialist. It typically involves keeping the treated area clean, avoiding direct sunlight, and refraining from any activities that might cause sweating or friction.

Long-Term Care Strategies

As your skin heals, you’ll transition into long-term care strategies. These include regular moisturizing, sun protection, and gentle cleansing. It’s about maintaining the integrity of the camouflage while nurturing your skin’s natural healing process.

Essential Aftercare Tips

Hygiene and Wound Care

Hygiene cannot be overstated in the context of aftercare. Keeping the treated area clean and dry is paramount to prevent infection and ensure optimal healing. Wound care, if applicable, should be performed as advised by your specialist.

Sun Protection and Vitiligo

UV rays can exacerbate Vitiligo and affect the longevity of your camouflage. Sun protection is not just a recommendation; it’s a necessity. Incorporating a high-SPF sunscreen into your daily routine is essential.

Moisturizing and Skin Nourishment

Moisturizing plays a dual role in aftercare: it aids in healing and enhances the appearance of the camouflage. A nourishing moisturizer, preferably one recommended by your specialist, should become a staple in your skincare regimen.

Camouflage Maintenance Techniques

Maintaining the camouflage involves periodic touch-ups and careful monitoring of any changes in your skin’s pigment. It’s about being proactive and responsive to the needs of your skin.

Lifestyle Adjustments for Optimal Healing

Dietary Considerations for Skin Health

What you eat reflects on your skin. A balanced diet rich in vitamins, minerals, and antioxidants can significantly impact your skin’s healing and overall health. Incorporating skin-friendly foods into your diet is a step towards optimal healing.

Stress Management and Skin Recovery

Stress can hinder the healing process and even trigger Vitiligo flare-ups. Adopting stress management techniques such as meditation, yoga, or any activity that brings you joy and relaxation can be beneficial for your skin and overall well-being.

Physical Activity and Skin Regeneration

Moderate physical activity can enhance circulation and promote skin regeneration. However, it’s important to choose activities that don’t cause excessive sweating or friction on the treated area, especially during the initial healing phase.

Common Challenges and Solutions

Dealing with Itching and Discomfort

Itching and discomfort are common post-procedure sensations. While they’re usually a sign of healing, it’s important not to scratch or irritate the area. Cool compresses and doctor-recommended ointments can provide relief.

Addressing Pigment Changes

Pigment changes can occur as your skin heals. Staying in close communication with your specialist and scheduling follow-up appointments can help address these changes promptly and effectively.

Managing Expectations and Emotional Well-being

It’s natural to have high expectations for the outcome of your camouflage. However, patience and understanding that results can vary are crucial. Seeking support from friends, family, or support groups can be instrumental in maintaining a positive outlook.

Professional Care and Follow-ups

The Role of Dermatological Consultations

Regular consultations with a dermatologist can help monitor the progress of your Vitiligo and the condition of your camouflage. They can provide professional insights and adjust your aftercare plan as needed.

When to Seek Medical Attention

If you notice signs of infection, excessive swelling, or any other concerning symptoms, it’s important to seek medical attention immediately. Early intervention can prevent complications and ensure the safety of your treatment.

Long-Term Monitoring and Touch-ups

Long-term monitoring is key to maintaining the appearance and effectiveness of your camouflage. Touch-ups may be necessary to address fading or changes in your skin’s pigment.

Vitiligo Camouflage Aftercare: Advanced Insights

Innovative Aftercare Products and Tools

The market is continually evolving, with new products and tools designed to enhance the aftercare experience. Staying informed about these innovations can help you make educated choices for your aftercare routine.

Technological Advancements in Vitiligo Treatment

Technological advancements are revolutionizing the way we approach Vitiligo treatment and aftercare. From cutting-edge camouflage techniques to innovative healing products, the future of Vitiligo care is promising.

The Future of Vitiligo Camouflage Aftercare

As research progresses, we can anticipate more effective and efficient aftercare protocols. The future holds the promise of personalized aftercare plans tailored to individual needs and skin types.

Conclusion

Embracing Your Journey with Vitiligo Camouflage Aftercare

Vitiligo Camouflage Aftercare is not just a set of instructions; it’s a journey towards healing, confidence, and self-acceptance. By following a comprehensive aftercare plan, making informed lifestyle choices, and staying connected with your care providers, you can ensure the longevity and success of your camouflage. Remember, each step you take in this journey is a step towards embracing your unique beauty and living life to the fullest.

Semi Permanent Eyebrows Aftercare

permanent makeup proud portfolio

What is the importance of aftercare in Vitiligo Camouflage?

Aftercare is crucial in Vitiligo Camouflage as it ensures the longevity of the camouflage and the health of your skin, acting as a bridge between the initial procedure and the long-term results.

What are the initial steps to take immediately after the Vitiligo Camouflage procedure?

The initial steps post-procedure include keeping the treated area clean, avoiding direct sunlight, and refraining from activities that might cause sweating or friction.

How can I protect my skin from the sun after Vitiligo Camouflage?

Incorporating a high-SPF sunscreen into your daily routine is essential for protecting your skin from UV rays, which can exacerbate Vitiligo and affect the longevity of your camouflage.

Why is moisturizing important in Vitiligo Camouflage Aftercare?

Moisturizing aids in healing and enhances the appearance of the camouflage. It’s important to use a nourishing moisturizer, preferably one recommended by your specialist.

What lifestyle adjustments should I consider for optimal healing?

Consider dietary adjustments for skin health, stress management techniques for skin recovery, and moderate physical activity to promote skin regeneration.

How do I deal with itching and discomfort after the procedure?

It’s important not to scratch or irritate the area. Cool compresses and doctor-recommended ointments can provide relief from itching and discomfort.

What should I do if I notice pigment changes in the treated area?

Stay in close communication with your specialist and schedule follow-up appointments to address pigment changes promptly and effectively.

When should I seek medical attention during my aftercare?

Seek medical attention immediately if you notice signs of infection, excessive swelling, or any other concerning symptoms.

Are there any innovative aftercare products and tools I should know about?

The market is continually evolving with new products and tools designed to enhance the aftercare experience. Staying informed about these innovations can help you make educated choices for your aftercare routine.

What does the future hold for Vitiligo Camouflage Aftercare?

As research progresses, we can anticipate more effective and efficient aftercare protocols, with personalized aftercare plans tailored to individual needs and skin types.
how-to-heal-tattoos-on-breasts-areole-reconstruction-aftercare

Areola Reconstruction Aftercare

Table of Contents

Aftercare Areola Reconstruction

Aftercare for Areola Reconstruction is an essential aspect of the healing process and achieving optimal results after the procedure. Brows & Lips Permanent Makeup Studio provides a comprehensive aftercare regimen to ensure that the treated area heals properly and the pigmentation settles as intended.

Initial Healing Phase:

  • It is common for the treated area to appear significantly darker and redder immediately after the procedure. This is a normal response due to the initial trauma to the skin.
  • Over the course of 5-7 days, you will notice the top layer of skin beginning to flake off. This is a natural part of the healing process, revealing the true pigment color beneath, which is typically softer and more natural-looking than the initial appearance.

Daily Care for the First 5 Days:

  • Each day, carefully remove the dressing that covers the treated area. It’s important to discard the old dressing to maintain cleanliness.
  • Using a damp cotton pad, gently cleanse the area to remove any lymph or residue.
  • With a clean cotton bud, apply a fresh layer of Permanent Cosmetic Healing Balm. This balm is specially formulated to aid in the healing process and protect the pigmentation.
  • After applying the balm, cover the area with a new, clean dressing to protect it from external irritants.

Showering and Moisture Precautions for the First Week:

  • It’s crucial to keep the treated area as dry as possible. When showering, apply a thick layer of Vaseline over the areola enhancement to create a waterproof barrier.
  • Limit your time in the shower and opt for cooler water temperatures to reduce steam, which can contribute to moisture buildup.

Activities and Products to Avoid for 2 Weeks:

  • Refrain from using soaps, cleansers, or any harsh chemicals on the treated area.
  • Avoid prolonged exposure to hot water, such as long showers, hot baths, saunas, or Jacuzzis.
  • Stay away from swimming pools and natural bodies of water, as chlorine and salt can adversely affect the healing process.
  • Protect the area from direct sunlight and abstain from using tanning beds or artificial tanning treatments.
  • Do not apply products containing aloe vera, as they can interfere with the healing process.

Signs to Watch For:

  • If you notice any signs of infection, such as extreme redness, swelling, or pus, seek medical attention promptly.

Long-Term Aftercare:

  • To maintain the integrity of the pigmentation, apply a high-quality sunscreen to the treated area whenever exposed to sunlight.
  • If you are considering undergoing chemical peels, MRI scans, or other medical procedures, inform the technician about your micropigmentation enhancement.
  • Following any tattooing procedure, including areola reconstruction, it is recommended to wait at least 4 months before donating blood.
  • If you plan to undergo laser or IPL hair removal treatments, make sure to inform the technician that you have had medical micropigmentation, as these devices can alter the pigment color.

For any concerns or questions regarding the aftercare process, clients of Brows & Lips Permanent Makeup Studio are encouraged to reach out directly for personalized guidance and support.

Semi Permanent Eyebrows Aftercare

permanent makeup proud portfolio

What should I expect immediately after areola reconstruction?

It’s normal for the treated area to appear darker and redder due to the initial trauma to the skin. This will subside as the healing process continues.

How long does it take for the top layer of skin to flake off after the procedure?

The top layer of skin typically begins to flake off within 5-7 days, revealing the true pigment color beneath.

How should I care for the treated area in the first 5 days after areola reconstruction?

Remove and replace the dressing daily, gently cleanse the area with a damp cotton pad, apply Permanent Cosmetic Healing Balm, and cover with a new dressing.

What precautions should I take when showering after areola reconstruction?

Keep the treated area dry by applying a thick layer of Vaseline to create a waterproof barrier. Limit shower time and opt for cooler water to reduce steam.

What activities and products should I avoid for 2 weeks post-procedure?

Avoid using soaps, cleansers, or harsh chemicals on the treated area. Stay away from long hot showers, baths, saunas, Jacuzzis, swimming pools, and direct sunlight. Do not use products containing aloe vera.

What are the signs of infection I should watch for after areola reconstruction?

Be vigilant for signs of infection such as extreme redness, swelling, or pus, and seek medical attention promptly if these occur.

How can I protect the pigmentation long-term?

Apply high-quality sunscreen to the treated area when exposed to sunlight. Inform technicians of your micropigmentation if undergoing chemical peels, MRI scans, or other procedures.

How long should I wait before donating blood after areola reconstruction?

It is recommended to wait at least 4 months after any tattooing procedure, including areola reconstruction, before donating blood.

Should I inform technicians about my areola reconstruction if planning laser or IPL hair removal treatments?

Yes, inform the technician that you have had medical micropigmentation, as laser or IPL treatments can alter the pigment color.

Who should I contact for any concerns or questions regarding the aftercare process?

Clients of Brows & Lips Permanent Makeup Studio should reach out directly for personalized guidance and support regarding the aftercare process.

Permanent Beauty Mark and Freckle Tattoo Aftercare

Beauty Marks and Freckles Healing Process and Aftercare

Table of Contents

The Comprehensive Guide to Beauty Marks and Freckles Healing Process

Understanding the healing process of beauty marks and freckles is essential for those who opt for these cosmetic procedures. In this guide, we delve deep into the day-by-day healing stages, ensuring you’re well-informed and can take the best care of your treated areas.

The Importance of Proper Aftercare

While beauty mark and freckle tattoos are relatively straightforward cosmetic procedures, the post-treatment care is crucial. Proper aftercare ensures not only the longevity of the tattoo but also its appearance and health.

Day-by-Day Healing Process: What to Expect

Day 1: Post-Procedure Reactions

Immediately following the procedure, it’s common for the treated area to exhibit slight swelling and redness. The color will appear significantly darker than expected.

Day 2-3: Initial Healing

During these days, any swelling and redness should begin to subside. The color remains dark, and it’s imperative to keep the area clean. Refrain from using skincare products or makeup directly on the treated spot. A thin layer of healing ointment can be applied to facilitate the healing.

Day 4-7: Scabbing Phase

By the fourth day, the healing process is in full swing. The treated area may start to form scabs. It’s vital not to pick or scratch these scabs as doing so can lead to scarring or potential damage to the tattoo. Keeping the area clean and dry is of utmost importance.

Day 8-14: The Revelation

During this period, the scabs naturally fall off, revealing the skin underneath. It’s not uncommon for the area to appear as if there’s no color. This is a standard part of the healing process. The skin continues to heal and develop its pigment. It’s essential to be patient and allow at least two weeks post-scabbing before evaluating the final tattoo color.

Day 15-20: The Final Outcome

By now, the healing process should be complete, and the beauty mark or freckle tattoo should be fully visible. To ensure the tattoo remains vibrant and lasts longer, avoid prolonged sun exposure. When the treated area is exposed to the sun, always use a broad-spectrum sunscreen with an SPF of at least 30.

Activities to Avoid During the Healing Process

  • Sun Exposure: Direct sunlight can fade the tattoo.
  • Make-up: Avoid applying makeup on the treated area to prevent infections.
  • Skincare Products: Some products might interfere with the healing.
  • Face Peels: These can cause the permanent makeup to lighten.
  • Swimming: Chlorinated water can affect the tattoo’s color.
  • Scratching or Picking: This can damage the tattoo and cause scarring.

In Conclusion

Beauty marks and freckle tattoos can enhance one’s natural beauty. However, understanding and following the healing process ensures the best possible outcome. By adhering to the aftercare guidelines and being patient, you can enjoy your beauty marks and freckles for a long time.

Semi Permanent Eyebrows Aftercare

permanent makeup proud portfolio

Why is aftercare important for beauty mark and freckle tattoos?

Post-treatment care is crucial for the appearance and longevity of beauty mark and freckle tattoos.

What reactions can be expected immediately after the procedure?

Immediately after the procedure, the treated area may show swelling, redness, and a darker color than anticipated.

How long does the scabbing phase last?

The scabbing phase typically occurs from days 4 to 7 post-procedure.

When will the final tattoo color be visible?

By day 20, the tattoo should be fully visible with its final color.

Can I apply makeup on the treated area immediately?

No, it’s recommended to avoid applying makeup on the treated area during the initial healing phase to prevent infections.

Is sun exposure harmful for the healing tattoo?

Yes, direct sunlight can fade the tattoo. It’s advisable to use sunscreen when exposed to the sun.

What happens between days 8 to 14?

Between days 8 to 14, scabs naturally fall off, revealing the skin underneath.

Can skincare products interfere with the healing?

Yes, some skincare products might interfere with the healing process of the tattoo.

Is it harmful to pick or scratch the scabs?

Yes, picking or scratching the scabs can damage the tattoo and lead to scarring.

How can I ensure the longevity of my beauty mark or freckle tattoo?

Adhering to the aftercare guidelines, avoiding direct sun exposure, and being patient during the healing process can ensure the longevity of the tattoo.

Scar Camouflage Aftercare

Scar Camouflage Aftercare

Table of Contents

Comprehensive Guide to Scar Camouflage Aftercare

Introduction

Scar camouflage is a revolutionary technique that uses micropigmentation to blend scars with the surrounding skin. As with any cosmetic procedure, proper aftercare is crucial to achieve the best results and ensure the longevity of the treatment. In this guide, we’ll delve deep into the aftercare procedures to ensure optimal results.

Importance of Aftercare

After undergoing a scar camouflage treatment, the skin needs time to heal and accept the newly introduced pigments. Proper aftercare ensures:

  • Faster healing of the treated area.
  • Prevention of infections.
  • Retention of the pigment in the skin.
  • Achieving a natural and seamless blend with the surrounding skin.

Immediate Aftercare: First 72 Hours

1. Protect the Treated Area

  • Keep the area covered: For the first three days, it’s essential to keep the treated area covered with a sterile bandage or dressing. This protects the skin from external contaminants and reduces the risk of infections.
  • Avoid direct sunlight: Sun exposure can cause the pigments to fade prematurely. Ensure you protect the treated area from direct sunlight by wearing protective clothing or using an umbrella.

2. Keep the Area Clean

  • Gentle cleansing: Clean the area with lukewarm water and a mild soap. Avoid scrubbing or using harsh cleansers.
  • Pat dry: After cleansing, gently pat the area dry with a soft towel. Avoid rubbing or applying pressure.

3. Moisturize Regularly

  • Use a recommended ointment: Apply a thin layer of the recommended ointment or moisturizer to keep the skin hydrated. This aids in the healing process and prevents scabbing.

Long-Term Aftercare: Beyond the First Week

1. Avoid Swimming and Saunas

  • Stay away from chlorinated water: Chlorine can bleach the pigments and alter the color of the camouflage. Avoid swimming pools for at least two weeks post-treatment.
  • Avoid saunas and steam rooms: Excessive sweating can cause the pigments to fade. It’s best to avoid saunas and steam rooms for a few weeks.

2. Limit Physical Activities

  • Avoid strenuous exercises: Sweating can affect the healing process. Limit physical activities for the first week to ensure the pigments settle well.

3. No Picking or Scratching

  • Let the skin heal naturally: Picking or scratching the treated area can lead to scarring and uneven pigment distribution. Allow any scabs or dry skin to fall off naturally.

Conclusion

Proper aftercare is the key to achieving the best results from scar camouflage treatments. By following the guidelines mentioned above, you can ensure a smooth healing process and enjoy long-lasting results. Always consult with your technician or dermatologist if you have any concerns or questions about the aftercare process.

Semi Permanent Eyebrows Aftercare

permanent makeup proud portfolio

What is the primary purpose of scar camouflage?

Scar camouflage uses micropigmentation to blend scars with the surrounding skin, offering a more uniform appearance.

How should I care for my skin immediately after the treatment?

For the first three days, protect the treated area from sunlight, keep it clean, and moisturize with a recommended ointment.

Why is moisturization important after scar camouflage?

Moisturization aids in the healing process, keeps the skin hydrated, and prevents scabbing, ensuring the longevity of the treatment.

What activities should I avoid post-treatment?

Avoid swimming in chlorinated water, using saunas, and engaging in strenuous exercises for the first week after treatment.

Can I pick or scratch the treated area?

No, picking or scratching can lead to scarring and uneven pigment distribution. Let any scabs fall off naturally.

Why should I avoid direct sunlight on the treated area?

Direct sunlight can cause the pigments to fade prematurely, altering the results of the camouflage.

How does chlorine affect the treated area?

Chlorine can bleach the pigments, potentially altering the color of the camouflage, so it’s best to avoid swimming pools for at least two weeks post-treatment.

How long should I limit physical activities after the treatment?

It’s recommended to limit strenuous exercises for the first week post-treatment to ensure the pigments settle well.

Can I use any ointment for moisturization?

It’s best to use the ointment recommended by your technician to ensure proper hydration and healing without adverse reactions.

Why is aftercare crucial for scar camouflage?

Proper aftercare ensures faster healing, prevention of infections, pigment retention, and a natural blend with the surrounding skin.

Permanent Cheek Blush Aftercare

Permanent Cheek Blush Aftercare

Table of Contents

Permanent Cheek Blush Aftercare Guide

Permanent cheek blush, often referred to as blush tattooing or semi-permanent blush, is a popular cosmetic enhancement. Ensuring proper aftercare is essential for the best results and longevity of the blush. This guide provides comprehensive steps for optimal permanent cheek blush aftercare.

Immediate Aftercare Tips

Hands Off!

  • For the first few hours, resist touching the treated area to prevent bacterial contamination.
  • Always ensure your hands are clean before touching your face.

Gentle Cleansing Ritual

  • Use a mild, fragrance-free cleanser to clean the blushed area.
  • Remember to pat dry with a soft cloth, avoiding any rubbing.

Maintaining Your Permanent Blush

Moisturizing is Key

  • Use the aftercare ointment given by your technician.
  • If none is provided, opt for a gentle, fragrance-free moisturizer.
  • Products with acids, retinoids, or strong ingredients should be avoided.

Sun Protection

  • The freshly treated area is sun-sensitive. Direct sun exposure should be avoided for at least a week.
  • To prevent premature fading of the pigment, always apply sunscreen once healed.

Makeup and Permanent Blush

  • Refrain from applying makeup on the treated area for a minimum of one week. This ensures proper healing and prevents potential infections.

Activities to Avoid

Sweat and Permanent Blush

  • Intense workouts or sweat-inducing activities should be avoided for at least 48 hours post-procedure.

Swimming Post-Procedure

  • Pools, saunas, hot tubs, or any water bodies are off-limits for a week to prevent infections.

Exfoliation Alert

  • The treated area should not be exfoliated for at least two weeks to maintain the blush’s vibrancy.

Healing and Recovery

What to Expect

  • Mild redness, swelling, and tenderness are normal post-procedure reactions. These should diminish within a few days.
  • For severe reactions or signs of infection, immediately consult your technician or a medical professional.

The Importance of Follow-ups

  • Scheduled follow-up visits are crucial. They allow the technician to assess the healing and make necessary touch-ups.

Resist Picking or Scratching

  • The healing area may flake or peel. Avoid picking or scratching to prevent scars and uneven pigment.

By adhering to this permanent cheek blush aftercare guide, you can ensure a smooth healing process and enjoy long-lasting, radiant results.

Semi Permanent Eyebrows Aftercare

permanent makeup proud portfolio

What should I avoid touching after the permanent cheek blush procedure?

Avoid touching the treated area for the first few hours to prevent bacterial contamination.

How should I cleanse my face post-procedure?

Use a mild, fragrance-free cleanser and pat dry gently without rubbing.

How long should I avoid makeup after the treatment?

Refrain from applying makeup on the treated area for at least one week.

Are there any activities I should avoid post-procedure?

Yes, avoid intense workouts, swimming, and exfoliating the treated area for specified durations.

What can I expect in terms of healing?

Expect mild redness, swelling, and tenderness which should diminish within a few days.

How important are follow-up visits?

Scheduled follow-up visits are crucial for assessing healing and making necessary touch-ups.

Should I be concerned about sun exposure?

Yes, the treated area is sun-sensitive. Avoid direct sun exposure for at least a week and apply sunscreen once healed.

Can I exfoliate my face after the procedure?

Avoid exfoliating the treated area for at least two weeks to maintain the blush’s vibrancy.

What type of moisturizer should I use post-treatment?

Use the aftercare ointment provided by your technician or a gentle, fragrance-free moisturizer.

How can I prevent scars or uneven pigment?

Resist the urge to pick or scratch the healing area to prevent scars and uneven pigment distribution.

scalp-micropigmentation-smp-aftercare dubai

Scalp Micropigmentation Aftercare

Table of Contents

Comprehensive Guide to Scalp Micropigmentation Aftercare

Scalp Micropigmentation (SMP) is a revolutionary procedure that offers a solution for people experiencing hair loss. However, like all cosmetic procedures, the results are significantly influenced by how well you care for the treated area afterward. Here’s a detailed guide to ensure the longevity and vibrancy of your SMP treatment.

Immediate Aftercare: The First 4 Days

  • Days 1-3: It’s crucial to let your scalp heal. Refrain from washing your head or engaging in activities that induce sweating, such as gym workouts or visits to saunas and beaches.
  • Day 4: You can start washing your scalp using only water. Begin the moisturizing routine to prepare your scalp for the next session.

Daily Care for the First Week

  • Cleansing: Use a gentle facial cleanser to keep the treated area clean.
  • Moisturizing: Ensure your scalp remains hydrated daily. A well-moisturized scalp can significantly enhance the appearance of the pigmentation.

Activities to Avoid for the First Month

  • Sun Exposure: Direct exposure to the sun can fade the pigmentation. Always use proper sun protection for your scalp.
  • Swimming & Saunas: Stay away from chlorinated pools, salt water, and saunas. These can interfere with the healing process and affect the pigment’s appearance.
  • Excessive Sweating: Activities that cause heavy sweating should be avoided. Sweating can lead to the secretion of salts, which can fade the pigmentation.

Long-Term Care Guidelines

  • Sun Protection: Always protect your scalp from direct sunlight to maintain the vibrancy of the pigmentation.
  • Avoid Alcohol-Based Products: Cosmetics and products with high alcohol content can fade the pigmentation. Opt for alcohol-free alternatives.
  • Exfoliation: Use an exfoliating cleanser regularly to keep your scalp in top condition.
  • MRI Scans: If you’re considering an MRI scan, inform your doctor about your SMP treatment.
  • Blood Donation: Inform the National Blood Service about your treatment, as there might be a waiting period before you can donate.

In conclusion, proper aftercare is paramount to achieving the best results from your Scalp Micropigmentation treatment. By following these guidelines, you can enjoy the benefits of your treatment for years to come.

Semi Permanent Eyebrows Aftercare

permanent makeup proud portfolio

What is the immediate aftercare for Scalp Micropigmentation?

For the first three days post-treatment, avoid washing the scalp and activities that induce sweating. By day four, you can gently wash with water and start moisturizing.

What is the recommended daily care routine during the first week?

During the initial week, cleanse the treated area with a gentle facial cleanser and maintain daily hydration to enhance the pigmentation’s appearance.

Which activities should be avoided after the treatment?

For the first month, protect the scalp from direct sunlight, avoid swimming in chlorinated pools and saunas, and refrain from activities causing excessive sweating.

How should I care for my scalp in the long term?

Always use sun protection, opt for alcohol-free cosmetic products, exfoliate regularly, and inform medical professionals about your SMP treatment when necessary.

Can I use any facial cleanser on the treated area?

It’s recommended to use a gentle facial cleanser to keep the treated area clean without causing irritation.

Is sweating harmful after the treatment?

Yes, excessive sweating can lead to the secretion of salts which can fade the pigmentation. It’s best to avoid heavy sweating activities for the first month.

Why should I avoid alcohol-based products?

Cosmetics and products with high alcohol content can fade the pigmentation. It’s best to opt for alcohol-free alternatives.

How often should I exfoliate my scalp?

Regular exfoliation is recommended to keep your scalp in top condition. However, the frequency can vary based on individual skin types and needs.

Do I need to inform my doctor about the SMP treatment before an MRI scan?

Yes, if you’re considering an MRI scan, it’s essential to inform your doctor about your Scalp Micropigmentation treatment.

Can I donate blood after the SMP treatment?

You should inform the National Blood Service about your treatment, as there might be a waiting period before you can donate.

bb glow aftercare

BB Glow Aftercare: Protecting Your Radiant Skin

bb glow aftercare

Table of Contents

BB Glow Aftercare: Protecting Your Radiant Skin

You’ve made the empowering decision to gift yourself the wonders of BB Glow. The anticipation, excitement, and promise of radiant skin – it’s a transformative journey indeed! But like any cherished treasure, it demands care. And with BB Glow, the aftercare is paramount to bask in its long-term luminance.

Introduction to BB Glow

What is BB Glow?

BB Glow, an innovative and non-surgical treatment, offers a fusion of microneedling and a special tinted serum application. The results? Diminished freckles, harmonized skin tones, and an overall youthful glow. But the true magic lies in the duo – the microneedling pen, a collagen-boosting magician, and the BB glow serum, the potion of radiance.

Key Benefits of BB Glow

Beyond offering you an even skin tone, BB Glow is the key to:

  • Less visible wrinkles.
  • A bright, semi-permanent skin tint.
  • Rejuvenated skin.

Preparing for BB Glow Treatment

Steps to Prepare

  • Bid adieu to Retin-A products at least 10 days prior.
  • A 6-month gap from Accutane is a must.
  • Hold off any autoimmune therapies 12 hours before diving in.
  • Botox? A no-go two weeks before the treatment.
  • Shield your skin from the sun the day before.
  • March in with a makeup-free, pristine face.

Why Preparation is Crucial

Preparation is more than a ritual; it’s the foundation for optimum results. It ensures your skin is in the right state to receive and magnify the treatment’s effects.

Comprehensive BB Glow Aftercare Tips

Initial 24 Hours

Hold off that face wash and ditch any cosmetic application.

12-72 Hours Post-Treatment

Say hello to mineral makeup, gentle cleansers, hyaluronic acid serums, and don’t forget, SPF is your BFF.

Beyond 72 Hours

It’s reunion time with your cherished skincare routine! Products boasting Retinol? They’re your new besties.

Things to Avoid Post BB Glow Treatment

Lifestyle Precautions

For a glow that stays, remember:

  • Makeup, not before 3 days.
  • Sunbathing & sunbeds? Cross them off the list.
  • Keep your skincare scent-free.
  • Neutral water temperature for showers & baths for the next 48 hours.
  • Spicy dishes and seafood get a 3-day break.
  • Retinol and Vitamin C products – a hiatus for 8 weeks.
  • Always, ALWAYS, sport a moisturizing cream with SPF 30 or more.

Maintaining Results

For a glow that’s not just a fling but a long-term relationship, aftercare is the secret. Your efforts in the post-treatment phase determine the longevity and quality of your BB Glow results.

Conclusion and Lasting Benefits of BB Glow

BB Glow isn’t just a treatment; it’s an experience. One that promises and delivers radiant skin. But the post-treatment care is the bridge to that lasting radiance. By honoring the BB Glow aftercare rituals, you’re not just protecting your skin but cherishing a gift you’ve given yourself.

Semi Permanent Eyebrows Aftercare

permanent makeup proud portfolio

With proper aftercare, the effects can last for several months. Regular touch-ups can extend this period.

Mostly, yes. However, always consult with a skincare professional to ensure it’s right for you.

It’s best to wait for at least 3 days before applying makeup.

For optimal results, consider getting touch-ups every few months.

No major downtime is required, but it’s crucial to follow the aftercare tips for best results.

saline tattoo removal

Saline Tattoo Removal Aftercare

eyebrow SALINE TATTOO REMOVAL AFTERCARE

Saline Tattoo Removal Aftercare

Understanding Saline Tattoo Removal

Saline tattoo removal is a popular method for fading and eliminating unwanted tattoos. This technique involves the use of a saline solution, which is carefully applied to the tattooed area to gradually extract the ink from the skin. Unlike laser removal, saline tattoo removal is known for being less painful and more skin-friendly, making it a preferred choice for many.

Immediate Aftercare Post-Procedure

First 48 Hours: Initial Care

  • Gently Cleanse: After the procedure, it’s crucial to gently cleanse the area with a mild, fragrance-free soap. Pat the area dry with a clean towel.
  • Apply Healing Ointment: Use a recommended healing ointment to keep the area moist. This aids in the healing process and prevents scabbing.
  • Avoid Water Immersion: Keep the treated area away from prolonged water exposure. Short showers are permissible, but avoid baths, swimming pools, or hot tubs.

First Week: Preventing Infection

  • Daily Cleaning: Continue to clean the area daily with mild soap.
  • Ointment Application: Apply the healing ointment as directed to maintain moisture.
  • Avoid Touching: Minimize touching the area to prevent the risk of infection.

Long-Term Aftercare and Healing

Weeks 2-4: Monitoring and Maintenance

  • Scabbing and Itching: Scabbing is a normal part of the healing process. Do not pick or scratch the scabs as this can lead to scarring.
  • Moisturize: Keep the area moisturized with a fragrance-free lotion to alleviate itching.
  • Sun Protection: Protect the area from direct sunlight. Use a high SPF sunscreen if exposure is unavoidable.

Beyond 4 Weeks: Ensuring Optimal Results

  • Regular Moisturizing: Continue to moisturize the area to aid in healing and comfort.
  • Avoid Harsh Chemicals: Steer clear of products with harsh chemicals or exfoliants on the treated area.
  • Follow-up Sessions: If additional sessions are needed, follow the same aftercare routine post each session.

Tips for Effective Healing

  • Stay Hydrated: Drinking plenty of water helps in the skin’s healing process.
  • Healthy Diet: A balanced diet rich in vitamins and minerals supports skin repair.
  • Avoid Smoking: Smoking can delay healing and should be avoided during the recovery period.

Potential Side Effects and How to Address Them

  • Redness and Swelling: Mild redness and swelling are common. Use a cold compress to reduce discomfort.
  • Infection Signs: If you notice excessive redness, swelling, or discharge, consult your technician immediately.
  • Color Changes: Some color changes in the skin are normal but consult your technician if you have concerns.

Conclusion

Proper aftercare following saline tattoo removal is crucial for effective healing and optimal results. By following these detailed guidelines, individuals can ensure a smoother recovery process and better overall outcomes. Remember, patience and diligent care are key to successful tattoo removal and skin health.

Semi Permanent Eyebrows Aftercare

permanent makeup proud portfolio

What is saline tattoo removal?

Saline tattoo removal is a method for fading and eliminating tattoos using a saline solution. It’s less painful and more skin-friendly compared to laser removal.

How do I care for my skin immediately after saline tattoo removal?

Immediately after the procedure, gently cleanse the area with mild soap, apply a recommended healing ointment, and avoid water immersion.

What should I do in the first week after saline tattoo removal to prevent infection?

In the first week, continue daily cleaning with mild soap, apply healing ointment as directed, and avoid touching the area to minimize infection risk.

How should I manage scabbing and itching during the healing process?

Manage scabbing and itching by keeping the area moisturized with a fragrance-free lotion and avoiding scratching or picking at scabs.

Is sun exposure safe after saline tattoo removal?

Avoid direct sun exposure on the treated area. If unavoidable, use a high SPF sunscreen to protect the skin.

Can I take a bath or swim after saline tattoo removal?

Avoid baths, swimming pools, and hot tubs for a specified period post-procedure to prevent water immersion and reduce infection risk.

What are the signs of infection I should watch for after the procedure?

Watch for signs of infection such as excessive redness, swelling, or discharge, and consult your technician if these symptoms occur.

How long does the healing process take after saline tattoo removal?

The healing process can vary but typically takes several weeks. Follow-up care and additional sessions may be required for optimal results.

Can I use makeup to cover the treated area during the healing process?

It’s advisable to avoid applying makeup on the treated area until it has fully healed to prevent irritation and infection.

Is saline tattoo removal suitable for all skin types?

Saline tattoo removal is generally suitable for all skin types, but a consultation with a professional is recommended to assess individual suitability.

Book your saline tattoo removal here.

Permanent Brows Aftercare

Permanent Eyebrows Aftercare

Permanent Brows Microblading Aftercare

Permanent Eyebrows Aftercare

What to expect immediately following your brow procedure:

You made it! Celebrate by sleeping in a little longer each day and enjoying your newfound free time. To preserve your completely healed results; apply sunscreen regularly, hats and larger sunglasses are encouraged, and avoid over-exposure to the sun. Chlorine, glycol acid, microdermabrasion, and other cosmetic products can lighten the pigment with repeated use. 

When getting any procedures, whether it be cosmetic or not, done to your face please let the individual performing the service know about your brows and continue at your own discretion. We are not responsible for any changes made to your brows in reaction to any additional services you may receive.

The intensity should regress within 3-4 days. The sensation can be comparable to that of a slight burn and minimal scabbing and/or flaking may take place. Refrain from removing the scabs/flakes as you may run the risk of removing pigment in the process. It’s very important to keep the brows hydrated with a tiny amount of Vaseline starting from the 3rd day onwards. The true vibrancy of your cosmetic tattoo will fade about 30-40% from what you walked out with revealing a soft and natural brow tone.

THINGS TO REMEMBER WHILE BROWS ARE HEALING:

  • Keep your brows dry on the first and second days of the  procedure 
  • Moisturize brows with a tiny amount of Vaseline starting from the 3rd day onwards
  • Avoid hot, spicy, and salty foods as they may cause added irritation
  • Do not pick or scratch the brows as it may lead to a loss of pigment and/or scarring
  • Placing cosmetic products on unhealed brows is heavily discouraged
  • The texture is normal and is often experienced in the first few days of healing
  • Alcohol is strictly forbidden for the following 3-5 days
  • Coffee is not recommended for 24 hours after brows treatment. It makes blood pressure high which is not good for the healing process
  • Avoid large bodies of water, direct sun exposure, and rubbing
  • Refrain from all medications that cause thinning of the blood including but not limited to Aspirin, Advil, Aleve, Niacin, Fish Oil, Vitamin E, and Ibuprofen. Please consult your physician before taking any medication
  • Refrain from suntanning, microdermabrasion, derma planning, laser treatment, and chemical peels 7-10 days after receiving brow procedure
  • Avoid exercising and sweating with unhealed brows for the first 3 days
  • Avoid Bath submersion or over-exposure to shower water with unhealed brows in the first 10 days
Semi Permanent Eyebrows Aftercare

permanent makeup proud portfolio

14 days+

  • No hot sauna, no swimming, no hot bath/shower, no sunbathing, no tanning salons. No facial massages, facials, waxing, threading, laser, or skin treatments.
  • Do not expose the area to dirty or unsanitary conditions. Try to avoid being in dusty places.

30 DAYS

  • Avoid sun/UV rays, sunbathing and pool activities.
  • Wear a hat/cap for additional protection.
  • Applying sunscreen to the treated area may help prevent fading.
  • Following all aftercare instructions will help you to archive the best results.

THERE MUST BE A MINIMUM 4-6 WEEKS PERIOD BETWEEN THE SESSIONS TO ENSURE THE BEST-HEALED RESULT.

Lip Blush aftercare permanent

Lip Blush Aftercare

Lip Blush Aftercare

LIP BLUSH AFTERCARE

What to expect immediately following your Lip Blush procedure:

Intensified color and swelling are part of the initial stages of healing. Be patient. Do not freak out!

The intensity should regress within 3-4 days. The sensation can be comparable to that of a slight burn and minimal scabbing and/or flaking may take place. Refrain from removing the scabs/flakes as you may run the risk of removing pigment in the process. It’s very important to keep the lips hydrated with a tiny amount of Vaseline starting from the 3rd day onwards. The true vibrancy of your cosmetic tattoo will fade about 30-40% from what you walked out with revealing a soft and natural blush tone.

Things to remember while the lip blush is healing:

  • Keep your lips dry on the first and second days of the Lip Blush procedure 
  • Hydrate lips with a tiny amount of Vaseline starting from the 3rd day onwards
  • Use a straw while drinking. Avoid too hot or too cold drinks
  • Avoid hot, spicy, and salty foods as they may cause added irritation
  • Do not pick or scratch the lips as it may lead to a loss of pigment and/or scarring
  • Placing cosmetic products on unhealed lips is heavily discouraged
  • The texture is normal and is often experienced in the first few days of healing
  • Alcohol is strictly forbidden for the following 3-5 days
  • Coffee is not recommended for 24 hours after Lip Blush. It makes blood pressure high which is not good for the healing process
  • Avoid large bodies of water, direct sun exposure, teeth whitening, rubbing, and smoking
  • Refrain from all medications that cause thinning of the blood including but not limited to Aspirin, Advil, Aleve, Niacin, Fish Oil, Vitamin E, and Ibuprofen. Please consult your physician before taking any medication
  • Refrain from suntanning, microdermabrasion, derma planning, laser treatment, and chemical peels 7-10 days after receiving Lip Blush
  • Avoid exercising and sweating with unhealed lips for the first 3 days
  • Avoid Bath submersion or over-exposure to shower water with unhealed lips in the first 10 days

hoW to prepare for lip blusH

Clients who have experienced a cold sore in or around the mouth MUST take Valtrex/ Zovirax on the day and 2 days after receiving this treatment. Failure to follow these instructions can risk an outbreak that can affect the healed result.

Lip fillers must be done at least 2 weeks prior to scheduling this service. Failure to disclose this information may result in a negative outcome.

Semi Permanent Eyebrows Aftercare

permanent makeup proud portfolio

first 14 days after lip blush tattoo

  • No hot sauna, no swimming, no hot bath/shower, no sunbathing, no tanning salons. No facial massages, facials, waxing, threading, laser, or skin treatments.
  • Do not expose the area to dirty or unsanitary conditions (dirty masks). Try to avoid being in dusty places.

THERE MUST BE A MINIMUM 4-6 WEEKS PERIOD BETWEEN THE SESSIONS TO ENSURE THE BEST-HEALED RESULT.

Read more about lip blushing in our blog or book your appointment today!

Dark Lip Whitening Neutralization After Care

Dark Lip Neutralization Aftercare

Dark Lips Nutralization permanent makeup after care 2

AFTERCARE INSTRUCTIONS FOR DARK LIP NEUTRALIZATION TREATMENT

Dark Lips Enlightenment post-care is very important to the appearance and longevity of your new lips. Please read the following aftercare instructions carefully:

YOU CAN NOT BE EXPOSED TO THE SUN DURING THE HEALING PROCESS. AROUND THE SECOND WEEK OF HEALING THE LIPS WILL APPEAR DARKER THAN THE ORIGINAL STATE THEY WERE IN.

Day 1:

  • Two hours after the procedure gently wash the treated area with warm water and antibacterial soap, and gently dry it by using tapping movements. Repeat it after 2 hours. Completing that, NO water or other cleansers of any kind can be used for any reason for 5 days.
  • Swelling is normal after the procedure. You can experience more swelling than others depending on individual body reactions. Swelling will go down from a couple of hours to 48 hours. Be patient. 
  • DO NOT EAT FOR 4 HOURS FOLLOWING THE PROCEDURE. If you are hungry, you can carefully drink a smoothie using a straw.
  • Do not drink anything that would stain the colour of your lips (red wine, cherry juice, pomegranate juice, etc.
  • No smoking of any kind.  

A very thin layer of Vaseline, Aquaphor, Hustle butter, or Laneige should be applied consistently throughout the day to the treated area using a fresh Q-tip. Applying too much moisturizer can lead to fading, so a super thin layer goes a long way. This will keep the area moist and accelerate the healing process. Do not let the area dry out and crack, keep it moist at all times. Do not press or rub when applying it. Apply a thicker coat of moisturizer to the treated area only before showering, bathing, brushing teeth, and washing adjacent areas. Do not use toothpaste when brushing your teeth on the first day. After that, when brushing teeth, use a minimal amount of toothpaste (for 5 days). Toothpaste and mouthwash are considered“soap” and will remove the lip colour.

Semi Permanent Eyebrows Aftercare

permanent makeup proud portfolio

FIRST 7 DAYS:

  • Do not touch, bite, lick, pick, peel, tamper, scratch, rub, injure or remove the peeling in any way, if you do, you will experience a loss of color. Let the skin naturally go through its own exfoliating and recovery process.
  • Do not let any water, lotion, soap, or makeup touch your lips.
  • Use a straw when drinking ANY liquids; avoid biting into foods that might cause friction to the lips. Cut foods into small bite-sized pieces when eating.
  • NO SPICY OR SUPER-HOT FOODS AND DRINKS.
  • No foreign body fluids.
  • No physical activity that can cause extreme sweating.
  • Do not use any lipstick or makeup on or near the treated area.

14 days+

  • No hot sauna, no swimming, no hot bath/shower, no sunbathing, no tanning salons. No facial massages, facials, waxing, threading, laser, or skin treatments.
  • Do not expose the area to dirty or unsanitary conditions (dirty masks). Try to avoid being in dusty places.

30 DAYS

  • Do not use products containing alcohol, tonics, or tonics based on lactose and fruit acids, retinol acids, and glycolic acids in the treatment area.
  • No injections/fillers for 30 days after the Lip Blush procedure.
  • Stay completely away from the sun. Use chapstick with SPF 50 after your lips are fully peeled off the scab.

THERE MUST BE A MINIMUM 4-6 WEEKS TO 5-6 MONTHS PERIOD BETWEEN THE SESSIONS TO ENSURE THE BEST-HEALED RESULTS.

Read more about dark lip neutralization in our blog or book your appointment today!

Microblading Aftercare

Microblading Aftercare

Microblading Aftercare

Microblading Aftercare Instructions

The microblading process is similar to a brow tattoo, in which there is an aftercare period during which strict guidelines must be followed. It takes time for your skin to heal and most clients experience patchy areas or fading after their first treatment. As microblading is a two-part procedure, the second touch-up treatment will complete the procedure, and, after healing, you will see the finished result. 


Please read all aftercare instructions on this page to make sure you are committed to this brow journey, especially the first 10 days. Your brows’ healing outcome is greatly influenced by the way you care for them.

NO MOISTURE! NO WATER! NO SWEAT! NO SUN! For 10 days.

A “Do Nothing” or “Dry Healing” method produces the best results. You will get the best results if you keep your brows extremely DRY for the next 10 days! You can preserve more detail, color, and crispness by keeping them dry. Although it sounds tricky, it is possible if you are mindful.

  • During the first 48 hours, clean your eyebrows 2-3 times with fragrance-free baby wipes. Vaseline should only be used when your eyebrows feel tight or dry. The layer should be applied in one direction very thinly. That’s it for the next 10 days!
  • Wash your hair carefully and keep your face as dry as possible while keeping your face out of the shower stream. In case they get wet, have clean, dry paper towels on hand to pat them dry. In addition, keep showers brief, since too much steam can damage brows. Hair and eyebrows can be covered by shower caps if you like.
  • Whenever you wash your face, avoid splashing water on it like we normally do. Use a paper towel or fragrance-free baby wipes to soak the brows AROUND the brows, making sure they remain dry and clean.
  • Wait at least 10 days before applying any cosmetics to your brows. The result will be damaged and ruined. You need to be patient!
  • During the first 10 days following the procedure, you should avoid heavy exercise and sweating. This is crucial if you want to retain color and detail.
  • It should not take more than 10 days for you to be able to wash your face normally, including your brows, with a gentle face wash like Cetaphil.
Semi Permanent Eyebrows Aftercare

permanent makeup proud portfolio

DURING THE FIRST 10 DAYS, AVOID:

  • Creams of all kinds 
  • Makeup (foundation) around the eyebrow area
  • Exercises that cause a lot of sweating
  • Sauna
  • Massage and steaming of the face – inhalation

IN THE NEXT 30 DAYS, PLEASE AVOID:

  • Taking a sunbath
  • Using a solarium
  • Light therapies
  • AHAs, BHAs, chemical peelings
  • Fruit acids
  • Microdermabrasion
  • Creams that contain regeneration factors
  • Treatment with lasers over the treated area (e.g. Fraxel Laser, IPL) – because they can destroy the pigment and cause burns
  • Treatment with antibiotics and hormones.

WHAT TO EXPECT AFTER MICROBLADING

  • You will notice that the tattooed area appears darker and bolder in color, more sharply defined, or even more filled in after your procedure. Healing can take up to a week after the treatment.
  • Scabs, flaking, or peeling of the skin may occur during the initial healing phase. Scabs or dry skin should be allowed to come off naturally rather than picked. This is very important! Scabs that come off prematurely will lose their pigment!
  • It takes between 4-6 weeks for the tattoo to heal completely, at which point the true color becomes apparent. Your tattoo will become softer and lighter during this process. Even if you think there is too much color loss, your skin is still regenerating and naturally exfoliating.

MICROBLADING HEALING PROCESS

A MICROBLADED BROW GOES THROUGH MULTIPLE PHASES WHILE HEALING!

  • Day 1 – very little to no redness, finely detailed
  • Day 2-4 – They become darker and more filled-in looking as they form a light protective layer or scab. This is only temporary- don’t panic!
  • Day 5-12– the protective layer naturally exfoliates, peels and flakes away over the course of several days as your skin heals underneath it. The freshly healed skin is white and has a waxy coating, making it appear that the brows are too light. Be patient!
  • Day 10-30 – After 10 days you may use brow makeup very gently if you need it. The color will slowly come back to life and bloom back to the surface as that new, white skin settles in and heals. Wait at least 4 weeks to see the true color, as it will take on new strength. Your second appointment is to tighten up your shape, touch up any light spots, and also to assess how your skin reacts to the process and the chosen color.
  • This is a two-step process. The brows look really finished after the 2nd appointment. 

WHAT NOT TO DO AFTER MICROBLADING

  • You may shower or bathe normally, but avoid getting any harsh soaps, shampoos, or water on them as this can be detrimental to the bonding process that must take place for the pigment to stabilize in the dermis.
  • DO NOT pick or scratch at the dry skin/flakiness; let the skin fall off naturally. Picking can cause scarring and premature loss of pigment. IMPORTANT: Once the flakes have fallen off, a shiny layer of healing skin will completely cover the hair strokes. It may appear as though the tattooed area has completely disappeared. This is just new skin forming. Within 1-2 weeks, the hair strokes will slowly reappear at a lighter shade as your skin regenerates.
  • DO NOT apply make-up to the tattooed area for the first 10 days. Cosmetics of any kind may interfere with the healing and color of your tattoo. After 10 days it’s fine if you need to gently apply makeup to any light spots.
  • DO NOT bleach, tint or dye the tattooed area for one month following the procedure.
  • DO NOT apply any anti-acne products (e.g. Benzoyl Peroxide, Salicylic Acid, Proactiv, etc.) or lightening creams (skin bleaching creams) such as hydroquinone to the treated area while healing.
  • No anti-aging products or facial products containing Alpha Hydroxyls (AHAs), Retin-A, Lactic or Glycolic Acids
  • Do not thread, wax, or use hair removal products on the treated area while healing. You may after 3-4 weeks.
  • NO exercising and/or excessive sweating one day prior to getting tattooed and for 10 days after. Heavy sweating will cause the hair strokes to blur and detail to be lost.
  • NO Sun exposure, swimming pools, jacuzzis, saunas, or other bodies of water for two weeks.
  • Do not soak your face underwater in a bathtub or allow the shower to spray directly on your face for two weeks.

ONCE MICROBLADING HEALED

  • Exposure to the sun over time can cause fading and discoloration of the pigment. Once completely healed, we recommend applying sunscreen daily on the treated area. Wear large sunglasses and a hat for further protection. Rinse and dry the area thoroughly when in contact with chlorine.
  • Glycolic acid, retinol, AHA’s, anti-aging lotions and serums, microdermabrasion, chemical face peels, and laser treatments must be kept away from the tattooed area as continued use could lighten or discolor the pigment.
  • If you are having laser resurfacing or laser hair removal after your tattoo has healed, please inform the laser technician. Continue at your own discretion. Laser procedures may darken, lighten, or discolor the tattooed area.
  • Once the treated area is completely healed, any changes or additions that need to be made can be done at your follow-up appointment no sooner than 6-8 weeks later. It takes about 4 weeks for the brow area’s skin cells to completely regenerate and settle in.
  • There are no implied or written guarantees if you do not take care of your tattoo, and everyone will heal a little differently.

Read more about microblading in our blog or book your appointment today!