ESSENTIAL STEPS TO ACHIEVE A SHARP AND TAILORED BROW SHAPING
A brow shaping is carefully done by two popular methods – hair removal and hair clipping; both of these methods are used the achieve a perfect look when it comes to personal grooming. For women, eyebrow shaping is a commonly experienced technique. Although males can shape their eyebrows too, women are more interested in achieving a perfect sharp look of their eyebrows that fits with the shape of their face and looks attractive to the public; a lot of methods and techniques are applied in salons for eyebrow shaping and is often practised by women themselves if they become a pro in this act. Regarding eyebrows, it’s about finding the right shape and symmetry that fits exactly how you imagine your face to look.
No matter what, one should always embrace natural brows first to get perfectly shaped ones. Stray hairs need maintenance and regular plucking from time to time, even if you choose to have a natural-looking entire eyebrow, as it helps you achieve a refined and neat look.
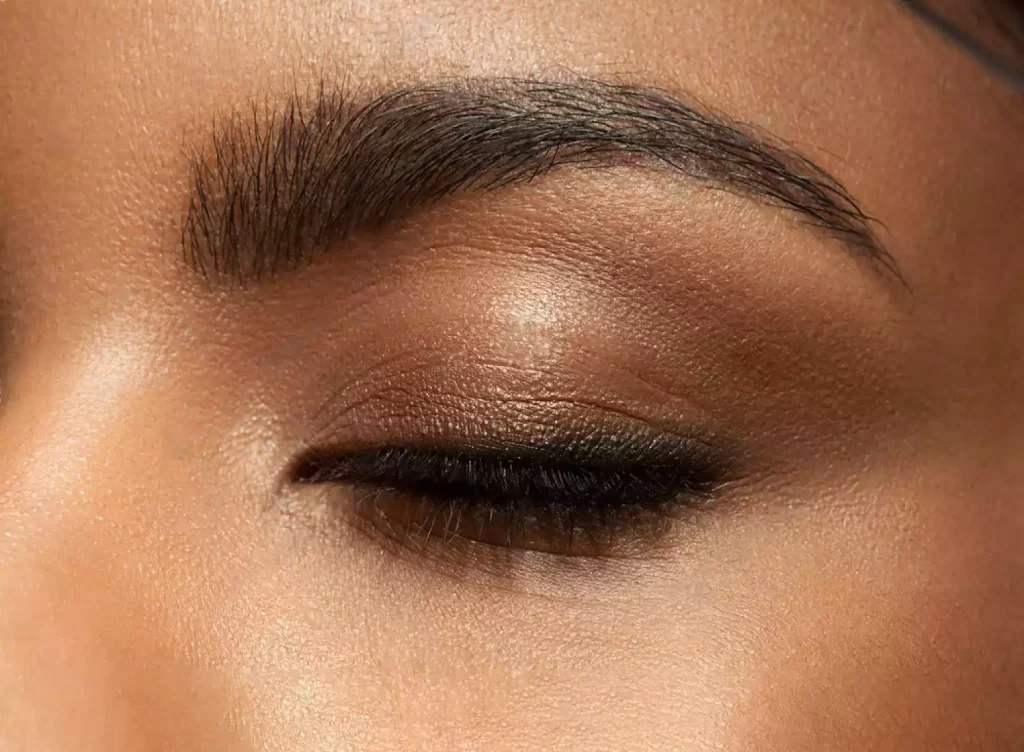
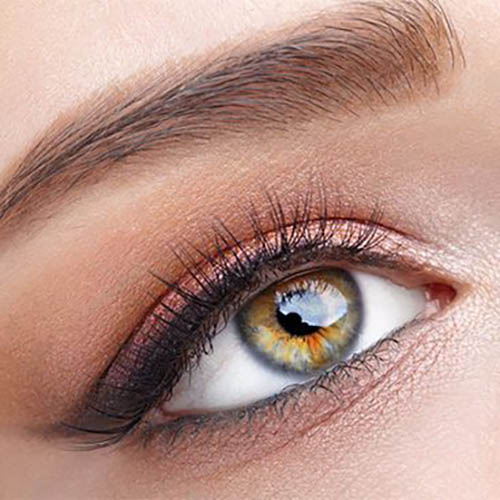
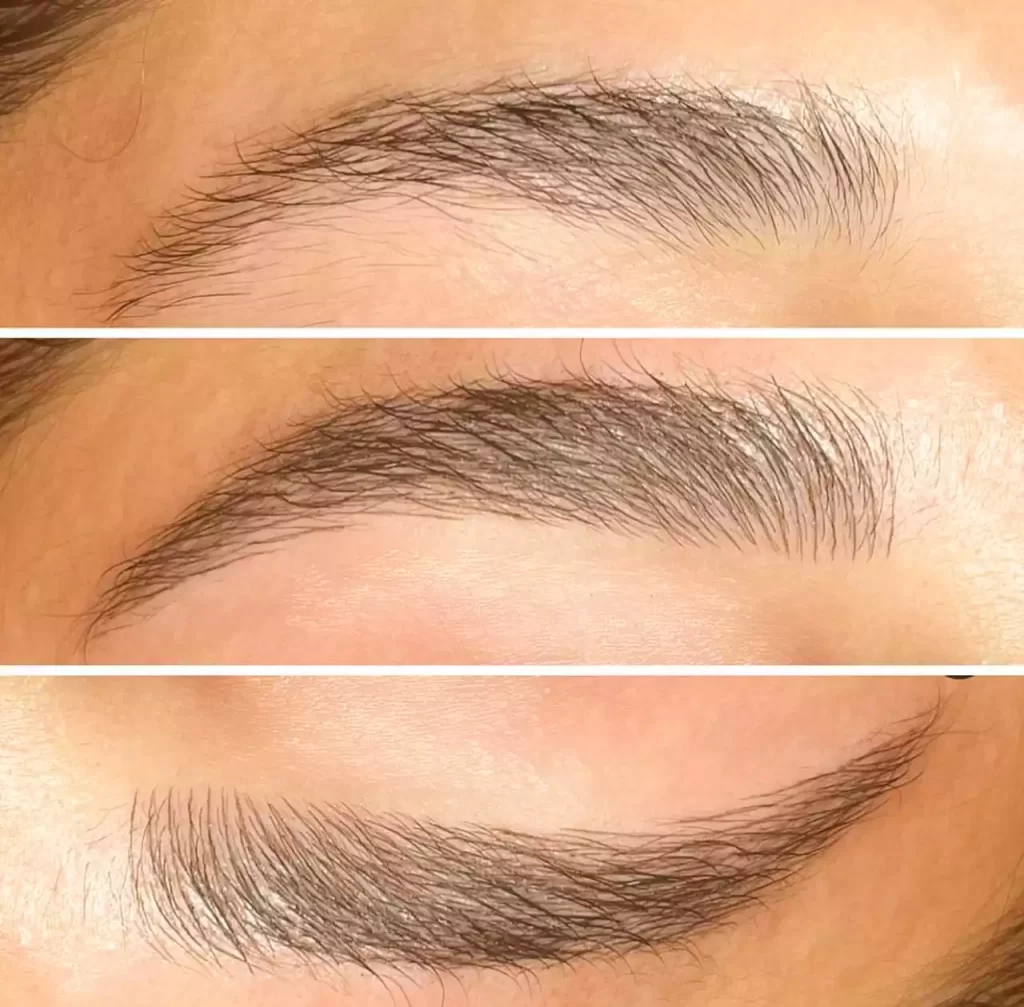
• Eyebrows that are a little bent or curved. Girls with pointed features and brows, like eyebrows with a slight natural bent or a little rounded, look better with them and need to maintain the arch just like it is, so it doesn’t look rough and the shape is not lost.
• Straighter variety. Straight brows might have a very slight arch, sometimes not even that. Just by little brushing, straight eyebrows look a lot better and refined, but maintenance is always needed and a little experimentation to make them look more attractive while not destroying their original shape.
Appropriate equipment or tools are used for the process of eyebrow shaping. The best quality and adequately functioning tools are on top while shaping the eyebrows, and of course, a perfectionist handles eyebrows with care.
Best quality tweezers with high sharpness
While there are many methods to shape the eyebrows, tweezing is still on top and is the most popular and easy to use, especially when plucking out stray hair. Hair is ideally removed from the root when you are tweezing, and there are higher chances of very slow regrowth of hair once you tweeze them. When using razors, waxing and threading give a lot of pain and discomfort to your eyebrows as it causes the skin to badly expand, although it’s simple and quick to use. Many other disadvantages include broken hair that is hard to touch and damaging the hair follicles. One should take care of the tiniest details so a perfect shape is achieved without damaging the area. That’s why tweezers are always recommended.
A spoolie brush
Messed hair totally ruins the shape of eyebrows, seems very unattractive in public, and also makes a beautiful face look ugly just because the eyebrow isn’t brushed properly, so a spoolie brush is a way to go. An ideally brushed look of the eyebrow will make you look gorgeous beyond everything.
A pair of brow scissors that are both tiny and sharp
Appropriate scissors that are sharp and easy to hold are the most important. Blades must be long enough to cut repeatedly according to the use. Otherwise, you will stop chopping after every second, putting your eyebrow in lousy shape. Scissors aren’t used a lot in this process, only where necessary, so make sure you grab the right one and handle it with extreme care.
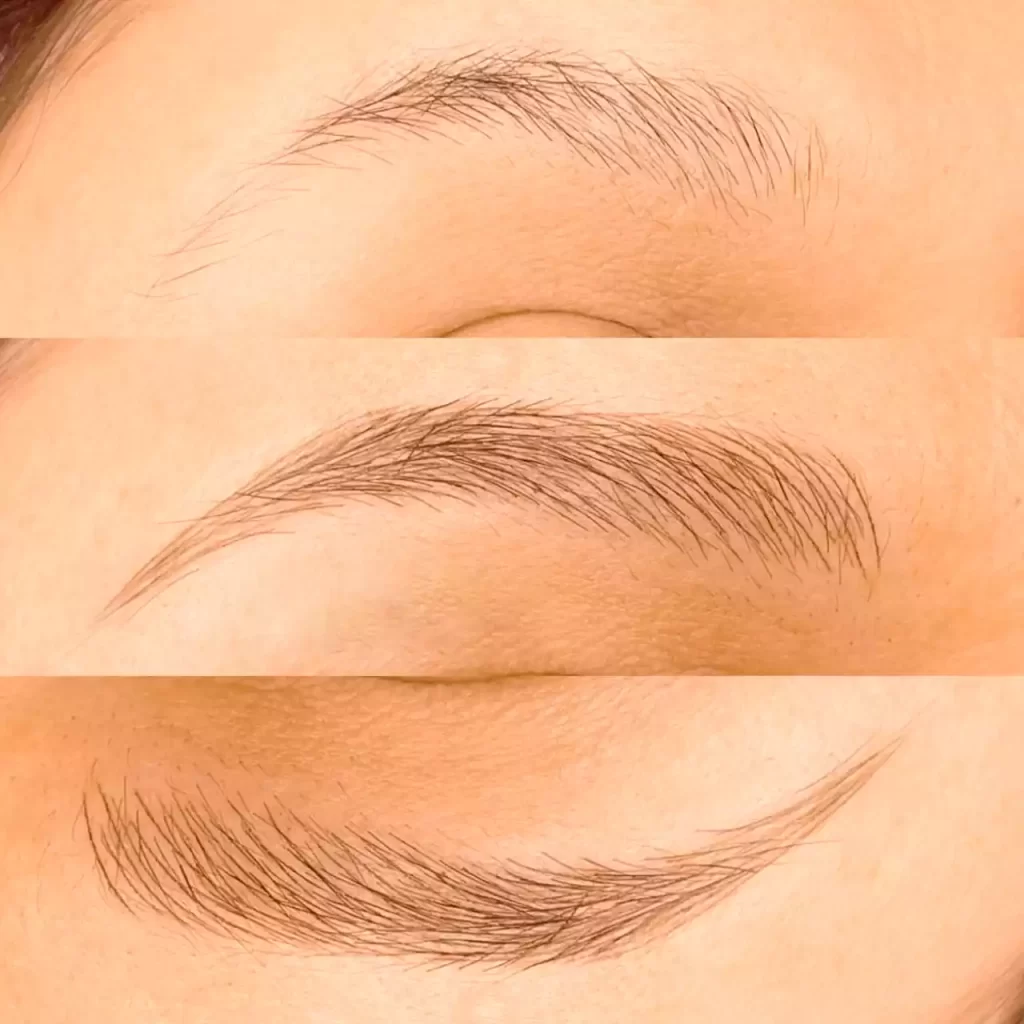
3 essential steps that can help you achieve a sharp and tailored look
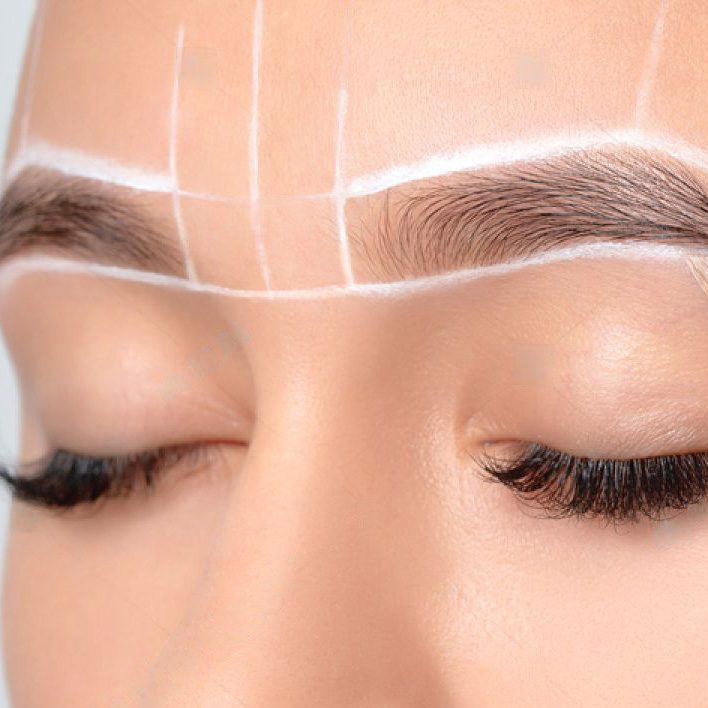
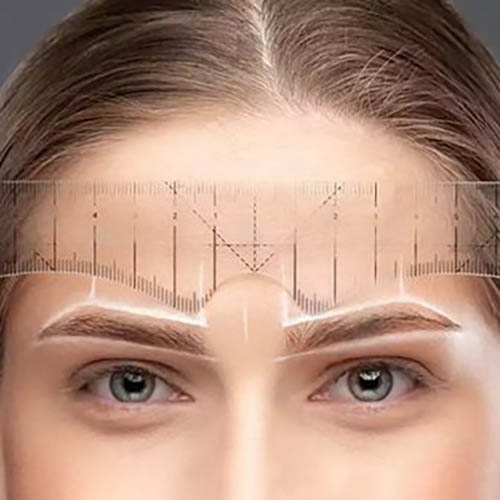
First, look in the mirror and see whether you have any excess hair.
Grab the last point of tweezers and place it in front of your brows; look at the peak of your brows and make the angle of the tweezers following that.
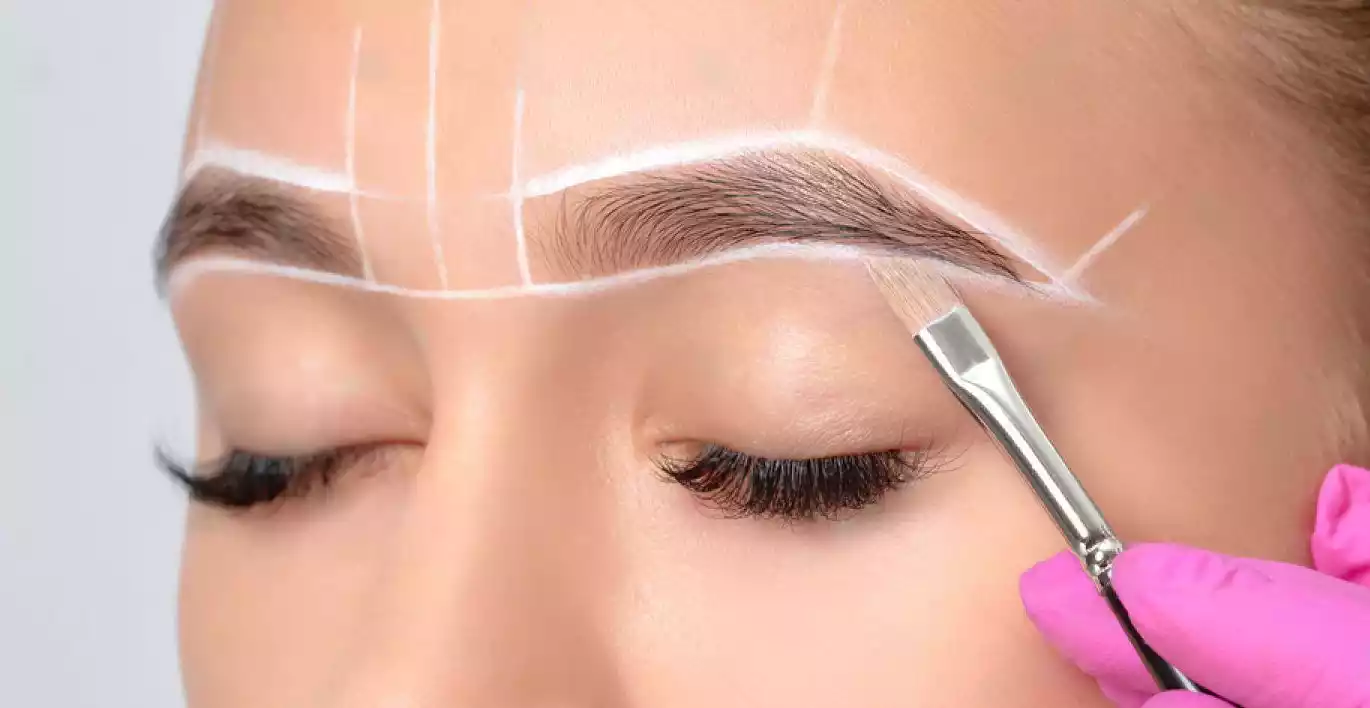
Once you are done with the mapping process, trim the stray hair from the top of your eyebrows that is not in the symmetry and seems unwanted to you.
Avoid pushing and pulling and consider just trimming the absolute ends with scissors; keep your spoolie brush with you to do it more appropriately, and keep brushing the eyebrows.
Tweezing is the second step.
Once you find the angle and map, see what hairs fall out of the map and tweeze them. There is no need for additional treatment for your eyebrows. Make sure you like the look and shape it according to your taste. After all, it is just the best version of the eyebrows that already exist. All you need is trim a few stray hairs that come in the way of making your eyes look perfect. Try not to use a magnifying mirror as it shows too much information that is just a prank and making you a fool.
Finally, to maintain a natural appearance, try filling the brows up
Start with filling the middle of your eyebrows, don’t use too much pressure when applying the product to fill your eyebrows, so you don’t put too much strain on it.
Draw a line with an eyeliner from the top and bottom to achieve the desired look. Add colour or gel according to your taste but don’t overdo it. Fill your eyebrows using an eyebrow pencil or powder. Pick a brow colour of your own choice, and then fill in the brows where you believe it’s needed. Take before and after pictures to help you compare. There is no harm in doing last-moment changes until you achieve the desired look.
Note: Don’t try to tweeze all hair at once. Try tweezing only one at a time, so you don’t destroy the overall look.
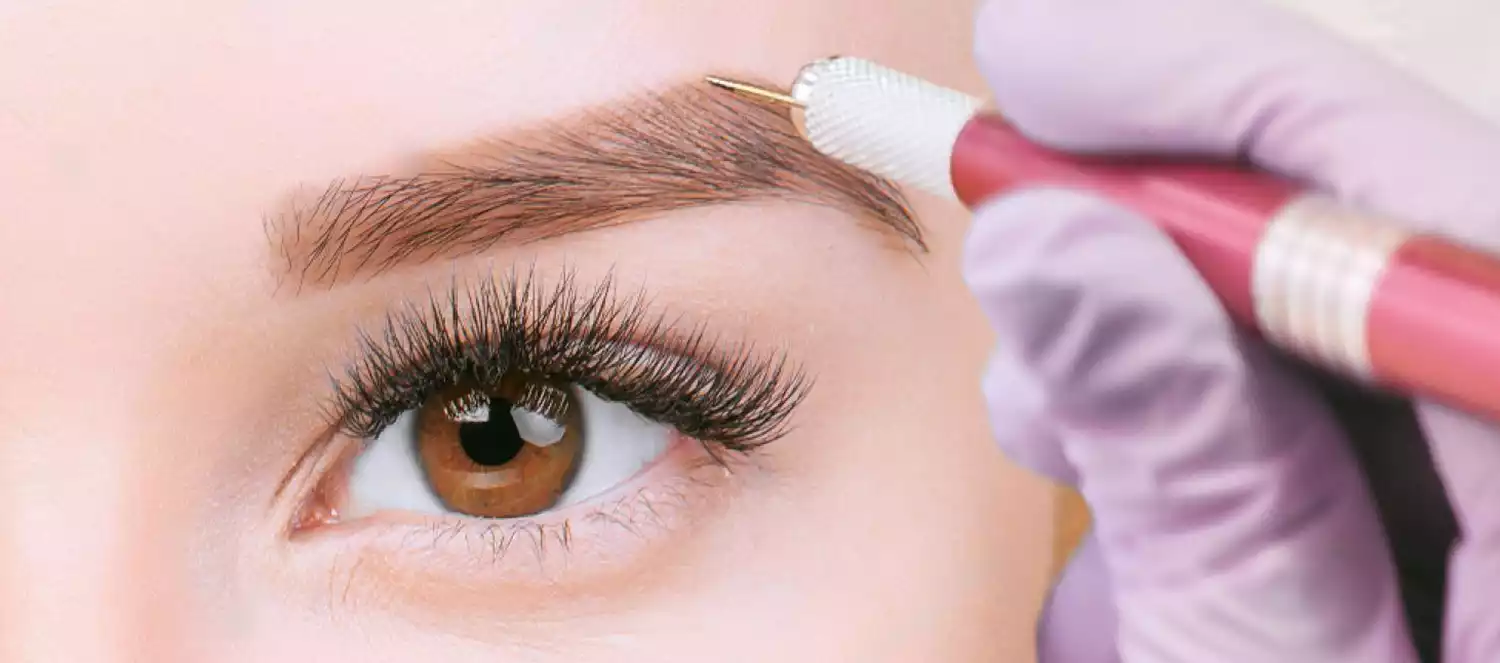
A gradient look that gets darker as it gets closer to the arches is known as an ombre brow. Many women worldwide swear by it because of its powdery finish and recommendation for oily skin. To achieve the soft-shaded brow pencil look, ombre brows utilize the semi-permanent eyebrow styling technique of ombre shading, which entails depositing microscopic dots of color into the skin with the help of a small machine.
What are ombre brows, and how do you get them?
Powdered brows, often known as powder brows, are a brow treatment that aims to mimic the appearance of naturally-looking, lightly colored brow hairs with a powdery finish. Even though this method has been around for decades, it has recently undergone significant revisions regarding its approach, style, and safety criteria.
Adding depth and definition to the brows is one of the most delicate features of this procedure. People with oily to mixed complexions who use brow pencils or powders often can benefit from this product. When it comes to designing a brow style that complements your face, this is an innovative approach. We employ a combination of in-house pigments and conventional treatment programs for all our clients.
The Treatment Process in Steps
Powdered eyebrows may be achieved by applying thousands of small pigment dots, which provide a natural powdered effect. There may be some initial blackness, but this will diminish with time and leave you with perfectly defined and tinted brows.
The therapy might take up to two hours, depending on the patient. Since a topical anesthetic cream is utilized to make the operation as comfortable and pain-free as possible, this surgery does not cause significant discomfort.
Recovery and Follow-Up Services
As a rule of thumb, the healing period lasts between two and three weeks on average. Our therapist will stay in touch with you after the session to help you with the following items:
The components in skincare and cosmetics products may interfere with the healing process; therefore, avoid wearing makeup during the healing phase (two weeks).
It’s best to wash the skin around your brows instead of the brow while cleaning your face.
Avoid strenuous exercises and activities that cause you to sweat profusely.
Stay out of the sun as much as possible.
During the healing phase, refrain from face treatments.
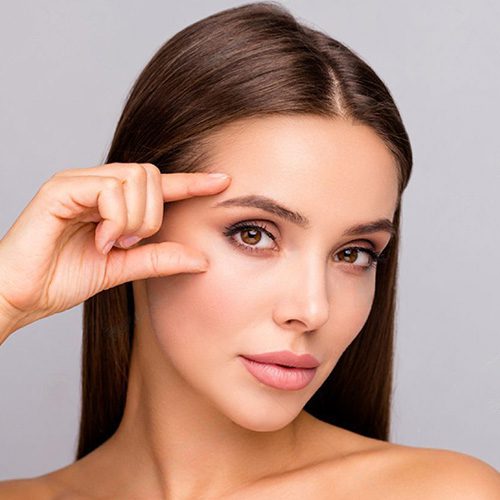
A brow-stretched gesture is one you should avoid at all costs.
Your brows will appear more significant, more defined, and more dramatic immediately.
If you apply this longer-lasting brow treatment, it’s okay to skip your usual morning ritual of brow filling and shading.
If you want a powdered appearance with darker arches, an ombre brow treatment is the way to go. Thanks to this method, you’ll be able to wear your brows all day long!
Don’t go for a jog or a run on the day of your appointment. There is no purpose in working out the day before your appointment. The fact that sweating causes pores to open is the reason. The difficulty in applying the ombre brows correctly may make it more challenging for the brow artist. The pigment may also be unable to adhere to the skin if it comes in contact with oil on the skin. Another reason to avoid working out on the day of your exam is to prevent bacteria from entering the region, which might lead to an infection.
Stay away from caffeine on the day of your appointment.
Consuming too much caffeine might make it harder for an eyebrow artist to paint ombre eyebrows correctly. Even after the pigment has been applied, it may wash away.
For at least 24 hours before your visit, refrain from drinking any alcoholic beverage.
Excessive bleeding can be triggered by both caffeine and alcohol. As a result, the pigment will not be able to enter the skin, resulting in a faded appearance.
You should avoid getting a tan at least thirty days before your procedure.
Two to thirty days before your visit, avoid using a tanning bed. UV radiation can cause color pigments to become less adherent to the skin.
Getting your eyebrows waxed or tinted seven days before your appointment is a no-no.
Before your session, you must refrain from waxing or tinting your brows for at least seven days. Perhaps the region will become inflamed, causing discomfort and possibly even agony. It’s also a good idea to leave the tweezing and shaping to your brow artist.
Saline tattoo removal is a popular method for fading and eliminating unwanted tattoos. This technique involves the use of a saline solution, which is carefully applied to the tattooed area to gradually extract the ink from the skin. Unlike laser removal, saline tattoo removal is known for being less painful and more skin-friendly, making it a preferred choice for many.
Immediate Aftercare Post-Procedure
First 48 Hours: Initial Care
Gently Cleanse: After the procedure, it’s crucial to gently cleanse the area with a mild, fragrance-free soap. Pat the area dry with a clean towel.
Apply Healing Ointment: Use a recommended healing ointment to keep the area moist. This aids in the healing process and prevents scabbing.
Avoid Water Immersion: Keep the treated area away from prolonged water exposure. Short showers are permissible, but avoid baths, swimming pools, or hot tubs.
First Week: Preventing Infection
Daily Cleaning: Continue to clean the area daily with mild soap.
Ointment Application: Apply the healing ointment as directed to maintain moisture.
Avoid Touching: Minimize touching the area to prevent the risk of infection.
Long-Term Aftercare and Healing
Weeks 2-4: Monitoring and Maintenance
Scabbing and Itching: Scabbing is a normal part of the healing process. Do not pick or scratch the scabs as this can lead to scarring.
Moisturize: Keep the area moisturized with a fragrance-free lotion to alleviate itching.
Sun Protection: Protect the area from direct sunlight. Use a high SPF sunscreen if exposure is unavoidable.
Beyond 4 Weeks: Ensuring Optimal Results
Regular Moisturizing: Continue to moisturize the area to aid in healing and comfort.
Avoid Harsh Chemicals: Steer clear of products with harsh chemicals or exfoliants on the treated area.
Follow-up Sessions: If additional sessions are needed, follow the same aftercare routine post each session.
Tips for Effective Healing
Stay Hydrated: Drinking plenty of water helps in the skin’s healing process.
Healthy Diet: A balanced diet rich in vitamins and minerals supports skin repair.
Avoid Smoking: Smoking can delay healing and should be avoided during the recovery period.
Potential Side Effects and How to Address Them
Redness and Swelling: Mild redness and swelling are common. Use a cold compress to reduce discomfort.
Infection Signs: If you notice excessive redness, swelling, or discharge, consult your technician immediately.
Color Changes: Some color changes in the skin are normal but consult your technician if you have concerns.
Conclusion
Proper aftercare following saline tattoo removal is crucial for effective healing and optimal results. By following these detailed guidelines, individuals can ensure a smoother recovery process and better overall outcomes. Remember, patience and diligent care are key to successful tattoo removal and skin health.
Saline tattoo removal is a method for fading and eliminating tattoos using a saline solution. It’s less painful and more skin-friendly compared to laser removal.
How do I care for my skin immediately after saline tattoo removal?
Immediately after the procedure, gently cleanse the area with mild soap, apply a recommended healing ointment, and avoid water immersion.
What should I do in the first week after saline tattoo removal to prevent infection?
In the first week, continue daily cleaning with mild soap, apply healing ointment as directed, and avoid touching the area to minimize infection risk.
How should I manage scabbing and itching during the healing process?
Manage scabbing and itching by keeping the area moisturized with a fragrance-free lotion and avoiding scratching or picking at scabs.
Is sun exposure safe after saline tattoo removal?
Avoid direct sun exposure on the treated area. If unavoidable, use a high SPF sunscreen to protect the skin.
Can I take a bath or swim after saline tattoo removal?
Avoid baths, swimming pools, and hot tubs for a specified period post-procedure to prevent water immersion and reduce infection risk.
What are the signs of infection I should watch for after the procedure?
Watch for signs of infection such as excessive redness, swelling, or discharge, and consult your technician if these symptoms occur.
How long does the healing process take after saline tattoo removal?
The healing process can vary but typically takes several weeks. Follow-up care and additional sessions may be required for optimal results.
Can I use makeup to cover the treated area during the healing process?
It’s advisable to avoid applying makeup on the treated area until it has fully healed to prevent irritation and infection.
Is saline tattoo removal suitable for all skin types?
Saline tattoo removal is generally suitable for all skin types, but a consultation with a professional is recommended to assess individual suitability.
What to expect immediately following your brow procedure:
You made it! Celebrate by sleeping in a little longer each day and enjoying your newfound free time. To preserve your completely healed results; apply sunscreen regularly, hats and larger sunglasses are encouraged, and avoid over-exposure to the sun. Chlorine, glycol acid, microdermabrasion, and other cosmetic products can lighten the pigment with repeated use.
When getting any procedures, whether it be cosmetic or not, done to your face please let the individual performing the service know about your brows and continue at your own discretion. We are not responsible for any changes made to your brows in reaction to any additional services you may receive.
The intensity should regress within 3-4 days. The sensation can be comparable to that of a slight burn and minimal scabbing and/or flaking may take place. Refrain from removing the scabs/flakes as you may run the risk of removing pigment in the process. It’s very important to keep the brows hydrated with a tiny amount of Vaseline starting from the 3rd day onwards. The true vibrancy of your cosmetic tattoo will fade about 30-40% from what you walked out with revealing a soft and natural brow tone.
THINGS TO REMEMBER WHILE BROWS ARE HEALING:
Keep your brows dry on the first and second days of the procedure
Moisturize brows with a tiny amount of Vaseline starting from the 3rd day onwards
Avoid hot, spicy, and salty foods as they may cause added irritation
Do not pick or scratch the brows as it may lead to a loss of pigment and/or scarring
Placing cosmetic products on unhealed brows is heavily discouraged
The texture is normal and is often experienced in the first few days of healing
Alcohol is strictly forbidden for the following 3-5 days
Coffee is not recommended for 24 hours after brows treatment. It makes blood pressure high which is not good for the healing process
Avoid large bodies of water, direct sun exposure, and rubbing
Refrain from all medications that cause thinning of the blood including but not limited to Aspirin, Advil, Aleve, Niacin, Fish Oil, Vitamin E, and Ibuprofen. Please consult your physician before taking any medication
Refrain from suntanning, microdermabrasion, derma planning, laser treatment, and chemical peels 7-10 days after receiving brow procedure
Avoid exercising and sweating with unhealed brows for the first 3 days
Avoid Bath submersion or over-exposure to shower water with unhealed brows in the first 10 days
No hot sauna, no swimming, no hot bath/shower, no sunbathing, no tanning salons. No facial massages, facials, waxing, threading, laser, or skin treatments.
Do not expose the area to dirty or unsanitary conditions. Try to avoid being in dusty places.
30 DAYS
Avoid sun/UV rays, sunbathing and pool activities.
Wear a hat/cap for additional protection.
Applying sunscreen to the treated area may help prevent fading.
Following all aftercare instructions will help you to archive the best results.
THERE MUST BE A MINIMUM 4-6 WEEKS PERIOD BETWEEN THE SESSIONS TO ENSURE THE BEST-HEALED RESULT.
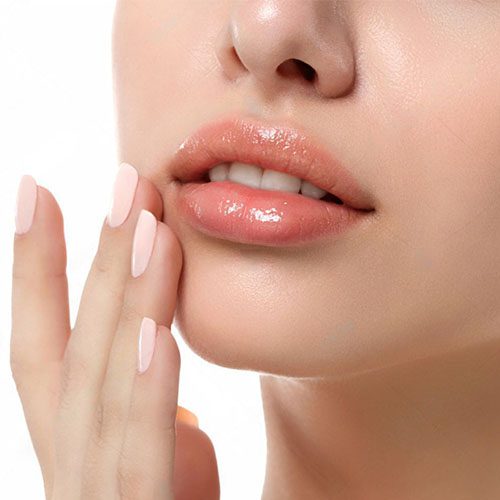
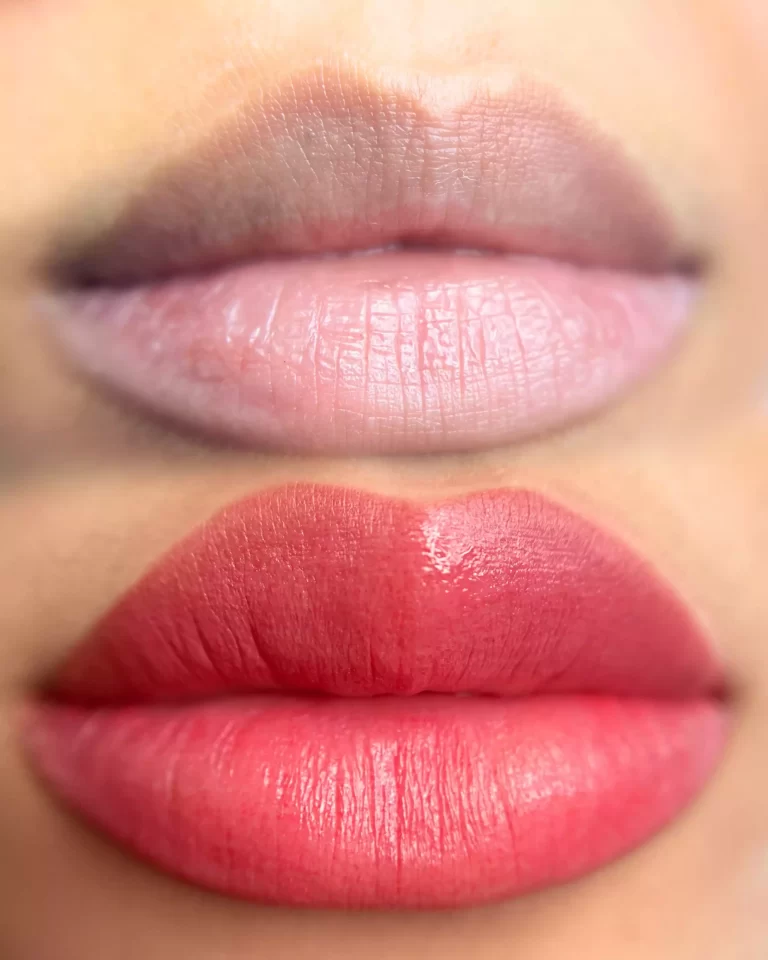
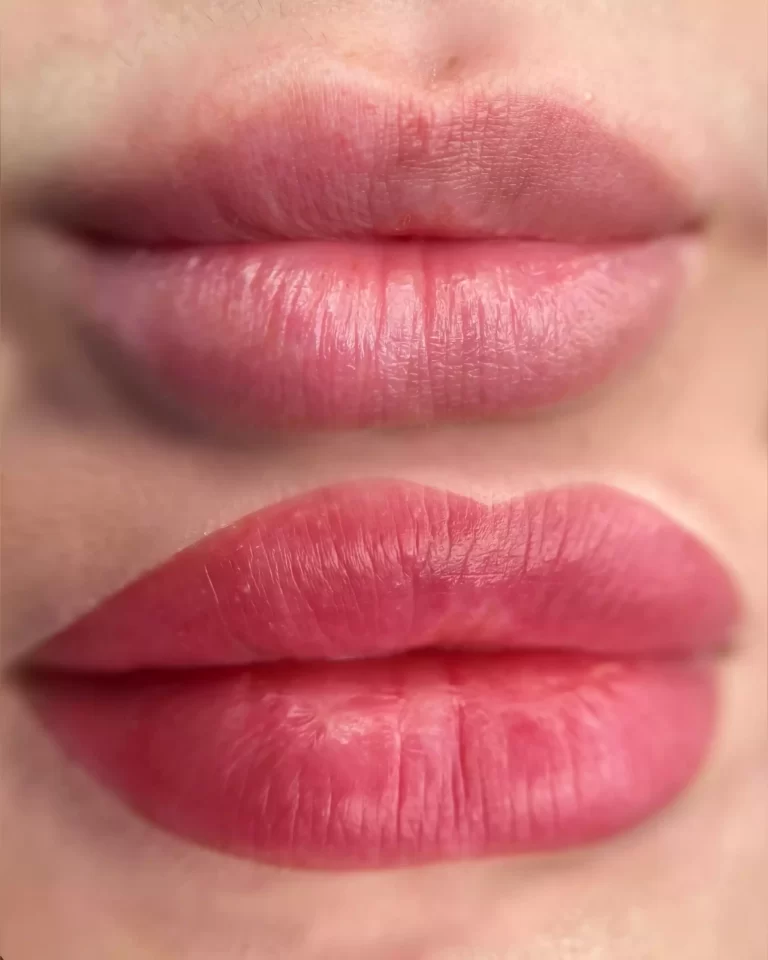
What to expect immediately following your Lip Blush procedure:
Intensified color and swelling are part of the initial stages of healing. Be patient. Do not freak out!
The intensity should regress within 3-4 days. The sensation can be comparable to that of a slight burn and minimal scabbing and/or flaking may take place. Refrain from removing the scabs/flakes as you may run the risk of removing pigment in the process. It’s very important to keep the lips hydrated with a tiny amount of Vaseline starting from the 3rd day onwards. The true vibrancy of your cosmetic tattoo will fade about 30-40% from what you walked out with revealing a soft and natural blush tone.
Things to remember while the lip blush is healing:
Keep your lips dry on the first and second days of the Lip Blush procedure
Hydrate lips with a tiny amount of Vaseline starting from the 3rd day onwards
Use a straw while drinking. Avoid too hot or too cold drinks
Avoid hot, spicy, and salty foods as they may cause added irritation
Do not pick or scratch the lips as it may lead to a loss of pigment and/or scarring
Placing cosmetic products on unhealed lips is heavily discouraged
The texture is normal and is often experienced in the first few days of healing
Alcohol is strictly forbidden for the following 3-5 days
Coffee is not recommended for 24 hours after Lip Blush. It makes blood pressure high which is not good for the healing process
Avoid large bodies of water, direct sun exposure, teeth whitening, rubbing, and smoking
Refrain from all medications that cause thinning of the blood including but not limited to Aspirin, Advil, Aleve, Niacin, Fish Oil, Vitamin E, and Ibuprofen. Please consult your physician before taking any medication
Refrain from suntanning, microdermabrasion, derma planning, laser treatment, and chemical peels 7-10 days after receiving Lip Blush
Avoid exercising and sweating with unhealed lips for the first 3 days
Avoid Bath submersion or over-exposure to shower water with unhealed lips in the first 10 days
hoW to prepare for lip blusH
Clients who have experienced a cold sore in or around the mouth MUST take Valtrex/ Zovirax on the day and 2 days after receiving this treatment. Failure to follow these instructions can risk an outbreak that can affect the healed result.
Lip fillers must be done at least 2 weeks prior to scheduling this service. Failure to disclose this information may result in a negative outcome.
No hot sauna, no swimming, no hot bath/shower, no sunbathing, no tanning salons. No facial massages, facials, waxing, threading, laser, or skin treatments.
Do not expose the area to dirty or unsanitary conditions (dirty masks). Try to avoid being in dusty places.
THERE MUST BE A MINIMUM 4-6 WEEKS PERIOD BETWEEN THE SESSIONS TO ENSURE THE BEST-HEALED RESULT.
Read more about lip blushing in our blog or book your appointment today!
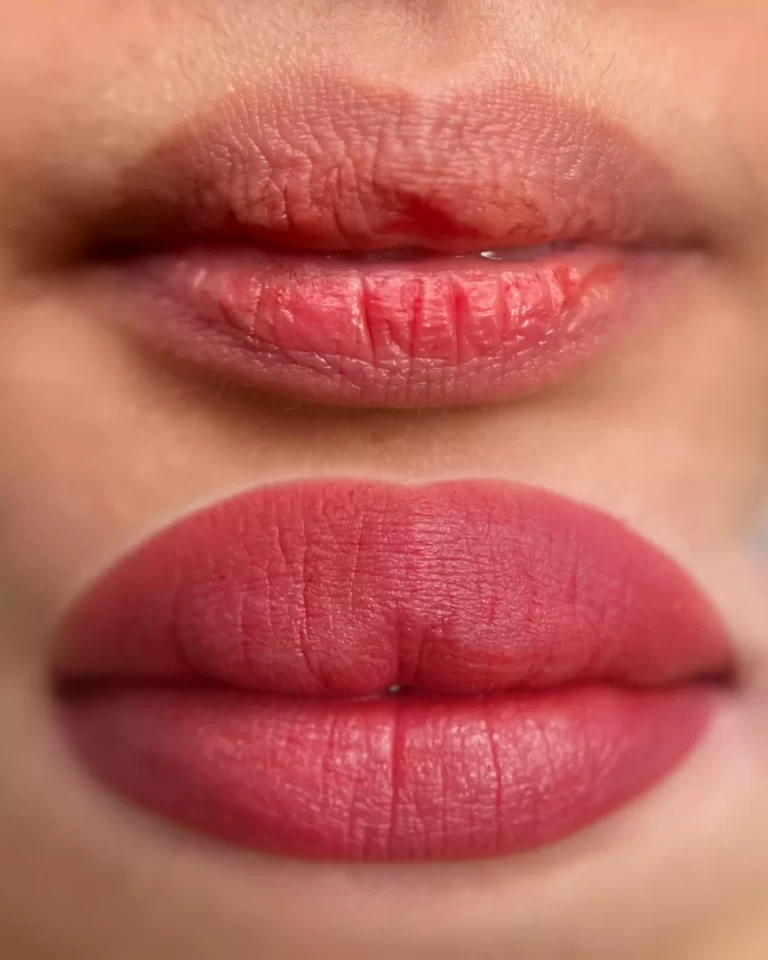
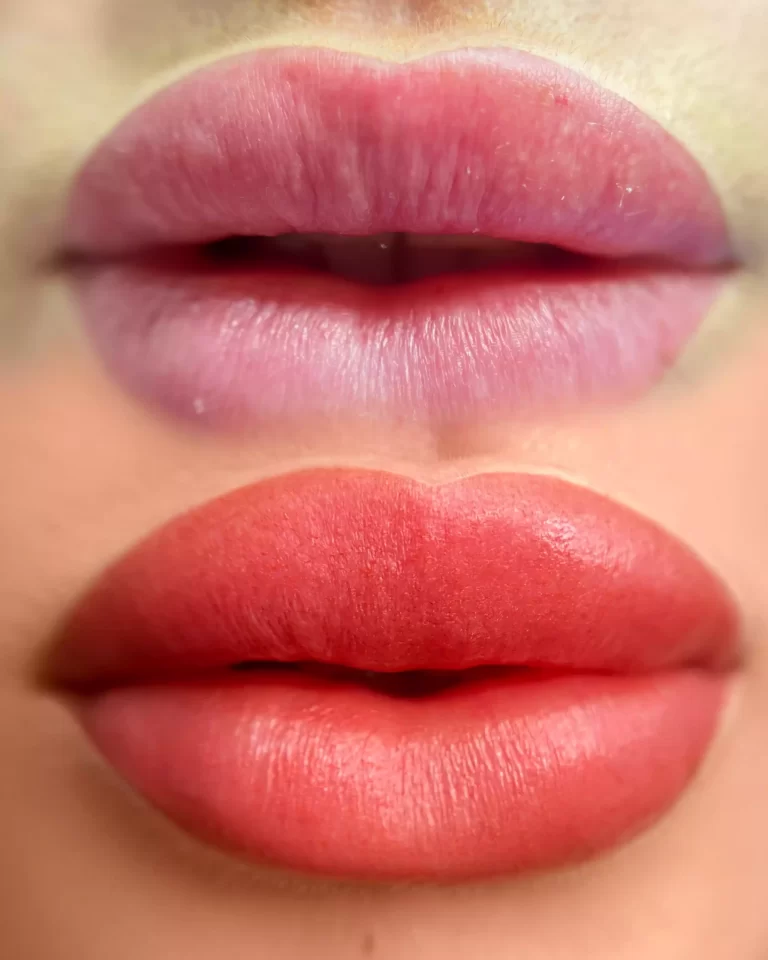
AFTERCARE INSTRUCTIONS FOR DARK LIP NEUTRALIZATION TREATMENT
Dark Lips Enlightenment post-care is very important to the appearance and longevity of your new lips. Please read the following aftercare instructions carefully:
YOU CAN NOT BE EXPOSED TO THE SUN DURING THE HEALING PROCESS. AROUND THE SECOND WEEK OF HEALING THE LIPS WILL APPEAR DARKER THAN THE ORIGINAL STATE THEY WERE IN.
Day 1:
Two hours after the procedure gently wash the treated area with warm water and antibacterial soap, and gently dry it by using tapping movements. Repeat it after 2 hours. Completing that, NO water or other cleansers of any kind can be used for any reason for 5 days.
Swelling is normal after the procedure. You can experience more swelling than others depending on individual body reactions. Swelling will go down from a couple of hours to 48 hours. Be patient.
DO NOT EAT FOR 4 HOURS FOLLOWING THE PROCEDURE. If you are hungry, you can carefully drink a smoothie using a straw.
Do not drink anything that would stain the colour of your lips (red wine, cherry juice, pomegranate juice, etc.
No smoking of any kind.
A very thin layer of Vaseline, Aquaphor, Hustle butter, or Laneige should be applied consistently throughout the day to the treated area using a fresh Q-tip. Applying too much moisturizer can lead to fading, so a super thin layer goes a long way. This will keep the area moist and accelerate the healing process. Do not let the area dry out and crack, keep it moist at all times. Do not press or rub when applying it. Apply a thicker coat of moisturizer to the treated area only before showering, bathing, brushing teeth, and washing adjacent areas. Do not use toothpaste when brushing your teeth on the first day. After that, when brushing teeth, use a minimal amount of toothpaste (for 5 days). Toothpaste and mouthwash are considered“soap” and will remove the lip colour.
Do not touch, bite, lick, pick, peel, tamper, scratch, rub, injure or remove the peeling in any way, if you do, you will experience a loss of color. Let the skin naturally go through its own exfoliating and recovery process.
Do not let any water, lotion, soap, or makeup touch your lips.
Use a straw when drinking ANY liquids; avoid biting into foods that might cause friction to the lips. Cut foods into small bite-sized pieces when eating.
NO SPICY OR SUPER-HOT FOODS AND DRINKS.
No foreign body fluids.
No physical activity that can cause extreme sweating.
Do not use any lipstick or makeup on or near the treated area.
14 days+
No hot sauna, no swimming, no hot bath/shower, no sunbathing, no tanning salons. No facial massages, facials, waxing, threading, laser, or skin treatments.
Do not expose the area to dirty or unsanitary conditions (dirty masks). Try to avoid being in dusty places.
30 DAYS
Do not use products containing alcohol, tonics, or tonics based on lactose and fruit acids, retinol acids, and glycolic acids in the treatment area.
No injections/fillers for 30 days after the Lip Blush procedure.
Stay completely away from the sun. Use chapstick with SPF 50 after your lips are fully peeled off the scab.
THERE MUST BE A MINIMUM 4-6 WEEKS TO 5-6 MONTHS PERIOD BETWEEN THE SESSIONS TO ENSURE THE BEST-HEALED RESULTS.
The microblading process is similar to a brow tattoo, in which there is an aftercare period during which strict guidelines must be followed. It takes time for your skin to heal and most clients experience patchy areas or fading after their first treatment. As microblading is a two-part procedure, the second touch-up treatment will complete the procedure, and, after healing, you will see the finished result.
Please read all aftercare instructions on this page to make sure you are committed to this brow journey, especially the first 10 days. Your brows’ healing outcome is greatly influenced by the way you care for them.
NO MOISTURE! NO WATER! NO SWEAT! NO SUN! For 10 days.
A “Do Nothing” or “Dry Healing” method produces the best results. You will get the best results if you keep your brows extremely DRY for the next 10 days! You can preserve more detail, color, and crispness by keeping them dry. Although it sounds tricky, it is possible if you are mindful.
During the first 48 hours, clean your eyebrows 2-3 times with fragrance-free baby wipes. Vaseline should only be used when your eyebrows feel tight or dry. The layer should be applied in one direction very thinly. That’s it for the next 10 days!
Wash your hair carefully and keep your face as dry as possible while keeping your face out of the shower stream. In case they get wet, have clean, dry paper towels on hand to pat them dry. In addition, keep showers brief, since too much steam can damage brows. Hair and eyebrows can be covered by shower caps if you like.
Whenever you wash your face, avoid splashing water on it like we normally do. Use a paper towel or fragrance-free baby wipes to soak the brows AROUND the brows, making sure they remain dry and clean.
Wait at least 10 days before applying any cosmetics to your brows. The result will be damaged and ruined. You need to be patient!
During the first 10 days following the procedure, you should avoid heavy exercise and sweating. This is crucial if you want to retain color and detail.
It should not take more than 10 days for you to be able to wash your face normally, including your brows, with a gentle face wash like Cetaphil.
Treatment with lasers over the treated area (e.g. Fraxel Laser, IPL) – because they can destroy the pigment and cause burns
Treatment with antibiotics and hormones.
WHAT TO EXPECT AFTER MICROBLADING
You will notice that the tattooed area appears darker and bolder in color, more sharply defined, or even more filled in after your procedure. Healing can take up to a week after the treatment.
Scabs, flaking, or peeling of the skin may occur during the initial healing phase. Scabs or dry skin should be allowed to come off naturally rather than picked. This is very important! Scabs that come off prematurely will lose their pigment!
It takes between 4-6 weeks for the tattoo to heal completely, at which point the true color becomes apparent. Your tattoo will become softer and lighter during this process. Even if you think there is too much color loss, your skin is still regenerating and naturally exfoliating.
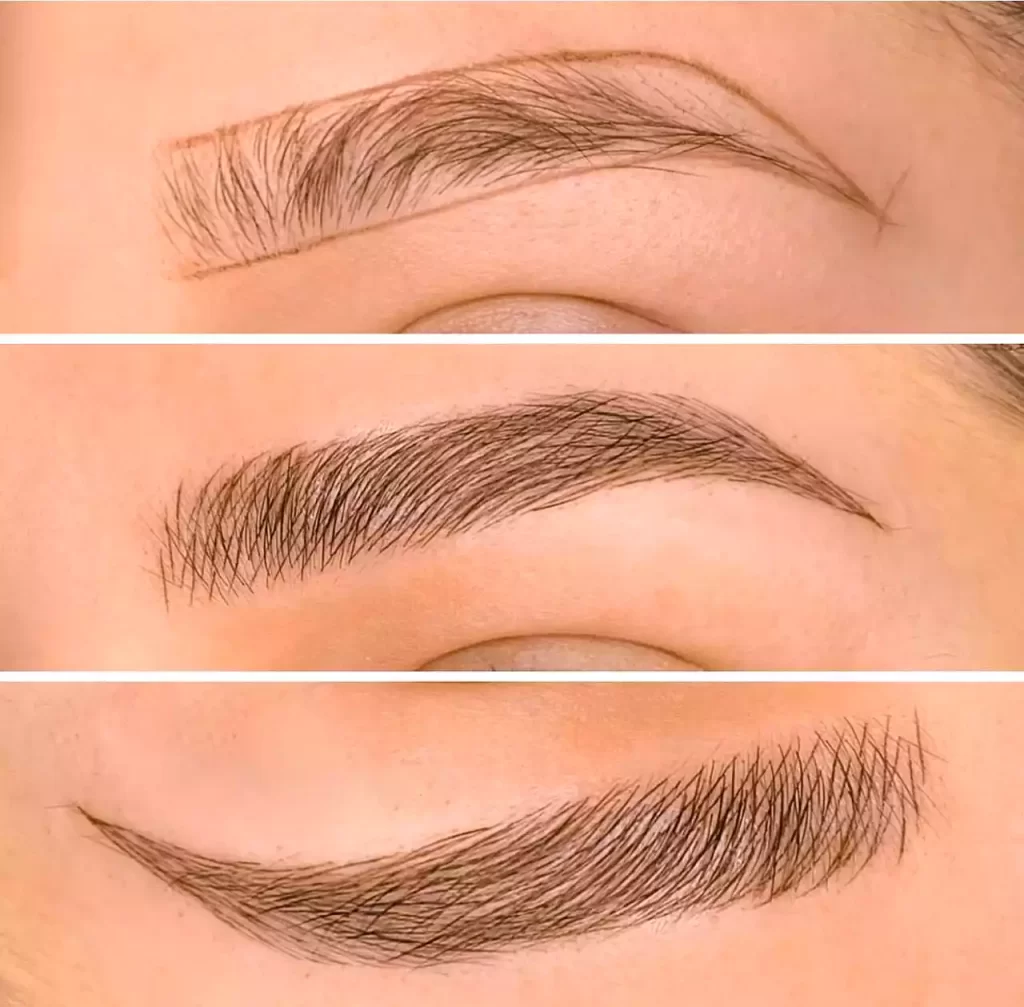
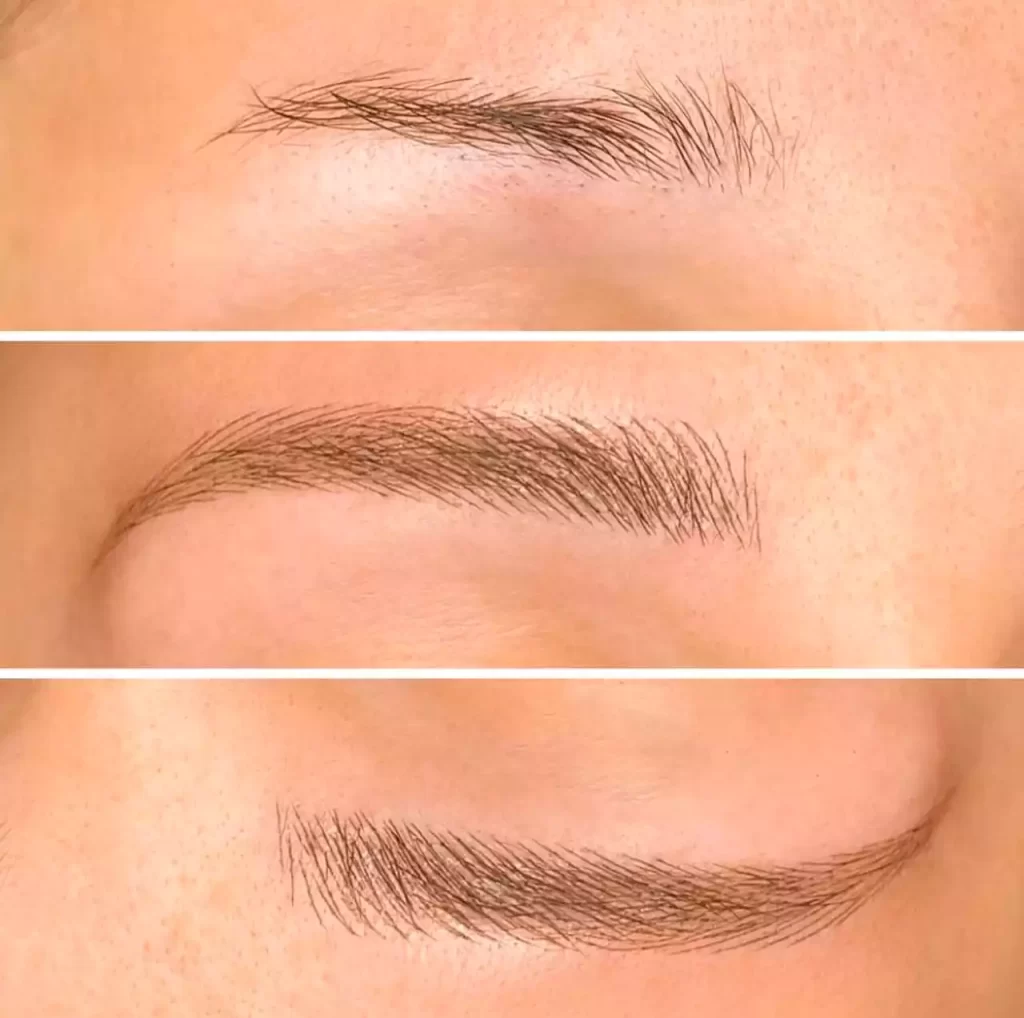
Day 1 – very little to no redness, finely detailed
Day 2-4 – They become darker and more filled-in looking as they form a light protective layer or scab. This is only temporary- don’t panic!
Day 5-12– the protective layer naturally exfoliates, peels and flakes away over the course of several days as your skin heals underneath it. The freshly healed skin is white and has a waxy coating, making it appear that the brows are too light. Be patient!
Day 10-30 – After 10 days you may use brow makeup very gently if you need it. The color will slowly come back to life and bloom back to the surface as that new, white skin settles in and heals. Wait at least 4 weeks to see the true color, as it will take on new strength. Your second appointment is to tighten up your shape, touch up any light spots, and also to assess how your skin reacts to the process and the chosen color.
This is a two-step process. The brows look really finished after the 2nd appointment.
WHAT NOT TO DO AFTER MICROBLADING
You may shower or bathe normally, but avoid getting any harsh soaps, shampoos, or water on them as this can be detrimental to the bonding process that must take place for the pigment to stabilize in the dermis.
DO NOT pick or scratch at the dry skin/flakiness; let the skin fall off naturally. Picking can cause scarring and premature loss of pigment. IMPORTANT: Once the flakes have fallen off, a shiny layer of healing skin will completely cover the hair strokes. It may appear as though the tattooed area has completely disappeared. This is just new skin forming. Within 1-2 weeks, the hair strokes will slowly reappear at a lighter shade as your skin regenerates.
DO NOT apply make-up to the tattooed area for the first 10 days. Cosmetics of any kind may interfere with the healing and color of your tattoo. After 10 days it’s fine if you need to gently apply makeup to any light spots.
DO NOT bleach, tint or dye the tattooed area for one month following the procedure.
DO NOT apply any anti-acne products (e.g. Benzoyl Peroxide, Salicylic Acid, Proactiv, etc.) or lightening creams (skin bleaching creams) such as hydroquinone to the treated area while healing.
No anti-aging products or facial products containing Alpha Hydroxyls (AHAs), Retin-A, Lactic or Glycolic Acids
Do not thread, wax, or use hair removal products on the treated area while healing. You may after 3-4 weeks.
NO exercising and/or excessive sweating one day prior to getting tattooed and for 10 days after. Heavy sweating will cause the hair strokes to blur and detail to be lost.
NO Sun exposure, swimming pools, jacuzzis, saunas, or other bodies of water for two weeks.
Do not soak your face underwater in a bathtub or allow the shower to spray directly on your face for two weeks.
ONCE MICROBLADING HEALED
Exposure to the sun over time can cause fading and discoloration of the pigment. Once completely healed, we recommend applying sunscreen daily on the treated area. Wear large sunglasses and a hat for further protection. Rinse and dry the area thoroughly when in contact with chlorine.
Glycolic acid, retinol, AHA’s, anti-aging lotions and serums, microdermabrasion, chemical face peels, and laser treatments must be kept away from the tattooed area as continued use could lighten or discolor the pigment.
If you are having laser resurfacing or laser hair removal after your tattoo has healed, please inform the laser technician. Continue at your own discretion. Laser procedures may darken, lighten, or discolor the tattooed area.
Once the treated area is completely healed, any changes or additions that need to be made can be done at your follow-up appointment no sooner than 6-8 weeks later. It takes about 4 weeks for the brow area’s skin cells to completely regenerate and settle in.
There are no implied or written guarantees if you do not take care of your tattoo, and everyone will heal a little differently.