Vitiligo camouflage tattoo is a life-changing paramedical procedure that restores natural colour to depigmented white patches caused by vitiligo. Whether you are looking to treat patches on your face, hands, arms, or legs, this complete guide covers how the treatment works, who it is for, what to expect during the process, and how to care for your skin afterwards for the best possible results.
What Is Vitiligo Camouflage Tattoo?
Vitiligo camouflage tattoo — also called paramedical micropigmentation for vitiligo — is a specialised tattooing technique that deposits flesh-toned pigment into depigmented white patches of skin. The goal is simple: blend the white areas seamlessly with your surrounding natural skin tone so the patches become virtually invisible.
Unlike cosmetic tattoos that follow beauty trends, vitiligo camouflage is a medical-grade procedure performed by trained paramedical technicians. Each pigment shade is custom-blended to match your unique skin tone, undertone, and texture. The result is a natural, uniform appearance that restores confidence and allows you to feel comfortable in your own skin again.
At Brows & Lips Dubai, we use high-quality, hypoallergenic pigments specifically formulated for medical micropigmentation. These pigments are designed to be safe for all skin types and to maintain their colour stability over time.
How Does It Work?
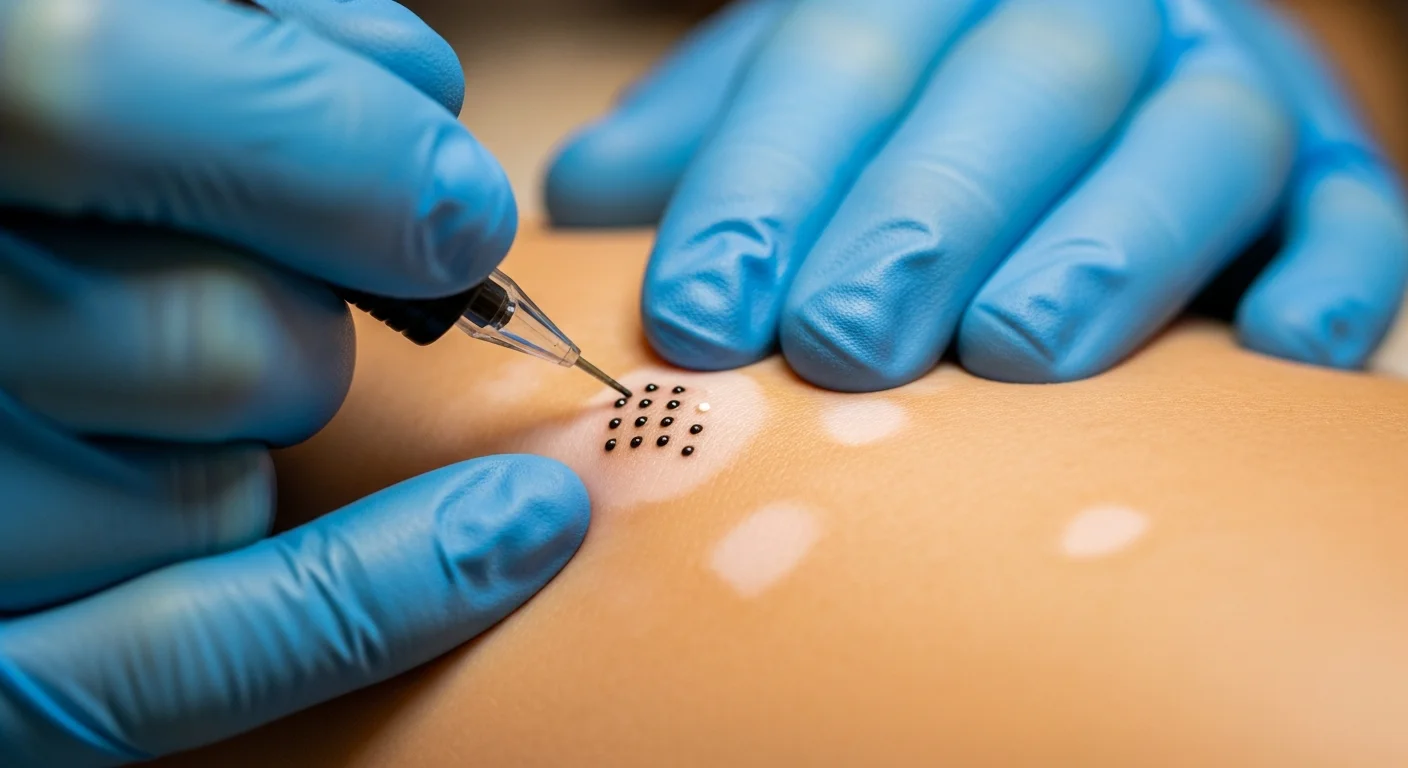
The procedure works by implanting pigment into the upper dermis of the skin using a fine needle device. The technician carefully deposits tiny dots of pigment into the depigmented area, layer by layer, until the white patch is brought to the same colour intensity as the surrounding skin.
The process requires significant skill and artistry. The technician must:
- Assess your skin tone — matching the undertone (warm, cool, or neutral) and depth of your natural pigmentation.
- Custom-blend the pigment — combining multiple shades to create the perfect match for your skin.
- Match the texture — using different needle configurations and depths to replicate the look of natural skin rather than a flat, painted-on appearance.
- Feather the edges — blending the treated area into the surrounding skin so there is no visible border.
Because vitiligo patches are often lighter than the surrounding skin by many shades, full coverage usually requires 2 to 3 sessions. The first session deposits approximately 60–70% of the pigment, with subsequent sessions refining the colour match and filling any remaining gaps. Sessions are spaced 6 to 8 weeks apart to allow the skin to heal fully between treatments.
Important: Vitiligo camouflage is only performed on stable vitiligo — when no new white patches have appeared and existing patches have not grown for at least 12 months. If your vitiligo is still active, we recommend consulting a dermatologist before pursuing camouflage treatment.
Who Is a Good Candidate?
Vitiligo camouflage tattoo is suitable for most people with stable vitiligo, but certain factors make for better candidacy:
- Stable vitiligo: No new patches or spreading for at least 12 months.
- Good general health: No active skin infections, uncontrolled diabetes, or conditions that impair healing.
- Realistic expectations: Understanding that multiple sessions may be needed and that the colour match improves with each session.
- Not pregnant or nursing: We recommend waiting until after pregnancy and breastfeeding.
- No allergy to tattoo pigments: A patch test is performed before the full treatment to rule out any adverse reactions.
- No history of keloid scarring: While rare with medical micropigmentation, keloid-prone individuals should discuss risks with their technician.
The treatment works on all skin types and all areas of the body, including the face, neck, hands, arms, legs, and torso. Some areas — like the face — tend to hold pigment more evenly than areas with thicker skin or more movement, such as the hands and feet.
What to Expect
Knowing what happens during a vitiligo camouflage session helps you feel prepared and confident. Here is the step-by-step process:
Step 1: Consultation and Patch Test
Your journey begins with a thorough consultation. The technician assesses your vitiligo, discusses your goals, and performs a patch test with a small amount of pigment to check for any allergic reaction and to preview the colour match.
Step 2: Pigment Customisation
On the day of your session, the technician custom-blends the pigment to match your natural skin tone precisely. Multiple pigment shades are combined to achieve the right depth, undertone, and warmth.
Step 3: Numbing and Preparation
A topical numbing cream is applied to the treatment area 20 to 30 minutes before the procedure. This ensures you remain comfortable throughout the session. The area is then cleaned and sanitised.
Step 4: The Tattooing Process
Using a sterile, single-use needle cartridge, the technician deposits pigment into the depigmented skin layer by layer. The process is meticulous — the technician works slowly, checking the colour frequently and adjusting as needed. Depending on the size of the area, a session can take 1 to 3 hours.
Step 5: Immediate Aftercare
Once the procedure is complete, the technician cleans the area and applies a healing balm. You will receive detailed aftercare instructions. The treated area will appear darker and more intense than the final result — this is completely normal.
Aftercare & Healing
The success of your vitiligo camouflage tattoo depends as much on how you care for your skin after treatment as on the procedure itself. Proper aftercare ensures optimal pigment retention and a flawless, natural-looking result.
Healing Timeline: Days 1–14+
Days 1–3: The Acute Healing Phase
Immediately after the procedure, the treated area will appear darker and more intense than the final result. This is normal — the pigment is sitting in the upper layers of the skin and will settle as healing progresses. You may experience mild redness, slight swelling, and a sensation similar to a light sunburn. The area may feel tender to the touch.
Care instructions: Keep the area completely dry for the first 48 hours. No washing, no sweating, no water contact. Apply the healing balm provided by your technician 2 to 3 times daily using clean hands or a cotton swab. Do not rub — dab gently.
Days 4–7: Peeling and Flaking
As the skin begins to regenerate, the treated area will start to flake and peel. This is a natural part of the healing process. The pigment may appear patchy or uneven underneath — this is temporary. Do not pick, scratch, or rub the peeling skin. Let the flakes fall off naturally. Removing them prematurely can pull out pigment and cause uneven results.
Care instructions: Continue applying the healing balm. You may gently rinse the area with lukewarm water and pat dry with a clean tissue — do not rub. Avoid makeup on the treated area until the peeling phase is complete.
Days 8–14: The Softening Phase
The peeling has mostly subsided, and the treated area will look significantly lighter. The pigment is settling deeper into the dermis. Some areas may appear lighter than others — this is normal and will be addressed at your touch-up session. The skin may feel slightly dry or tight.
Care instructions: You can resume gentle cleansing. Introduce a fragrance-free moisturiser to keep the skin hydrated. Still avoid direct sun exposure and any harsh skincare products containing retinol, glycolic acid, or vitamin C on the treated area.
Weeks 3–4: Final Colour Revelation
By the end of week 3, the pigment has settled to approximately 80–90% of its final shade. The colour will continue to soften and look more natural. Any minor unevenness usually resolves by week 4. This is when you can properly assess the result and determine what adjustments are needed at your follow-up session.
Aftercare: The DOs
- Moisturise gently: Use only the balm or moisturiser recommended by your technician. Apply in thin layers 2–3 times daily.
- Use SPF 50+ daily: The treated area is highly photosensitive. UV exposure can cause the pigment to fade unevenly or shift colour. Apply sun protection every morning once the initial healing phase is complete.
- Attend your follow-up session: A touch-up 6–8 weeks after the initial treatment is essential for perfecting the colour match and filling any gaps.
- Keep the area clean: Gently cleanse with lukewarm water and pat dry. Avoid rubbing or using washcloths on the treated area.
- Sleep on your back: If the treated area is on your face, sleeping on your back prevents rubbing against the pillow.
- Wear loose clothing: For body patches, wear soft, breathable fabrics that do not rub against the treated area.
Aftercare: The DON’Ts
- Do not scratch or pick: Picking at flakes or scabs can remove pigment and cause scarring. Let the skin heal naturally.
- Do not soak the area: No swimming, hot tubs, saunas, steam rooms, or long baths for at least 2 weeks. Prolonged moisture can disrupt pigment retention.
- No gym for 1 week: Sweating in the first week can introduce bacteria and cause the pigment to lift. Wait at least 7 days before resuming intense exercise.
- No direct sun exposure: Keep the treated area out of the sun for at least 4 weeks. After healing, always use SPF 50+.
- No harsh skincare products: Avoid retinol, AHAs, BHAs, glycolic acid, and vitamin C on the treated area for at least 4 weeks.
- No makeup on the treated area: Avoid applying foundation, concealer, or powder directly on the healing skin until the peeling phase is complete (around day 10–14).
- No alcohol or blood-thinners: These can interfere with healing and pigment retention. Avoid for at least 48 hours after treatment.
Results & Longevity
Your vitiligo camouflage will reach its final appearance at 3 to 4 weeks after each session. During the first week, the colour looks significantly darker than intended. By week 2, it softens considerably as the outer layer of skin sheds. At week 3, the true shade begins to emerge, and by week 4, the pigment has fully settled into the dermis and the colour is stable.
The colour shifts you can expect during healing:
- Day 1: Colour appears 30–50% darker than the final shade due to oxidation and superficial placement.
- Days 2–7: The colour may appear darker and more intense as the skin is still inflamed.
- Days 8–14: The colour lightens significantly as the top layer of skin peels away. Some areas may look uneven.
- Weeks 3–4: The pigment settles into its true shade. The colour softens and blends naturally with the surrounding skin.
- Weeks 6–8: The final result is fully visible. Any uneven areas can be corrected at the touch-up session.
How long does vitiligo camouflage last? With proper care, vitiligo camouflage typically lasts 2 to 5 years before a refresh session is needed. Factors that affect longevity include your skin type, sun exposure, the location of the treatment, and how well you maintain the area. The face tends to retain pigment well, while areas with more friction or thinner skin — such as the hands — may fade faster. Using SPF 50+ daily and avoiding excessive exfoliation will extend the life of your results.
Patience is key: The colour you see on day 1 is never the final result. Trust the healing process, follow your aftercare instructions, and attend your follow-up for the best outcome.
Book Your Consultation
Ready to restore your natural skin tone with vitiligo camouflage tattoo? At Brows & Lips Dubai, our experienced paramedical tattoo specialists have helped many clients achieve natural-looking, confidence-restoring results. We take the time to understand your goals, assess your skin, and create a personalised treatment plan.
Book a consultation at Brows and Lips Dubai to discuss your vitiligo camouflage options. Our team will guide you through every step — from the initial assessment and patch test through your treatment sessions and aftercare support.
We also offer scar camouflage tattoo for clients looking to reduce the appearance of surgical scars, burn scars, and other skin irregularities. If you have both vitiligo patches and scars, ask your technician about combining treatments during your consultation.
For those interested in other medical micropigmentation solutions, our scar camouflage service uses similar techniques to blend scar tissue with the surrounding skin tone — another life-changing option for many of our clients.